On June 20th, 2024, Elden Ring's DLC expansion, Shadow of the Erdtree, will release. But are you truly prepared for the challenges within? Read on, brave Tarnished, as I share with you my research for maximizing one's readiness before the launch in two week's time. I'll be channeling my inner Gideon the All-Knowing with this one!
I will be answering three major questions in this guide:
- How do I access the DLC? - If you're not sure, and/or are newer to the game, I'll go over in detail the steps required to enter Shadow of the Erdtree.
- How do I prepare myself for the DLC? - I'll go over exactly what to look out for and collect so you're ready for all the new gear. Includes location descriptions for Smithing Stones and Glovewort, both the Bell Bearings to buy them as well as the other high tier materials you'll need.
- How do I empower myself once in the DLC? - Improving yourself while in the Land of Shadow will be different than what you're used to. I'll share what we currently know regarding this process.
Table of Contents
How Do I Access The DLC?
Elden Ring's director Hidetaka Miyazaki revealed that two bosses in particular must be vanquished to access Shadow of the Erdtree: Starscourge Radahn and Mohg, Lord of Blood. I will go over each of them, in case you're newer to the game.
Defeating Starscourge Radahn
General Radahn is located in Caelid, the region east of Limgrave where you begin your adventure. It is a dangerous place, with pools of Scarlet Rot and aggressive enemies everywhere. Making an early beeline to Redmane Castle in the southeast to challenge Radahn would be a foolish idea, even before you consider that his boss fight is not immediately available.
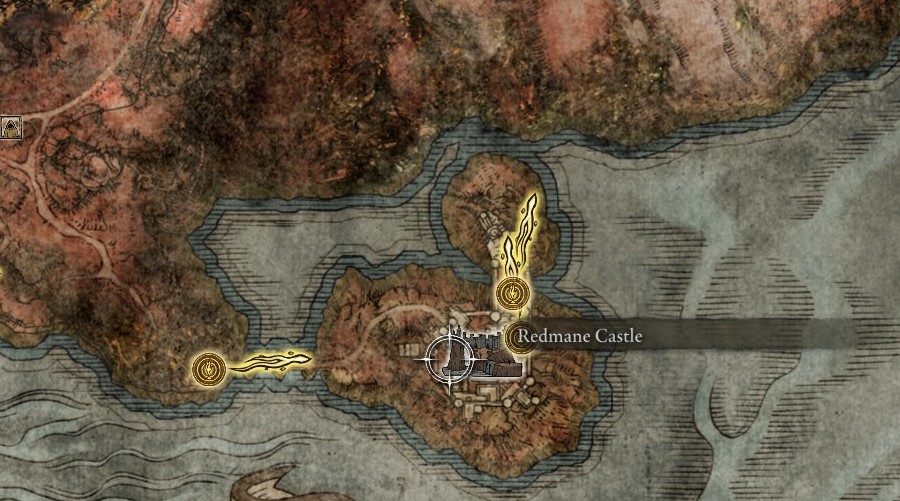
In order to access him, you must trigger the "Radahn Festival", a contest of combat and skill...or, to be more honest, an attempt to give the General a worthy death. You see, he has been driven mad by the Scarlet Rot festering within him, and warriors from around The Lands Between come together to finally put him down. Without triggering the Festival, Redmane Castle will be filled with enemies, with a separate boss encounter at the end; only by beginning the Festival will the Castle be cleared and your ability to take down Radahn will start in earnest. The Festival can begin in one of two ways:
- Option 1 - You must reach Altus Plateau, and activate a Site of Grace there. This in-of-itself has a few options:
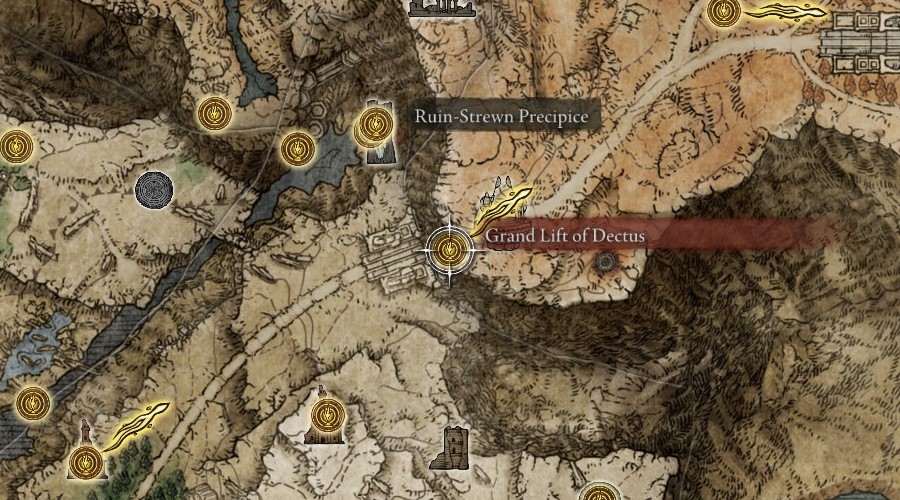
- You can activate the Grand Lift of Dectus in northern Liurnia to be lifted up to the Plateau, wherein the "Altus Highway Junction" will be the closest Site. You will need two halves of the Dectus Medallion to use the Lift: they can be found to the south of the Mistwood, in Fort Haight, and in the southeast of Dragonbarrow, in Fort Faroth. The latter is quite dangerous in its own right, so be ready.
- You can bypass the Grand Lift by navigating through the Ruin-Strewn Precipice and defeating the Magma Wyrm. It is located just to the northwest of the Grand Lift, but you must come at it from below, using a hidden path on the lake. Make your way up the Precipice, defeat the Wyrm, and come out onto the Plateau near the "Abandoned Coffin" Site of Grace.
- The final alternative is not recommended for newer players, but it is an option. Hidden at the bottom of the large rotating wheel inside the Academy of Raya Lucaria is a powerful enemy: the Abductor Virgin. By allowing it to kill you via its grab attack - not in general; you must be eaten - the Virgin will teleport you inside Volcano Manor, to the northwest of the Plateau. You'll have to deal with even stronger enemies inside the Manor before you can find a Site of Grace that counts toward this objective.
- Option 2 - Alternatively, you can progress the quest of Ranni the Witch, until she requires you to enter the subterranean city of Nokron and find its hidden treasure. Getting to Nokron is impossible without first defeating Radahn, but reaching this point will trigger the Radahn Festival. Ranni's questline is quite long; thankfully, we only need to go so far into it before the Festival is forced to begin.
- Ranni's quest begins after you have received Torrent from Melina. By fast traveling to the "Church of Elleh" Site of Grace, a woman named Renna will call you over. She will provide you the Spirit Calling Bell, an invaluable tool for making one's life easier in The Lands Between! She will then disappear.
- Later on in the northwest of Liurnia of the Lakes, after proceeding through Caria Manor and defeating its boss, you will come to the Three Sisters subregion. By chasing off a dragon, you will be able to locate Ranni's Rise, where Renna - whose real name is Ranni - is located. Speaking to her, Ranni provides you a task: locate the hidden treasure of Nokron, the Eternal City.
- You'll have to speak with her three associates to learn more about them, your task, and Ranni herself, then go back up the tower to talk to Ranni again.

- The next step will be to locate Blaidd the Half-Wolf, who has wandered to the Siofra River region. This area is actually located beneath the earth, which you can access via a well in the Mistwood. Proceed through the linear area until you reach the "Siofra River Bank" Site of Grace, then travel a little bit east to find Blaidd.
- Blaidd doesn't know how to reach Nokron, but he suspects one of Ranni's other helpers - Preceptor Seluvis - does. Returning to the Three Sisters to Seluvis' Rise will have you talk to him, and he will lead you to talk to someone else: Sorceress Sellen.
- By comparison, Sorceress Sellen isn't as difficult to reach. She is found in the Waypoint Ruins in central Limgrave, down a flight of stairs near a Giant Miranda Sprout (a big pink plant monster). A Mad Pumpkin Head blocks your path into the Ruins; defeating this enemy will reveal Sellen behind it.
- Talking to her will reveal that the stars have stopped their movement due to Radahn's interference. Go back to Blaidd to deliver this news, and the Radahn Festival will begin.
- The next step will be to locate Blaidd the Half-Wolf, who has wandered to the Siofra River region. This area is actually located beneath the earth, which you can access via a well in the Mistwood. Proceed through the linear area until you reach the "Siofra River Bank" Site of Grace, then travel a little bit east to find Blaidd.
Now that the Festival has begun, your last step is to actually defeat Starscourge Radahn. This is a monumental task: he is fast on his horse, can shoot huge arrows from a ridiculous range, has large sweeping blade attacks, can mess with you via gravity magic, and you cannot summon a Spirit Ash to help you! Thankfully you can use Torrent for this fight, plus you're not alone: strewn about the gigantic arena are summon-signs, to bring the other warriors into the fight. Their primary mission will be to distract Radahn while you do all the heavy lifting; they will inevitably die, wherein you must locate a sign to resummon them (each individual sign can only be used once, so to bring each warrior back you'll have to find another one).
At around 50% health, Radahn will leap into the sky and disappear for a moment: this is your signal to RUN!! He will return to the arena in a large meteor impact, which can be devastating if you're caught in the blast. From this point on, Radahn will start using his gravity magic more frequently, and all of his attacks will be more damaging. It will be difficult to maintain the other warriors at this point, but remaining diligent will see you through.
If you're having trouble, I can confirm that the Rock Sling spell is a very cheesy method for winning. Keep your distance, spam Rock Sling, and he'll die pretty quickly; it's a lame way to go, but you've got places to be!

Defeating Mohg, Lord of Blood
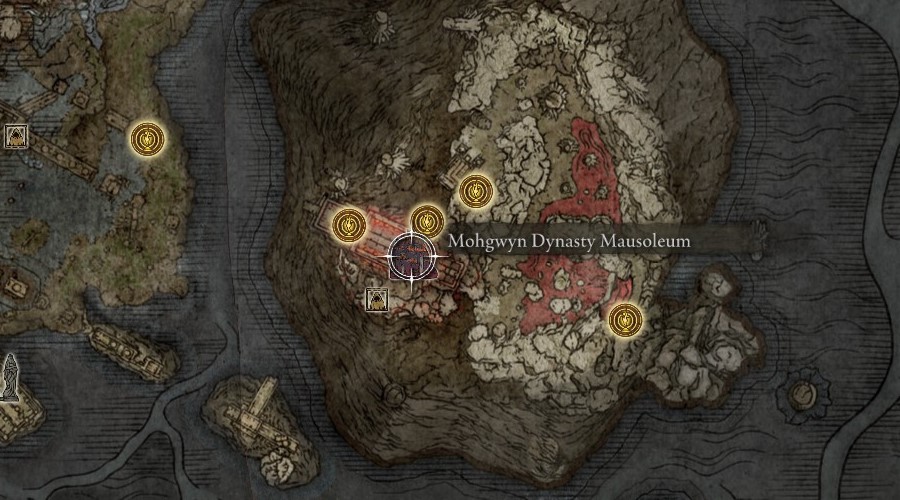
Locating and defeating Mohg is also rather involved - accessing the expansion will require you to earn it! Mohg, Lord of Blood is located in his Mausoleum, beneath the ground; you can actually see it from where you located Blaidd in the Siofra River, up above you (but across a giant chasm). Reaching it, however, will require some work: you'll have to get pretty far into the game, or rely on PvP shenanigans and your own skill to defeat Mohg earlier than "intended".
- Option 1 - You must complete White Mask Varre's questline. He is actually the very first NPC you can encounter in the game, seen right next to "The First Step" Site of Grace in Limgrave.
- Talking to him initially will amount to nothing, other than preparing him for the next step. After acquiring a Great Rune and talking to Enia in the Roundtable Hold, Varre will move to the Rose Church, south of the Academy of Raya Lucaria. He will then provide you a Festering Bloody Finger.
- Using the Festering Bloody Finger, you must invade three other players online - you don't have to actually defeat them, just enter their world.
- Supposedly there is a non-PvP way to progress, going to the Writheblood Ruins in the northwest part of the Altus Plateau. Cannot confirm.
- After doing this, Varre will give you the Lord of Blood's Favor, which must be soaked in the blood of a maiden.
- There are a couple different people who count as being "maidens", that you could decide to kill for this objective. The easiest path would be to just use a maiden's corpse, found at the Church of Inhibition in northeast Liurnia, atop the Frenzied Flame Village.
- Upon acquiring the blood, talking to Varre twice will net you the Pureblood Knight's Medal. Using it will teleport you to the Mohgwyn's Palace subregion (our destination).
- Option 2 - If you don't want to fight your fellow players, you'll have to make up for it with a lot more effort. This will involve reaching the Consecrated Snowfield, a hidden region next to the Mountaintops of the Giants. In order to go down this path, you'll have to proceed with the main storyline until you get past Morgott, The Omen King and enter the Mountaintop.
- At the end of the Forbidden Lands subregion connecting Leyndell, Royal Capital to the Mountaintops of the Giants, you'll encounter the Grand Lift of Rold. Using the Rold Medallion given to you by Melina will take you to the Mountaintop; however, a second, secret Medallion will take you to the Consecrated Snowfield.
- The first piece of the Medallion can be obtained far earlier in the game, even if its use is not immediately apparent. By heading to the swampy cave to the south of the Academy of Raya Lucaria, you can reach the Village of the Albinaurics. Along the way through this dark area, you'll chance upon a pot that seemingly talks to itself. Hitting the pot will reveal Albus, who will give you half of the Medallion.
- The second piece requires you to visit and complete Castle Sol, in the northwest part of the Mountaintops of the Giants. This is not an easy location to reach, passing by multiple mini-bosses before reaching the Site of Grace at the Castle's entrance. Only by defeating Commander Niall at the top of the Castle can you access a chest with the other half of the Medallion.
- Combining both halves of the Medallion at the Grand Lift of Rold will take you down to a secret path (naturally filled with difficult enemies); getting through this path will lead to the Consecrated Snowfield.
- At the end of the Forbidden Lands subregion connecting Leyndell, Royal Capital to the Mountaintops of the Giants, you'll encounter the Grand Lift of Rold. Using the Rold Medallion given to you by Melina will take you to the Mountaintop; however, a second, secret Medallion will take you to the Consecrated Snowfield.
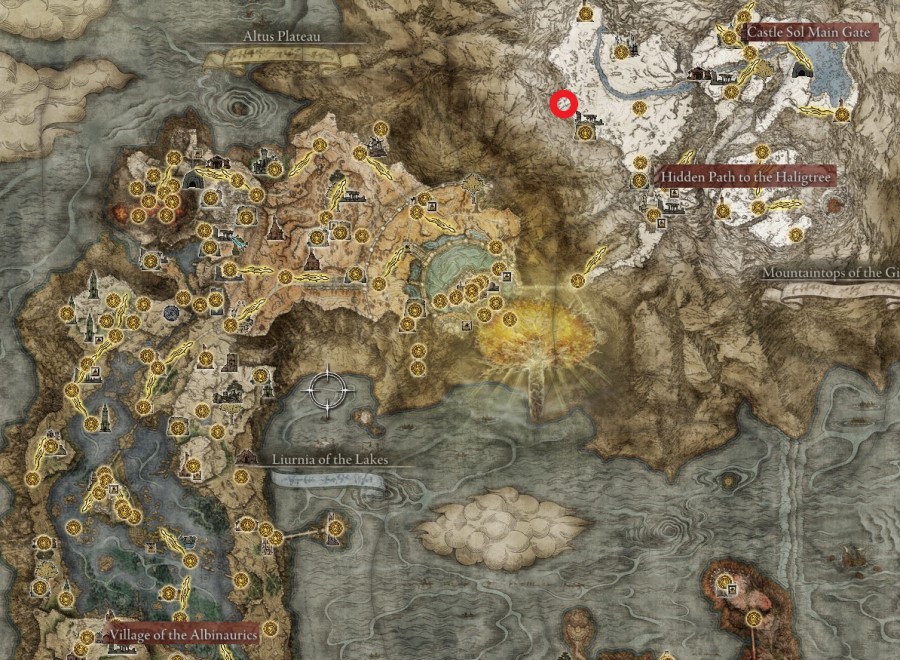
- Upon reaching the Snowfield, you'll have to locate a teleporter on the western side (noted in the above screenshot with the red circle): you'll know you're in the right area when you see a lot of Runebears hanging around, and you're invaded by a Sanguine Noble. Kill the Noble (preferably without upsetting the bears), and enter the portal to reach the same "Palace Approach Ledge-Road" Site of Grace you would have found had you done the Varre quest.
Regardless of how you got there, the road to the Mausoleum is a dangerous one. While you can farm the passive white-Albinaurics in the area for a huge amount of Runes, eventually you'll have to proceed past them. You'll have to head north, through the bloody swamp-like area and past the aggressive red-Albinaurics, past the ones that summon giant laser-firing skeletons, and to the Site of Grace at the foot of the Mausoleum. Fight your way through the cave there, and you'll be at Mohg in no time!
Much like Starscourge Radahn, the Lord of Blood is no pushover. He likes to inflict bleeding with his attacks (duh), although he also incorporates fire into his repertoire as well. He can fly around the arena, setting fire to the ground which can hemorrhage you if you're standing in it. The battle will feel like a race at times, as building up bleed stacks can be devastating for you...but also for Mohg himself, who for some reason is weak to his own condition.
At certain intervals in the early stages of the fight, Mohg will place a red ring around your character that you cannot remove. When he begins his second phase, he'll stand still and chant "Nihil!" three times, which will signal his most dangerous attack. Nihil cuts a large portion of your health while healing Mohg, and it will interrupt your ability to heal if you time it poorly. The main way to bypass this attack is to mix the Purifying Crystal Tear into your Flask of Wondrous Physick, and drink it right before he begins to chant. The Crystal Tear can be earned by defeating "Eleonora, Violet Bloody Finger", who invades you at the Second Church of Marika in the Altus Plateau.
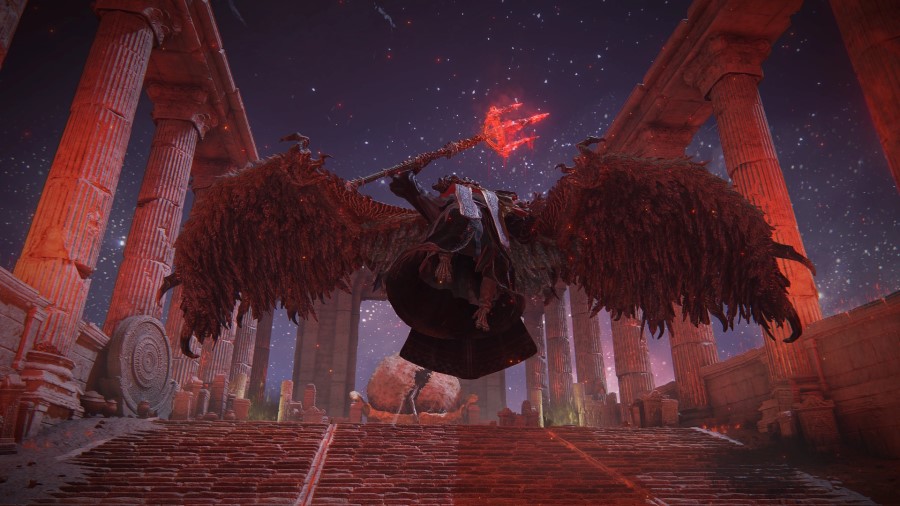
With both of these bosses defeated, you'll be able to access Shadow of the Erdtree by interacting with Miquella's Cocoon, located behind Mohg's arena (you can see it in the image above).
How Do I Prepare Myself For The DLC?
Before taking the trip to the Land of Shadow, there are a number of things you can do to better yourself - some of these will be more important than others, but it's still a good idea in general to improve your gear and stock up on whatever you can before heading into uncharted territory.
#1: Upgrade Your Flasks
While we know some mechanisms will be in place to curtail stronger characters from just plowing through the DLC (more on that below), Flasks are independent of your stats, and as such should be upgraded as much as possible to maximize your healing (and thus your chances of survival). This involves two resources: Golden Seeds, for upping the number of Flasks you can have, and Sacred Tears, for improving the effectiveness of the restoration you get from each use.
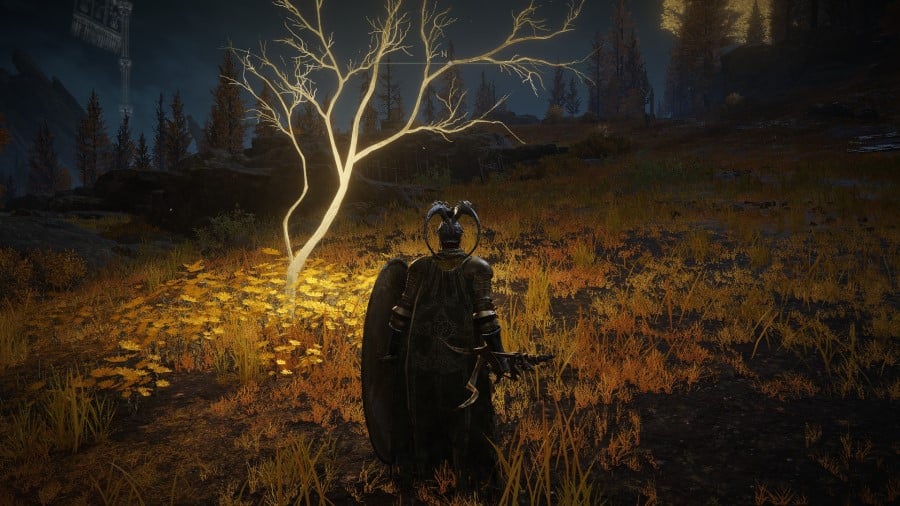
- Golden Seeds increase the number of Flasks you can carry. It's up to you how to divvy them up between Crimson (health) and Cerulean (FP/mana) Flasks, but you can only have 14 in total. You need to acquire 30 Golden Seeds all-told to reach the limit, although there are plenty more than you need in a single playthrough of the game. I do not plan to share the location of every Seed; just know that they are usually found next to branches of the Erdtree, which look like what you see in the image above.
- Sacred Tears make each use of your Crimson/Cerulean Flasks better, reducing your downtime in combat where you're a sitting-duck and allowing you to proceed farther between checkpoints. You need 12 in total to improve your Flasks to maximum efficiency, and there are exactly 12 in the game. They are all found in individual churches, such as the Third Church of Marika, Stormcaller Church, etc.
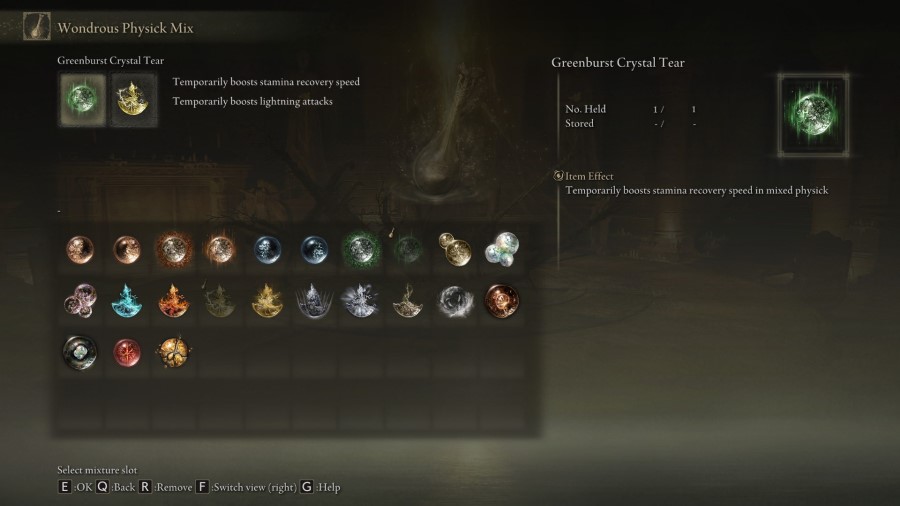
- A third Flask resource is the Flask of Wondrous Physick, which can be found at the aforementioned Third Church of Marika in eastern Limgrave. The Flask can only be used once between rests at a Site of Grace, but it is customizable, using Crystal Tears to mix-and-match effects the Flask can provide. It can heal you, restore Stamina, create a bubble shield, improve your attack power for a time, and so on; not all of those at once, mind you, but two at a time is still better than none. Acquiring more Crystal Tears usually means defeating an Erdtree Avatar, found at Minor Erdtrees throughout the map. They can also be located in various other hidden places.
#2: Upgrade Your Preferred Gear
As with the above, another thing the expansion will presumably not touch is your armor and weapons, so improving them as best you can is an exceptional idea. Locate the best pieces of gear you can wear for your given Equip Load, preferably to maximize defenses while staying within Medium Load (to keep the ability to dodge roll effectively). Your weapon(s) of choice should be as high as possible, improved to +25 for "normal" armaments or +10 for "special" ones. If you can't get that high, that's alright: reaching the final stage of progress requires Ancient Dragon Smithing Stones - or their Somber equivalent - of which there are a finite number of them, usually tied to the completion of quests or as rewards for difficult enemies/dungeons. Every little bit helps!
Similarly, before you head into Shadow of the Erdtree, you should probably finalize your given build (or thereabouts), determining what exactly your gameplan is with this new area. Do you hit enemies with large Strength weapons? Cast Intelligence magic/sorceries? Dance around inflicting bleed with Arcane? If you haven't figured it out by now...well, you should have! If you're having trouble, after completing the Academy of Raya Lucaria you can use any Larval Tears you've found to respec your stat allocation. You might want to stock up on any Larval Tears you come across, as well, should you happen to want to try a different build with gear from the expansion!
#3: Collect Smithing Stones
Director Hidetaka Miyazaki boasted that the expansion contains 100(!) new weapons, with eight new categories of armaments to discover and mess around with. Thrusting shields, large katanas, martial combat; there'll be a lot of new toys to play with in Shadow of the Erdtree, and you don't want to miss out! Hoarding a stash of Smithing Stones will allow you to quickly upgrade any choice gear you come across. We can imagine there will be more Smithing Stones available within the expansion - especially the limited Dragon stones - but until we know for sure, it's best to gather what you can.
- Regular Smithing Stones are used for "normal" armaments - requiring 12 of each tier to progress to +24 - and are thus the most common to locate. All tiers of regular Smithing Stones can be purchased from the Twin Maiden Husks in the Roundtable Hold after giving them the appropriate Bell Bearing, increasing their stock of said stones...except for Ancient Dragon Smithing Stones, which are used to reach the final +25 stage with said weapons. There are only so many of those, which I'll list below. But first, a different list: the location of the Bell Bearings!
- Smithing-Stone Miner's Bell Bearing [1]: The reward for defeating the boss at the end of Raya Lucaria Crystal Tunnel, located northeast of the Academy.
- Bearing [2]: Located in the Sealed Tunnel, behind a hidden wall near the respective Site of Grace in southwest Leyndell Outskirts. There is a chest inside.
- Bearing [3]: Located in a chest within Zamor Ruins, one of the first locations in the Mountaintops of the Giants.
- Bearing [4]: Reward for defeating the Godskin Duo in Crumbling Farum Azula, near the game's end.
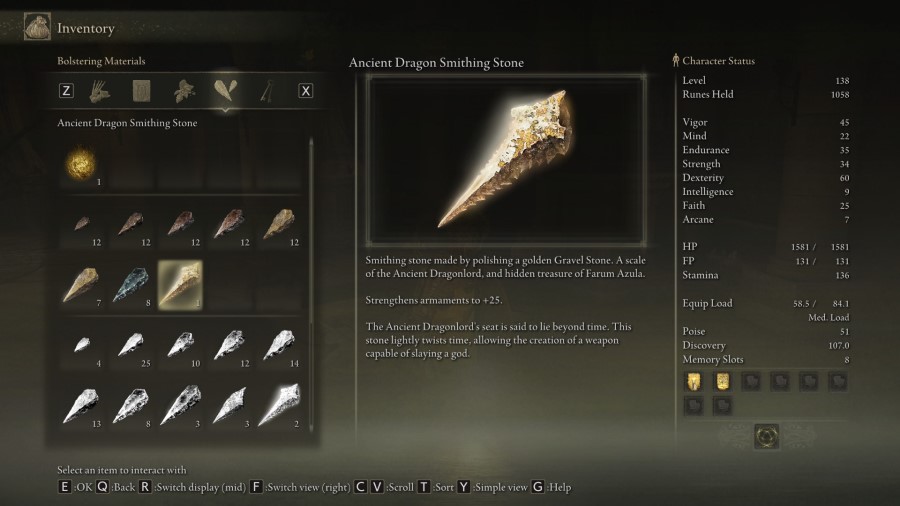
- As said above, Ancient Dragon Smithing Stones are (currently) limited in supply: there are only 13 available in a single playthrough of the game. Should you wish, you can replay through Elden Ring via the NG+ system, and thus acquire even more stones that way. Either way, they are located in the following places:
- Rewarded by Nepheli Loux for completing her questline.
- Another can be purchased, for 20,000 Runes, assuming Gostoc is alive at the end of Nepheli's questline.
- Rewarded by Witch-Hunter Jerren, if you side with him in Sorceress Sellen's quest.
- Rewarded by Gurranq in Dragonbarrow, after giving him all nine Deathroots in the game.
- Found on the Mountaintops of the Giants, inside a skull southeast of the Church of Repose.
- Rewarded for killing a particular Farum Azula Dragon in the Crumbling Farum Azula.
- On a corpse on a platform north of the Dragon Temple, in the Crumbling Farum Azula.
- Rewarded for killing another Farum Azula Dragon, the one constantly hurling lightning at you.
- Rewarded for killing the Night's Cavalry duo at nighttime in the Consecrated Snowfield.
- Found in Yelough Anix Tunnel, in the southwest portion of the Consecrated Snowfield.
- On a corpse near the Cave of the Forlorn in the Consecrated Snowfield, hidden above a dragon.
- On a corpse in Miquella's Haligtree, guarded by a Lesser Leonine Misbegotten.
- Found in a chest in Miquella's Haligtree after defeating Loretta.
- Compared to regular Smithing Stones, Somber Smithing Stones tend to be more rare, due in part to the nature of only requiring a single Somber stone of the appropriate tier to progress each "special" armament. As with their plainer counterparts, you can purchase each tier of Somber Smithing Stone from the Twin Maiden Husks in the Roundtable Hold, assuming you have given them the correct Bell Bearing. As with the above, I will list the location of the Bearings first, then denote where to find the elusive Somber Ancient Dragon Smithing Stones.
- Somberstone Miner's Bell Bearing [1]: Rewarded for completing Sellia Crystal Tunnel, in central Caelid.
- Bearing [2]: Rewarded for completing the Altus Tunnel, in central Altus Plateau.
- Bearing [3]: Found on a corpse near the First Church of Marika, on the eastern side of the Mountaintops of the Giants.
- Bearing [4]: Found in Crumbling Farum Azula, near the "Tempest-Facing Balcony" Site of Grace.
- Bearing [5]: Found in Crumbling Farum Azula, in a church near the "Beside the Great Bridge" Site of Grace.
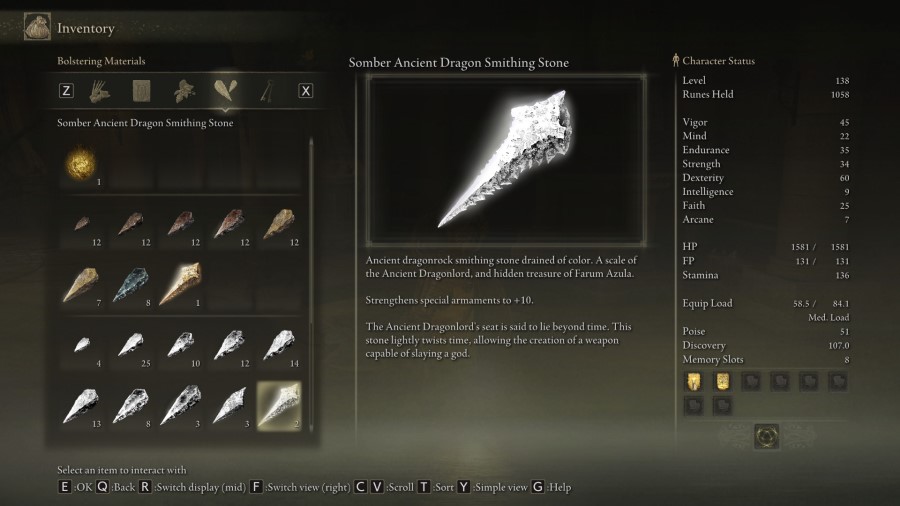
- Much like the Ancient Dragon Smithing Stones, their Somber equivalent (for upgrading special armaments to +10) are limited in number. However, unlike the former, only eight of the latter exist in one playthrough.
- Rewarded by Latenna, should you complete her questline and bring her to the Apostate Derelict near the top of the Consecrated Snowfield.
- Rewarded for killing "Anastasia, Tarnished-Eater", after her third invasion in the central region of the Consecrated Snowfield.
- Found in a chest in the Mohgwyn's Palace subregion, near the "Dynasty Mausoleum Midpoint" Site of Grace.
- Found in a gazebo behind the dragon constantly hurling lightning at you, in Crumbling Farum Azula.
- Found on a corpse in Leyndell, Ashen Capital, after you've forever changed Leyndell by completing Farum Azula.
- Found in a chest in the Haligtree, in a small room after the "Prayer Room" Site of Grace.
- Found near a Putrid Avatar in the Haligtree, roaming around the "Prayer Room" Site of Grace.
- Rewarded for completing Milllicent's questline, defeating Malenia in the Haligtree, and using the gold needle on Malenia's scarlet flower.
#4: Collect Grave Glovewort + Ghost Glovewort
Much like the Smithing Stones, it wouldn't hurt to gather as much Glovewort as you possibly can, too, to upgrade any new Spirit Ashes we may encounter in Shadow of the Erdtree. And again, like the Smithing Stones, you can find Bell Bearings for each kind - so you can buy them from the Twin Maiden Husks - and there are only so many of the "Great" variety for each, that you need for the final tier. There are two variants of Glovewort: Grave and Ghost.
- Grave Glovewort is used to upgrade normal ashes to +9, one per tier.
- Glovewort Picker's Bell Bearing [1]: Rewarded for completing the Wyndham Catacombs, in western Altus Plateau.
- Bearing [2]: Rewarded for completing the Giant's Mountaintop Catacombs, near the beginning of the Mountaintops of the Giants.
- Bearing [3]: Found in Crumbling Farum Azula, in a gazebo near a lake, before you reach the "Tempest-Facing Balcony" Site of Grace.
- Great Grave Glovewort is used to reach the final +10 tier for normal ashes; there are six in the game.
- Two are acquired at the same time, after completing the Consecrated Snowfield Catacombs, in the southeast portion of that region.
- Found hidden in Giant-Conquering Hero's Grave, above the starting area for the Mountaintops of the Giants (you must actually go to the southeast section and cross over to reach it).
- Found in a building near the "Crumbling Beast Grave Depths" Site of Grace in the Crumbling Farum Azula.
- Hidden in a tomb in the northwest part of Crumbling Farum Azula, found before the "Dragon Temple" Site of Grace.
- Hidden in the Haligtree, in the second lake of Scarlet Rot, guarded by an Ulcerated Tree Spirit.
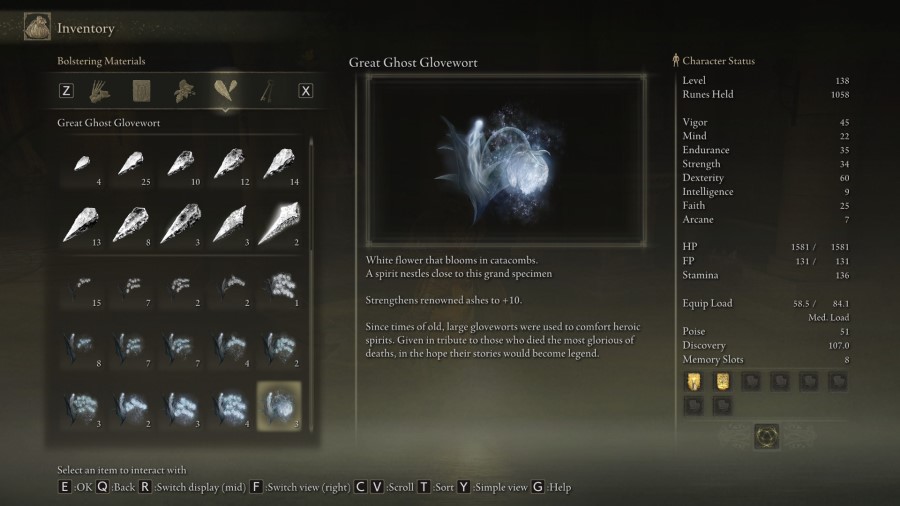
- Ghost Glovewort is used to upgrade "renowned" ashes of named characters, one per tier up to +9.
- Ghost-Glovewort Picker's Bell Bearing [1]: Found on a corpse near a gazebo, when you first reach Nokron, Eternal City beneath Limgrave.
- Bearing [2]: Found in a chest, guarded by several Silver Tears, in Nokstella, Eternal City beneath Liurnia.
- Bearing [3]: Found on a grave in the Haligtree, guarded by many Lesser Kindred of Rot near the "Haligtree Roots" Site of Grace.
- Great Ghost Glovewort is used to reach the final +10 tier with the renowned ashes. There are only four in the game.
- Found in a chest hidden deep within Nokron, Eternal City; it is the same chest the Fingerslayer Blade is located.
- Found in a chest at the end of Ainsel River, after defeating the Dragonkin Solder of Nokstella.
- Found in a chest in Nokstella, Eternal City, in a room defended by a large iron ball.
- Found in the Mohgwyn Dynasty Mausoleum, glowing in the dark cave surrounded by walking corpses.
#5: Other Miscellaneous Resources
While we don't know for sure what to expect from our enemies in the Land of Shadow, we do know two things just from watching the expansion's trailer: there is yet-another poisonous swamp area, and Messmer the Impaler uses a heavy amount of fire in his attack pattern. With that in mind, we can help ourselves by acquiring spells or gear that will alleviate such problems.
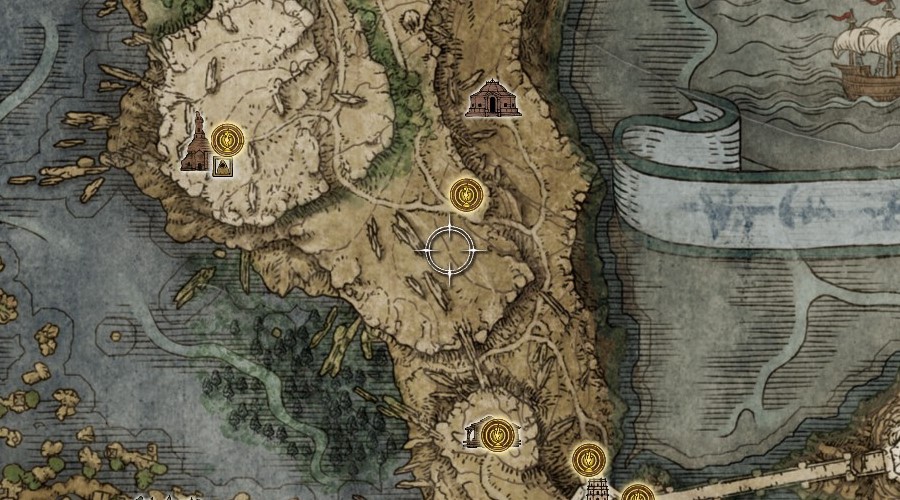
- The "Flame, Cleanse Me" Incantation can cure you of status buildups, such as Poison, Scarlet Rot, and Frostbite. It will also remove the conditions as well if you've been fully afflicted. It requires 12 Faith to use - not a whole lot, but might be something your build doesn't afford. It is located in the Fire Monk camp, to the southeast of the Church of Vows in eastern Liurnia. The screenshot below is a rough depiction of its location.
- Alternatively, you can amass a collection of Boluses, consumables that directly remove their specified condition. You can craft most of them fairly readily, although you will need their respective Cookbooks to do that. Armorer's Cookbook [2], for example, has the recipe for Neutralizing Boluses (which cure Poison): it is bought from a merchant on Limgrave's western beach.
- Fire Resistance can come from gear, but more directly from Talismans; specifically the Flamedrake Talisman and/or the Pearldrake Talisman. Lesser Talismans usually come in three forms: a base version, a +1 variant that's a little better, and a +2 variant that's a lot better than the base version.
- Flamedrake Talismans are your go-to if all you want is Fire Resistance, reducing damage taken by 13, 17, or 20%, depending on the variant.
- The base version is a reward for completing Groveside Cave, in Limgrave, north of the Church of Elleh.
- The +1 variant is found in Leyndell, Royal Capital, right near the elevator that takes you to the Forbidden Lands.
- The +2 variant is a reward for completing Dragonbarrow Cave, located on the east side of Dragonbarrow.
- Pearldrake Talismans reduce Elemental Damage by 5, 7, or 9%, depending on the variant. Not as much as a Flamedrake, but still useful if you expect a variety of damage flavors headed your way.
- The base version can be found inside the first teleporter of the Four Belfries, located on the west side of Liurnia. You need an Imbued Sword Key to open each waygate, of which there are three.
- The +1 variant is found in Wyndham Ruins, on the border of Mt. Gelmir and Altus Plateau. You need a Stonesword Key to open the area, where a chest is located containing it.
- The +2 variant is found in Miquella's Haligtree, at the end of the Consecrated Snowfield region. It's roughly near the "Haligtree Town" Site of Grace, on a corpse guarded by a Misbegotten Warrior.
- Flamedrake Talismans are your go-to if all you want is Fire Resistance, reducing damage taken by 13, 17, or 20%, depending on the variant.
How Do I Empower Myself Once In The DLC?
Regardless of what level you find yourself at when you begin your traversal into the Land of Shadow, you'll find that most players will be on the same footing entering the expansion. That is on purpose, a conscious balancing decision so higher-level players don't just breeze through the new content. As such, in order to rise up and meet these new challenges, you'll need an extra boon to empower your character.
Two items found within the DLC can boost your character, plus your Spirit Ashes and Torrent as well. They are known as Scadutree Fragments and Revered Spirit Ashes.
- Scadutree Fragments increase all of your character's main stats, further enhancing yourself the more you find. Your stats will glow yellow in the character screen to demonstrate their improved value. However, this boost only functions while in the Land of Shadow.
- Revered Spirit Ashes are used to reduce the damage your Spirit Ashes (and Torrent) take, while also improving the damage said Ashes can dish out. Like the Scadutree Fragments, they do not function in the base game.
We know they are scattered throughout the Land of Shadow, hidden in dungeons and around the overworld. How many you seek out before tackling the DLC's bosses is up to you, but the more you acquire the better off you'll be. A new functionality of the Sites of Grace (or whatever they're called in Shadow of the Erdtree) will be to consume these items and earn their blessing, much like Sacred Tears and Golden Seeds in Elden Ring proper.
And there you have it! By reading through this you should now be as learned as possible as-to what will be required of you to enter and overcome Elden Ring's Shadow of the Erdtree expansion! Hopefully you gleaned something valuable from this article, whether as a Elden Ring newbie or a full-fledged professional Tarnished.
Played Elden Ring before? Are you excited for Shadow of the Erdtree? Let us know in the comments below!



Comments
Steam claims the DLC will unlock in less than an hour, so significantly earlier than the map shows for my region (CEST). We'll see which is correct. Edit: The Steam counter just jumped up 5 hours, so unfortunately the map was right.
I had a relatively easy time defeating Mohg, skipping his second phase entirely. It was probably a combination of having a bleed build combined with being over-leveled, as I only found out about his existence when I started reading wikis in the end game; I played the early game avoiding most spoilers.