
Welcome to our Harvest league mechanic guide! Harvest is perhaps the most controversial crafting league ever released in Path of Exile. It underwent not one, not two, but three major reworks to become the mechanic we know today. We'll take you through all aspects of Harvest, from gathering Lifeforce (the mechanic's special currency) to fighting Oshabi herself and finally we'll take a look at how you can squeeze the most out of each Harvest.
Note that this is a league mechanic guide, not a Harvest crafting guide.
Harvest is considered Extra Content and has a baseline 8% chance of being randomly encountered in maps.
Our league mechanic guides are structured according to "Depth" - the deeper you go into the article, the more complex the mechanics get. If it all becomes too much, take a break from this guide, play with the league mechanic enough to master the fundamentals then come back and delve deeper!
Difficulty: Generally easy, with occasional mortal danger.
Complexity: Low, for Path of Exile standards.

The icon that denotes Harvest content.
- Harvest league launched in June 2020, but did not immediately go core.
- It was brought back in January 2021 alongside the Echoes of the Atlas expansion, with major changes such as removing the seed minigame.
- That proved too strong, so after a controversial Harvest Manifesto, the league's special crafts received major nerfs the following league!
- Later, monsters were decoupled from crafts and Lifeforce was introduced as a currency, once again changing how Harvest works.
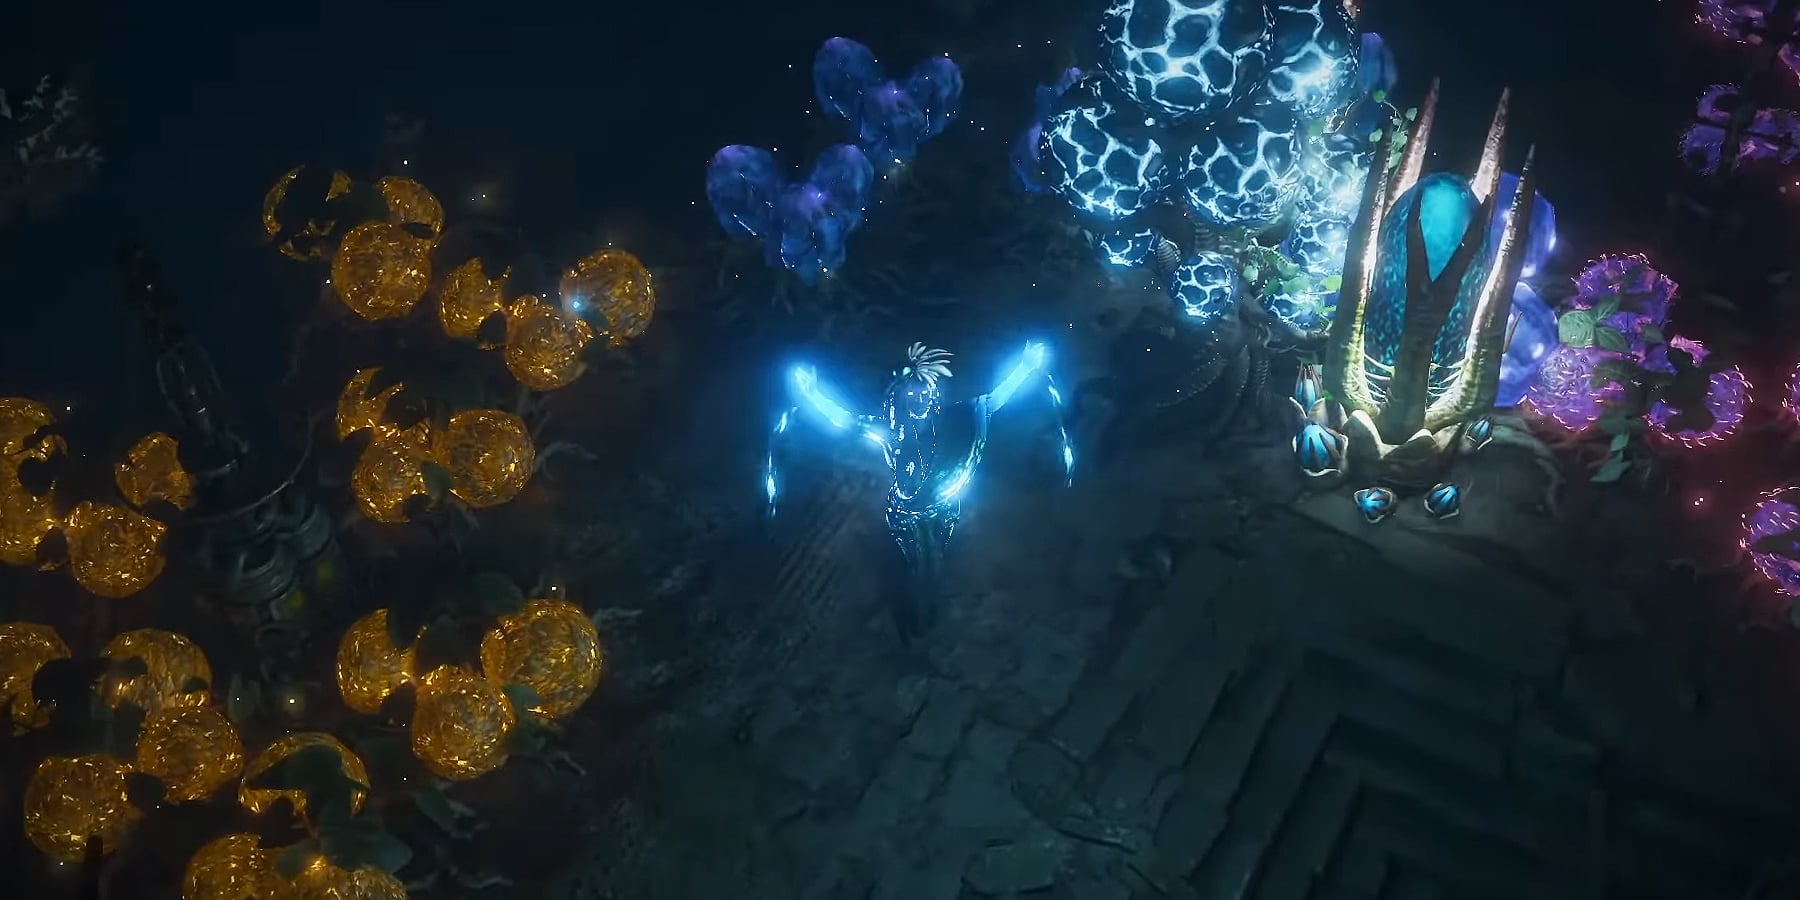
Depth 1 - The Sacred Grove
During your map travels, you may come across a portal leading to the Sacred Grove. Upon entering, you'll notice an NPC, Oshabi, in the center of the garden as well as several plots of shiny, colorful seeds on the edges of the sub-zone. Now, Oshabi will explain what you must do with some very fancy words, but we'll just tell you straight up:
- Each two plots of seeds have a Lifeforce Disperser between them.
- You'll note above each plot there's a button! When you click one of the buttons, the Lifeforce Dispenser drains the other plot of all life in order to feed the plot whose button you clicked on.
- Now, clicking on the button again will release the monsters.
- Monsters will release in 3-4 waves, with the higher-rarity monsters coming in the later waves.
- Kill them for a chance at getting Crystallized Lifeforce, the main currency type of Harvest!
It's important to note that the Sacred Grove isn't a separate area to your map, which means both the strength of its monsters, as well as the amount of Lifeforce they drop, is affected by your map mods. Careful, as some of the Rare monsters can become very dangerous on highly-juiced maps!
Depth 2 - Crystallized Lifeforce & Harvest Monsters
You'll notice Harvest seeds can be three colors. Each color / seed type comes with its own set of monsters, with different abilities. In addition, their loot differs:
- Red Seeds are called Wild seeds, and they drop Wild Crystallized Lifeforce. The monster pool contains more physical damage monsters.
- Yellow seeds are called Vivid seeds, and they drop Vivid Crystallized Lifeforce. The monster pool contains more chaos damage monsters.
- Blue seeds are called Primal seeds, and they drop Primal Crystallized Lifeforce. The monster pool contains more caster-type monsters.
These three types of Crystallized Lifeforce are used in the Horticrafting Station, which is Harvest's true reward: A crafting bench with plenty cool crafts, all of them divided into three categories based on what they cost: Wild, Vivid or Primal Crystallized Lifeforce. There's another type of Lifeforce that drops from this league's final boss, but first let's take a look at the Horticrafting Station.
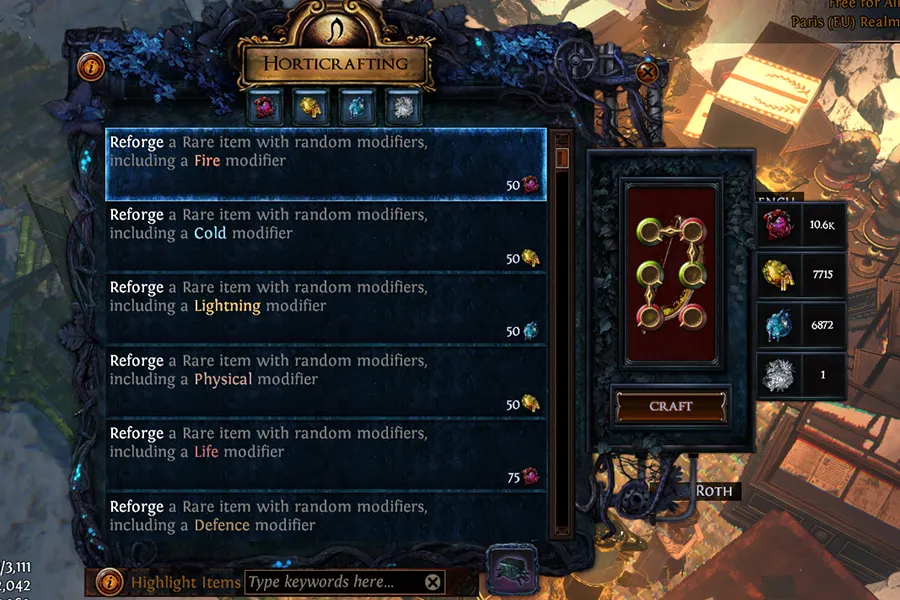
Depth 3 - Horticrafting Station
After you complete your first Harvest by successfully killing all monsters in a Harvest Plot, you'll unlock the Horticrafting Station, which you can also place in your Hideout!
As we mentioned, Harvest crafts are divided into three categories. Each craft requires a pre-determined amount of a certain Lifeforce, with some being fairly cheap, others quite expensive. You can check the full list of crafts HERE, but we've handpicked a few of the basic crafts to give you a better idea of how cool some of these are.
Some of the Wild Crystallized Lifeforce crafts are:
- Change a stack of Breach Splinters or a Breachstone into Splinters or a Breachstone of another type. Cost is proportional to stack size.
- Reforge a Rare item with random modifiers, including a Life modifier.
- Reforge a Rare item, being more likely to receive the same modifier types.
- Change a modifier that grants Cold Resistance into a similar-tier modifier that grants Fire Resistance.
- Enchant a Body Armor. Quality does not increase its Defences, insteads grants +1 Maximum Life per 2% quality.
Some of the Vivid Crystallized Lifeforce crafts are:
- Sacrifice up to half a stack of Divination Cards to receive between 0 and twice that amount of the same Card.
- Reforge a Rare item with random modifiers, including a Speed modifier.
- Change a stack of Conqueror Fragments into another random type of Conqueror Fragments. Cost is proportional to stack size.
- Change a modifier that grants Fire Resistance into a similar-tier modifier that grants Cold Resistance.
- Enchant a Weapon. Quality does not increase its Physical Damage, instead grants 1% increased Attack Speed per 8% quality.
Some of the Primal Crystallized Lifeforce crafts are:
- Change a stack of Delirium Orbs into a different type of Delirium Orb. Cost is proportional to stack size.
- Reforge a Rare item with random modifiers, including a Caster modifier.
- Randomise the Influence types of an Influenced Normal, Magic of Rare Item, as well as reforging the item with new random modifiers.
- Change a modifier that grants Fire Resistance into a similar-tier modifier that grants Lightning Resistance.
- Enchant a Body Armor. Quality does not increase its Defences, instead grants +1 Intelligence per 2% quality.
This is really just scratching the surface. When you unlock your Horticrafting Station, take a good look through all the Harvest crafting recipes. There's lots of useful stuff to find in there!
Fancy Chaos Orbs!
Depth 4 - Seed Tiers, Harvest Minibosses
Monsters, and implicitly, their seeds, are divided into four tiers. So far, we've talked about three. Let's complete that list:
- Tier 1 seeds contain Normal monsters.
- Tier 2 seeds contain Magic monsters.
- Tier 3 seeds contain Rare monsters.
- Tier 4 seeds contain one of three Harvest minibosses, one for each color of seed!
Tier 3 seeds are denoted by their light blue text in the Plot tooltip, while Tier 4 seeds, being 'unique', are listed in dark orange / brown text. Note that even if a plot doesn't have Tier 3 seeds, it will still spawn some Rare monsters.
You may have already fought a weaker version of all three Harvest minibosses if you've completed the Bramble Valley map. Occasionally, you'll find a plot in the Sacred Grove that contains the seed of one of the following bosses:
- Ersi, Mother of Thorns (Wild / red seeds)
- Namharim, Born of Night (Vivid / yellow seeds)
- Janaar, the Omen (Primal / blue seeds)
Unless you've juiced your map by a lot, these bosses aren't too threatening. Their abilities are very well telegraphed and can be dodged if you're paying attention. Each boss:
- Has a chance of appearing once in each plot, but multiple bosses could appear in different plots in the same Sacred Grove.
- Midway through the fight, they enter a short invulnerability phase where they summon a bunch of monsters to defend them.
- Upon death, they drop a good chunk of their respective Lifeforce.
In addition, each boss has a chance to drop their exclusive Unique item, which you can find in the table below.
| Ersi, Mother of Thorns | Namharim, Born of Night | Janaar, the Omen |
| Bear's Girdle | The Felbog Fang | Plume of Pursuit |
But that's not all! Rarely, they may also drop the Sacred Blossom, a map item that opens portals to a separate instance of the Sacred Grove, where you will fight the final boss of Harvest, Oshabi herself!
Depth 5 - Oshabi, Avatar of the Grove
Oshabi is your friend, for a short while, until it's time for her to harvest you. To begin the encounter, click on the tree in the middle of the Sacred Grove instance you open by using the Sacred Blossom in the map device:
- Oshabi uses powers thematically linked to all three seed types.
- Her main attack is a fairly fast projectile. Every now and then, she fires a boatload of them in a row, so you'll want to run far and around her to dodge them.
- When the arena turns red, she has access to her Wild ability: A traveling, rotating Orb of Thorns that fires, well, thorns that Hinder on hit.
- When the arena turns yellow, she has access to her Vivid ability: Charging up a bulbous root before slamming it on the ground, repeating two large shockwaves around it, applying Poison on hit.
- When the arena turns blue, she has access to her Primal ability: Creating several blue blobs that chase you and explode shortly after touching you.
- When the arena turns orange, she has access to her Sacred ability: Trapping you in a Vine Barrier, a cage whose walls are made of Root Wall "monsters".
- When you're trapped, a ground degen effect starts growing inside the arena.
- Destroy one Root Wall to break the cage, which will stop the ground degen from spreading.
- The ground degen stops growing, but persists through the rest of the fight.
- To make things worse, Oshabi also likes teleporting around, as well as sumoning Harvest monsters. Yay!
Oshabi's fight is fairly complex in terms of all the different mechanics she can use, but most are very well telegraphed and can be dodged by a cautious player. What about her loot, you say? Aside from two nice Divination Cards, The Aspirant and The Bitter Blossom, she can drop the following Unique items:
| Abhorrent Interrogation | Forbidden Shako |
| Law of the Wilds | Witchhunter's Judgement |
The most important loot you want from her, however, is the fourth type of Lifeforce we previously teased: Sacred Crystallised Lifeforce. She is guaranteed to drop one on death. This Lifeforce is used for the strongest Harvest crafts available, which cost 1 Sacred Lifeforce and a boatload of one other regular Lifeforce. Here's a few examples, this time with costs attached:
- Reforge the color of a random socket on an item, turning it White (1 Sacred, 12500 Wild)
- Add a new Cold modifier and remove another random modifier from a non-Influenced item (1 Sacred, 15000 Vivid)
- Reforge an Influenced Rare item with random modifiers, including an Influence modifier (1 Sacred, 5000 Primal)
- Synthesize an item, giving random Syntheszed implicits. Cannot be used on Unique, Influenced, Synthesised or Fractured items (1 Sacred, 5000 Vivid)
Worth the effort? I think so.
Depth 6 - More Harvests & Harvest Scarabs
Looking to get more of that sweet Lifeforce nectar? Let's see how you can guarantee Harvest in your maps:
- Using the Harvest map crafting option, which costs 6 Chaos Orbs and guarantees the Sacred Grove will be present in your map.
- Using the Harvest Scarab, which does the same!
- Allocating certain passives nodes on the Atlas Passive Tree that increase the chance of Harvest showing up in your maps, or eventually outright guarantee it. Here's a link to a Passive Tree that has all chance-increasing nodes allocated. With all of them allocated, your total chance of getting the Sacred Grove in your maps will be XXX%!
In addition, Harvest has 2 more Scarabs you can use to further juice your Sacred Groves. Note that these do not implicitly guarantee Harvest. You'll want to combine them with one of the above options to ensure you don't waste them on merely a chance to encounter the Sacred Grove:
- Harvest Scarab of Doubling - Monsters are twice as beefy, but twice as filled with Lifeforce!
- Harvest Scarab of Cornucopia - This will guarantee you at least one Harvest miniboss, generally at least two, and sometimes all three! Go get that Sacred Blossom!
Harvest loot doesn't currently drop anywhere else in the game; it is exclusive to Harvest content.
Depth 7 - Atlas Effects
not now
Other Considerations
yes
About_Author

Nox is a senior editor at outof.games, with a 20-year history of playing video games. While you won't find him finally playing GTA V after having bought it many years ago, you may occasionally stumble upon one of his 3000-word essays on the front page.
More_Path of Exile_Guides


A Guide to MARVEL SNAP's Token Shop
Latest_Path of Exile_Guides


// join_the_conversation
Sign in to share your thoughts, vote on comments, and connect with the community.
Comments
// no_comments_found
Be the first to share your thoughts!
Leave a Comment