Among Us
Guide to the Fifth Map Added to Among Us - The Fungle
The fifth map for Among Us is out, and it's an interesting one. This guide to The Fungle will help navigate around this unique map.
The fifth map in Among Us, The Fungle has been out for about two weeks now (at the time of writing this guide, which is November 9th 2023). In those two weeks, many players have surely figured out most things by now but if you haven't played the game recently, then it might seem a bit overwhelming to grapple with how different this map is.
Look no further because this little guide is here to help you! This guide will present a general overview of the map, all the tasks, where they are, and how to beat them, and how the impostors can move and break things around the map.
Note: Various action terminology will assume that you're playing on the PC version, but for mobile or controller players, they should be pretty easy to translate into your preferred mode of play.
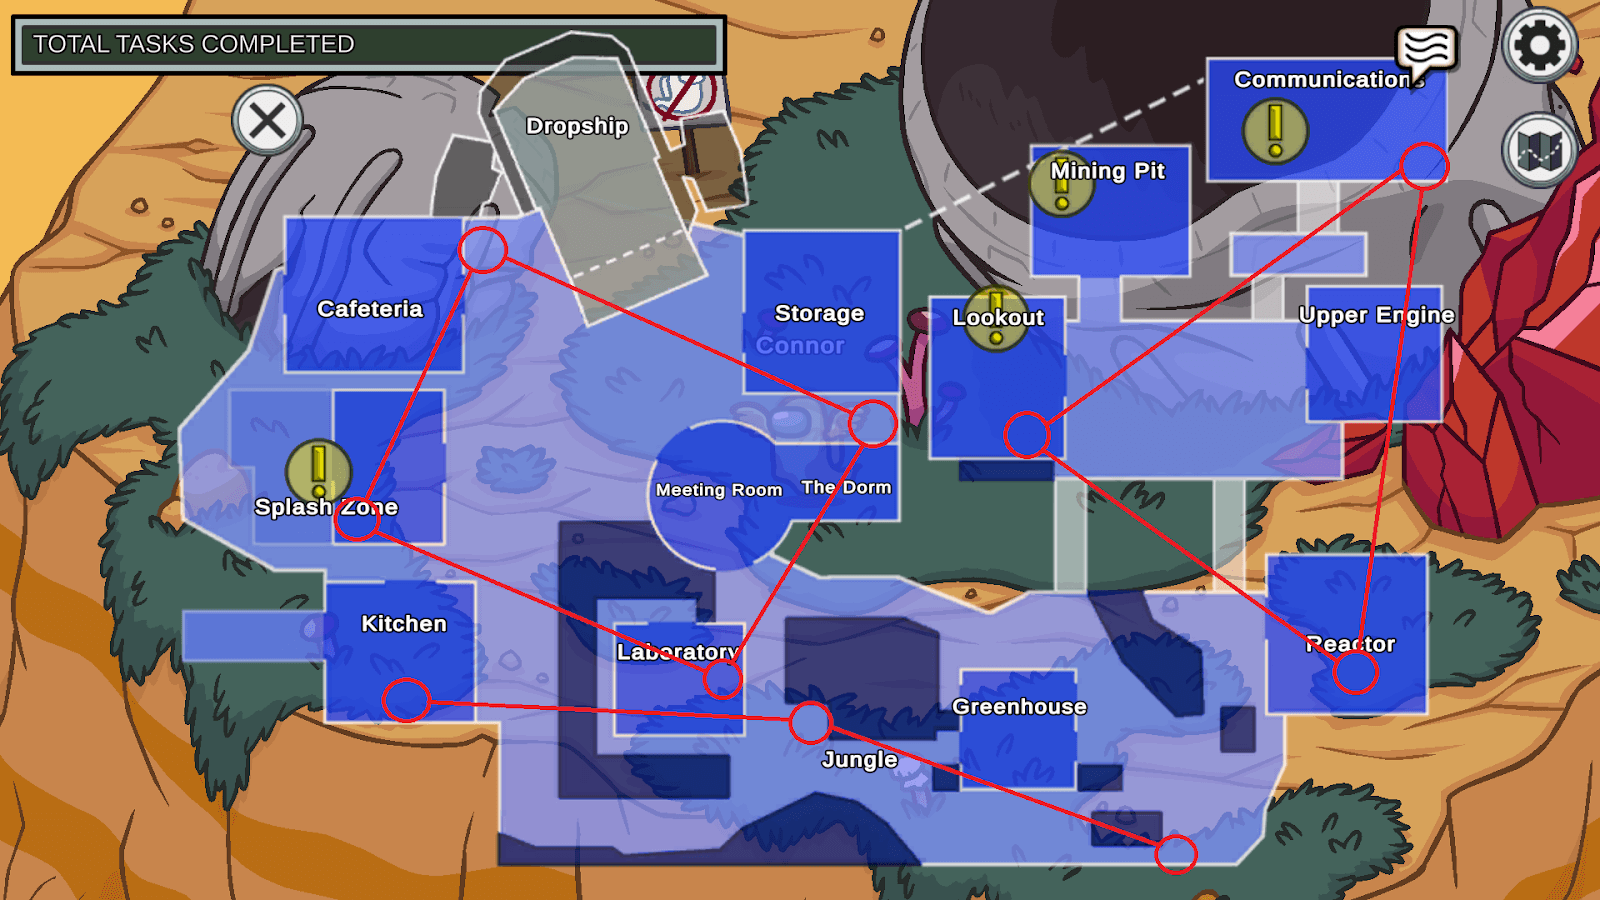
The Map
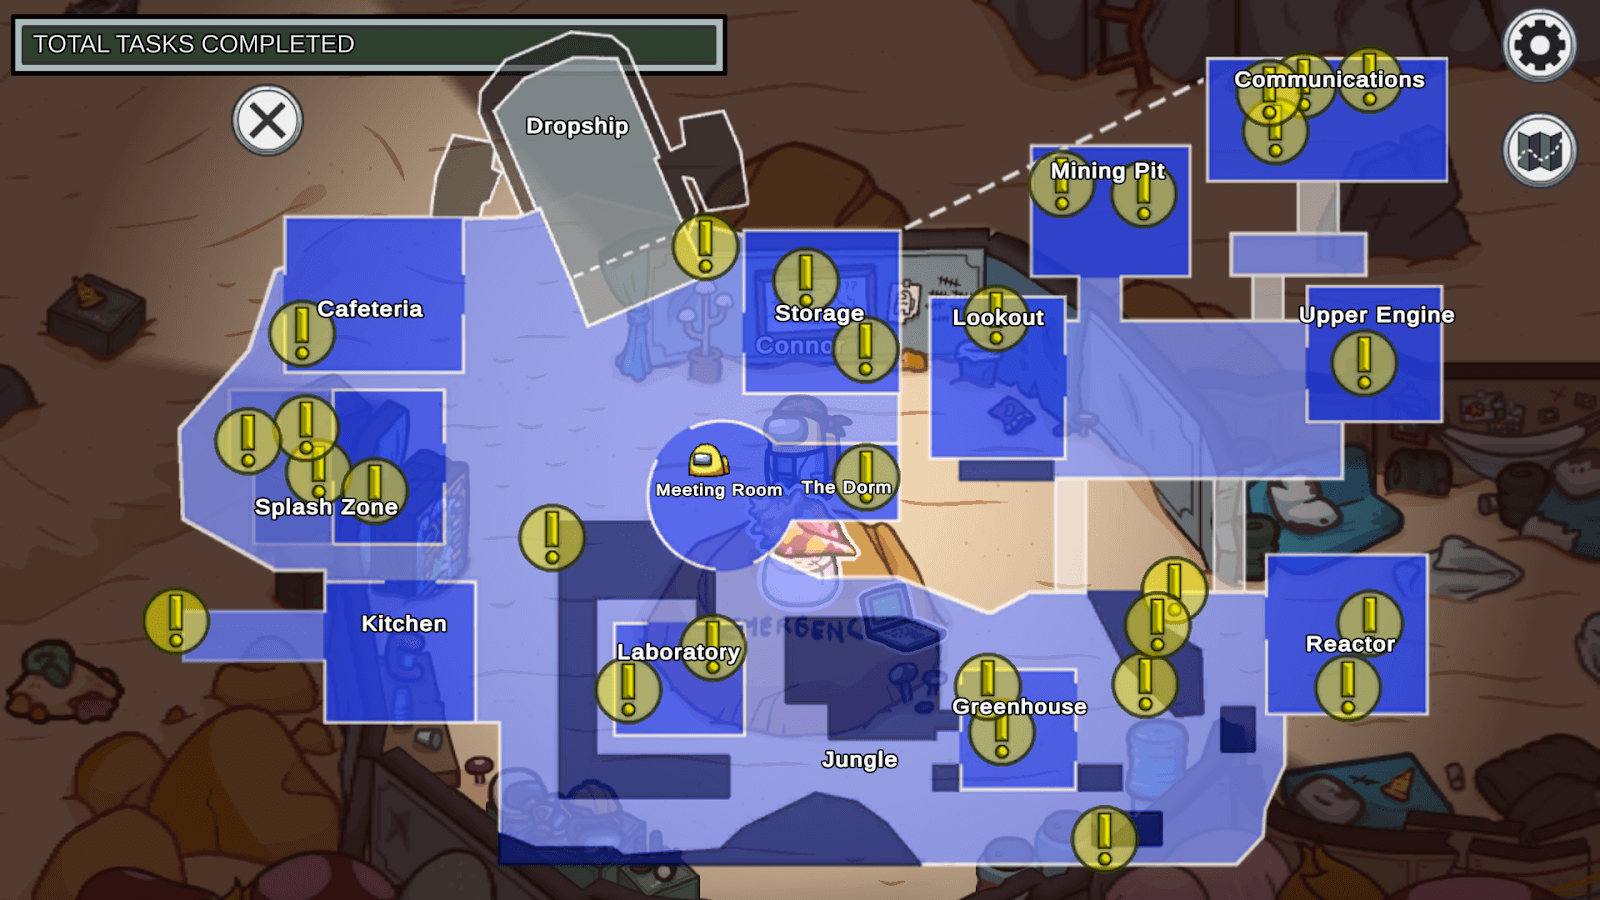
Here is an overview of the map and all possible task starting locations. When the game begins, you will spawn around the campfire on the Beach just outside the Meeting Room. On all subsequent rounds, players will spawn around the table. The Meeting Room itself has no tasks, but it is often the most convenient route to get to the Jungle or the zipline in Storage (more on that later). As is typical of Among Us maps, the Meeting Room is also where you call for an Emergency Meeting, this time with the conch shell.
A trademark feature of this map are the green, donut-shaped plants that will create a puff of pink smoke when a player runs over them. After a few seconds, the cloud will disappear and the plants will regrow. The cloud, however, has one important functionality to it: While you'll still be able to see your own character sprites, all other players will be hidden from your view while they're inside the pink cloud. These only appear in the Jungle section of the map, but this does mean that you will have to be mindful of where you're walking while in the Jungle.
Tasks and Features
Cafeteria
The Cafeteria itself has one single task, 'Empty Garbage' which is identical to the task of the same name on The Airship. Click and hold on the bag and drag it outside of the garbage can to complete the task.
![]()
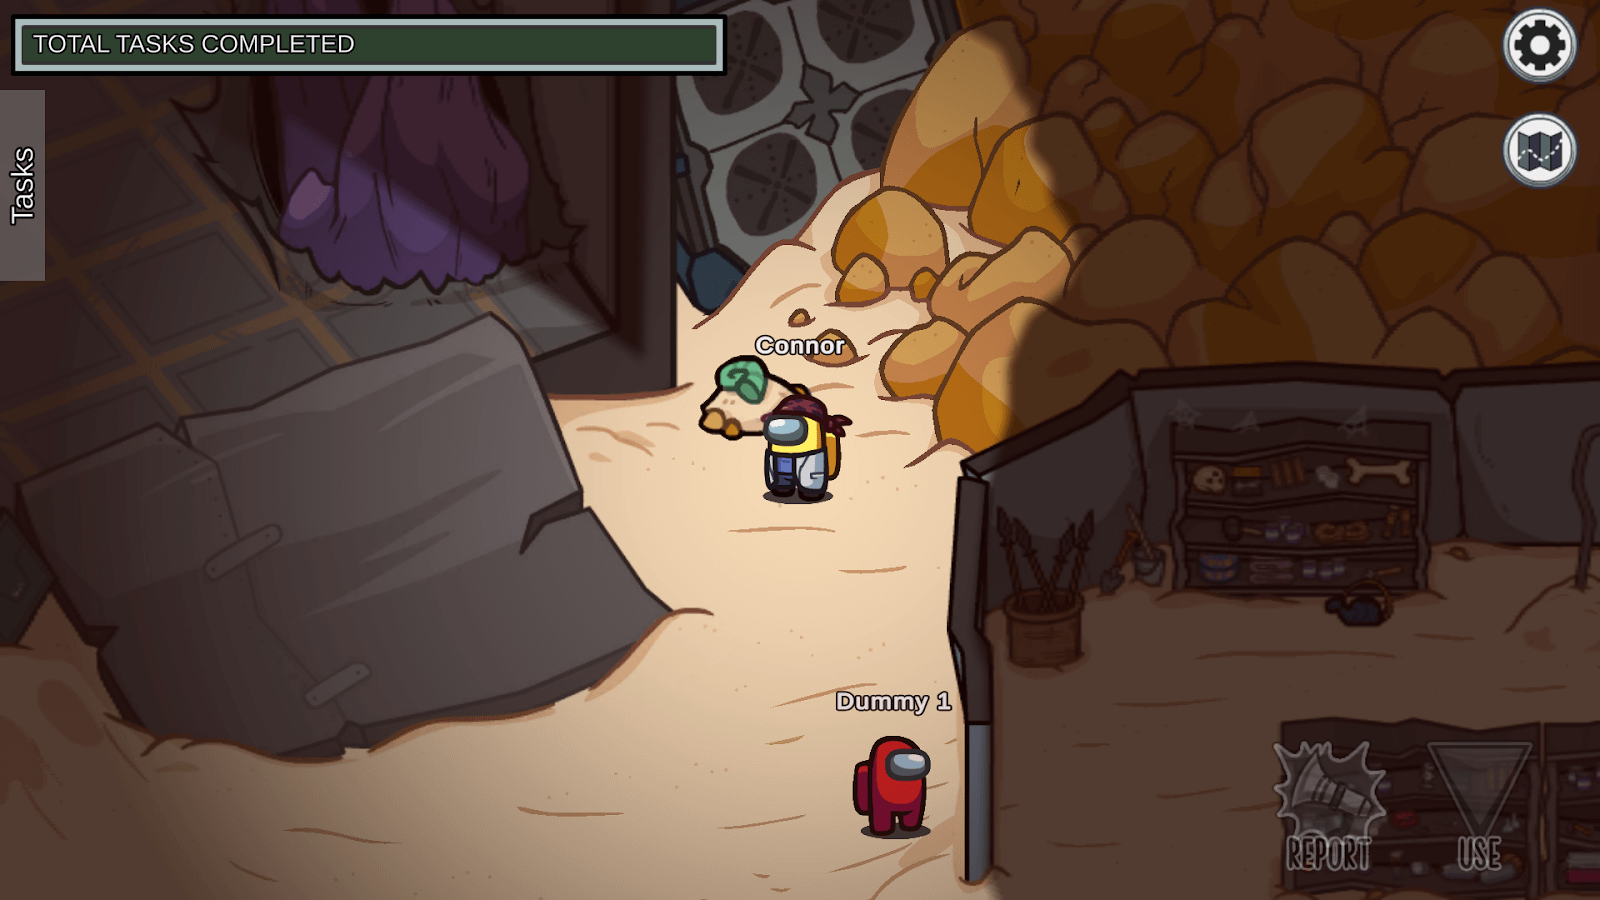
Right outside of the Cafeteria though is a vent and a pile of sand with a stick protruding from its peak. This is one of four possible locations for the 'Collect Stick' task out on the beach.

Splash Zone
Splash Zone contains several tasks, each in quite close proximity of each other, meaning that some players might be able to quickly clear a sizeable chunk of their task list as soon as the game starts. Although it is technically considered a "room" by the game, it consists of one outside and one inside area, where all but one task are outside. It can be accessed through the western opening in Cafeteria, through the one building of the zone, or through a narrow alleyway in-between the building and Cafeteria. Neither path has line of sight of the other paths.
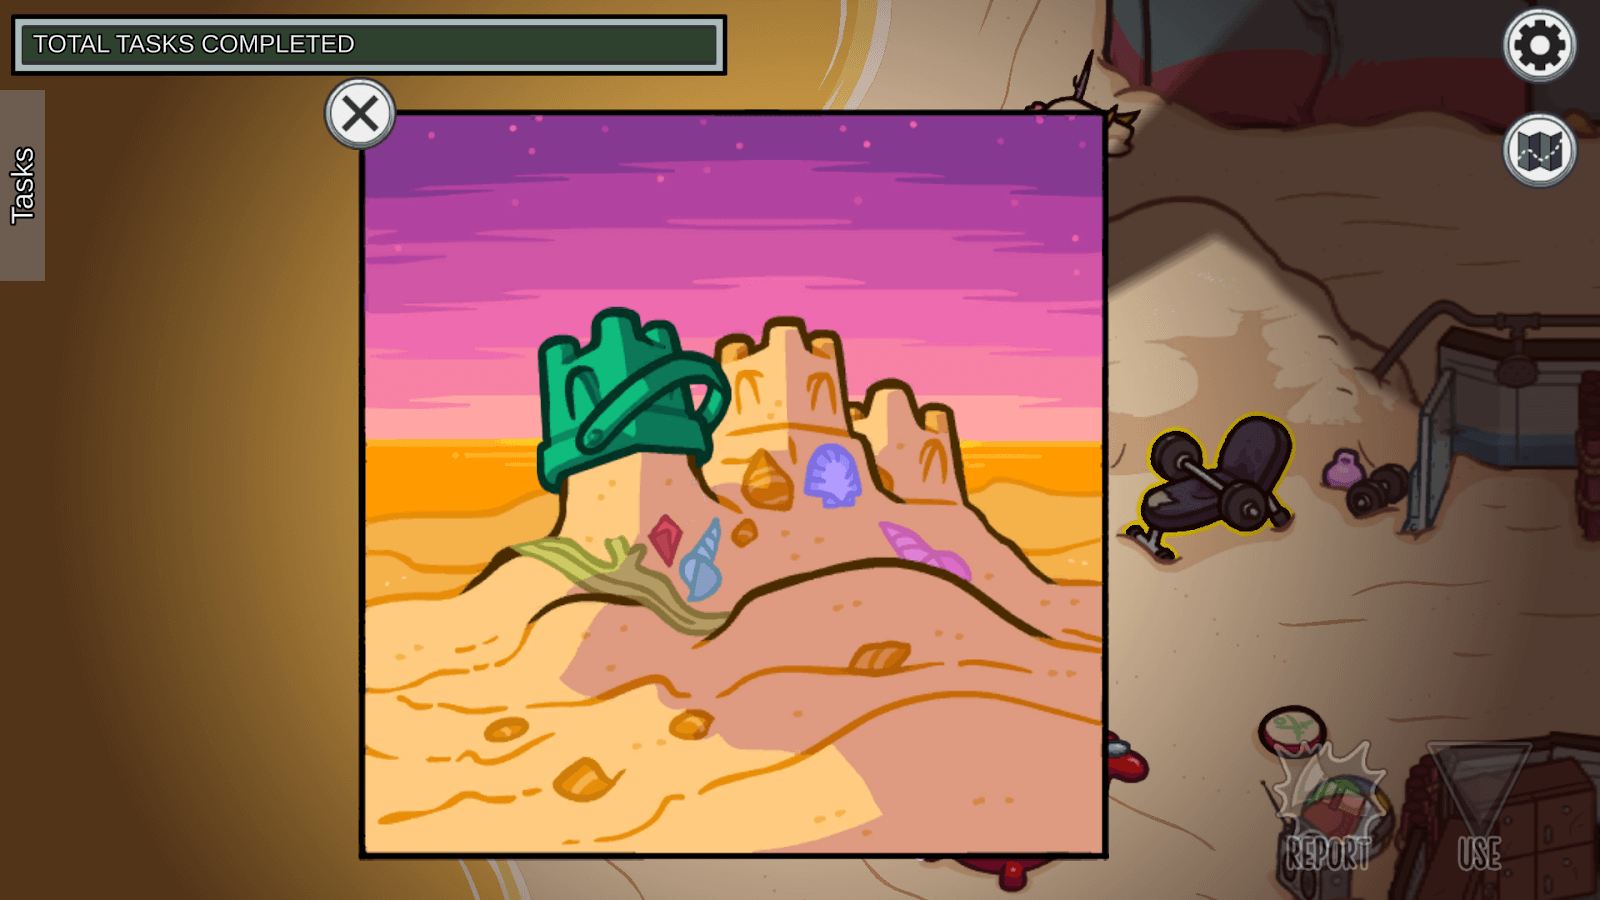
The task closest to the water is 'Build Sandcastle'. To complete this task, simply click and hold over the green bucket and move it up off of the sand.
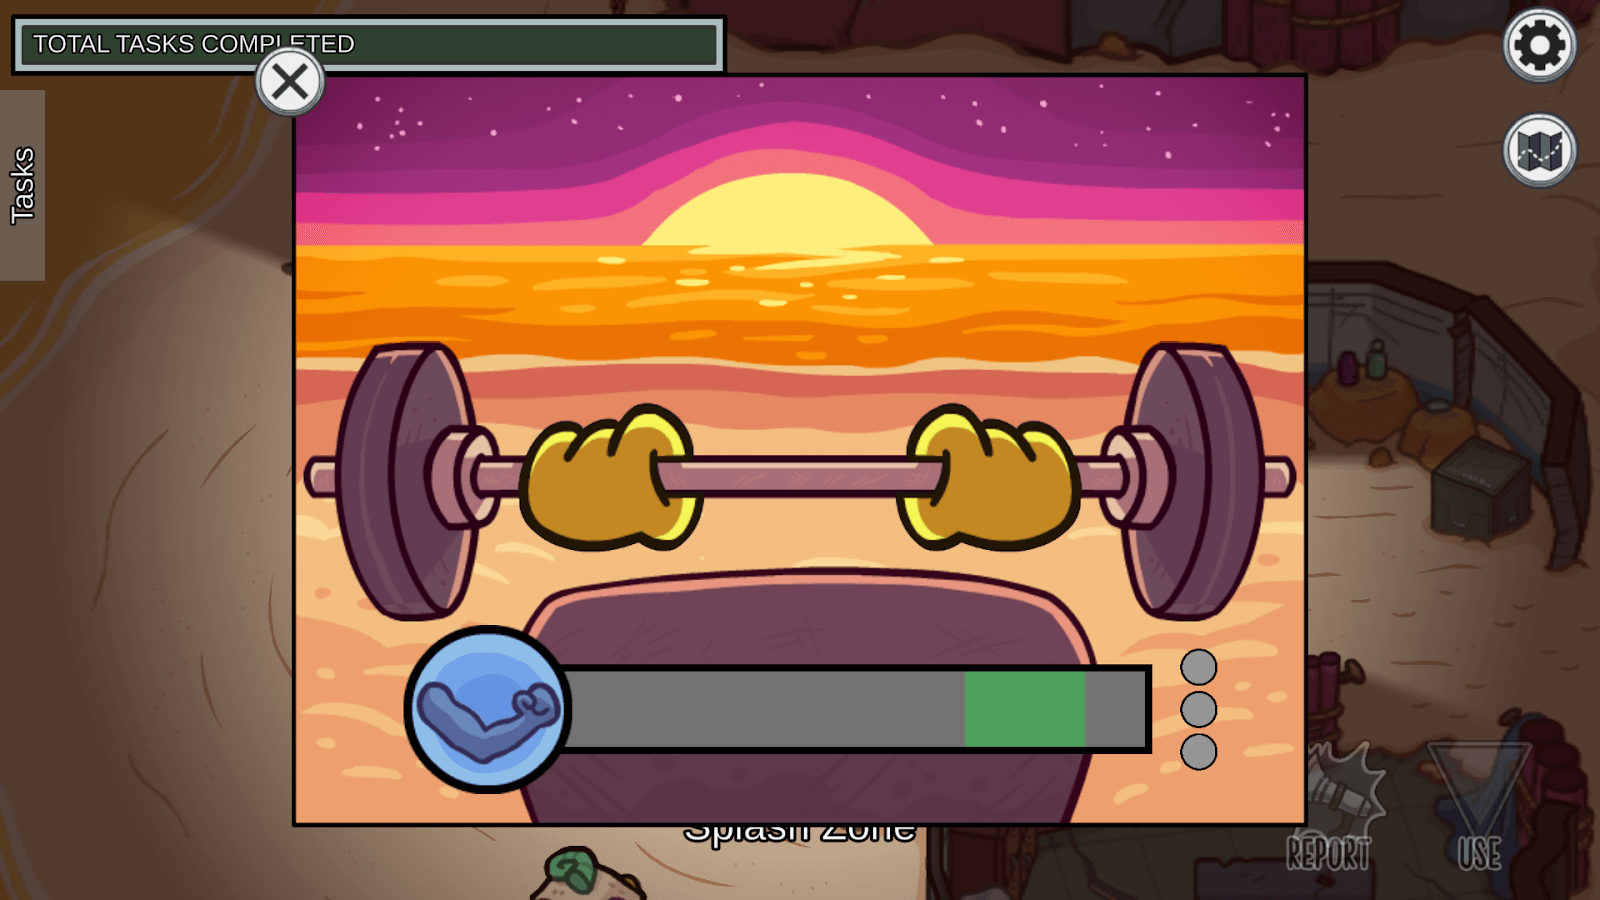
'Lift Weights' is a simple task, but it does take a little bit of time to complete. When you click and hold anywhere on the task window, a white bar at the bottom of the screen will begin to fill up. If you let go of the click, the white bar will disappear.
To complete this task, hold the mouse click until the white bar reaches the green zone and then release. Once you do this three times, you will have successfully completed the task. The three circles towards the right of the bar will track your progress.
'Throw Frisbee' is another simple task. To complete this task, click on the frisbee that is partially submerged into the sand. It will start to float in mid-air. After this, click and hold on the frisbee and then drag it towards the sun to "throw" it.

This room also contains another 'Empty Garbage' task which is the same as the one in the Cafeteria. It is located right next to a vent.
The room only has a small amount of line of sight towards the exit on the north-eastern part of the wall. As a result, you have very limited vision of the action around you and other players may not have line of sight of you while in this room. This combined with the vent right next to the task can make this an ideal spot for an Impostor to achieve a kill and then quickly escape.
![]()
Although not technically part of the room, right at the end of the alleyway in-between it and Cafeteria is another possible location for the 'Collect Stick' task.

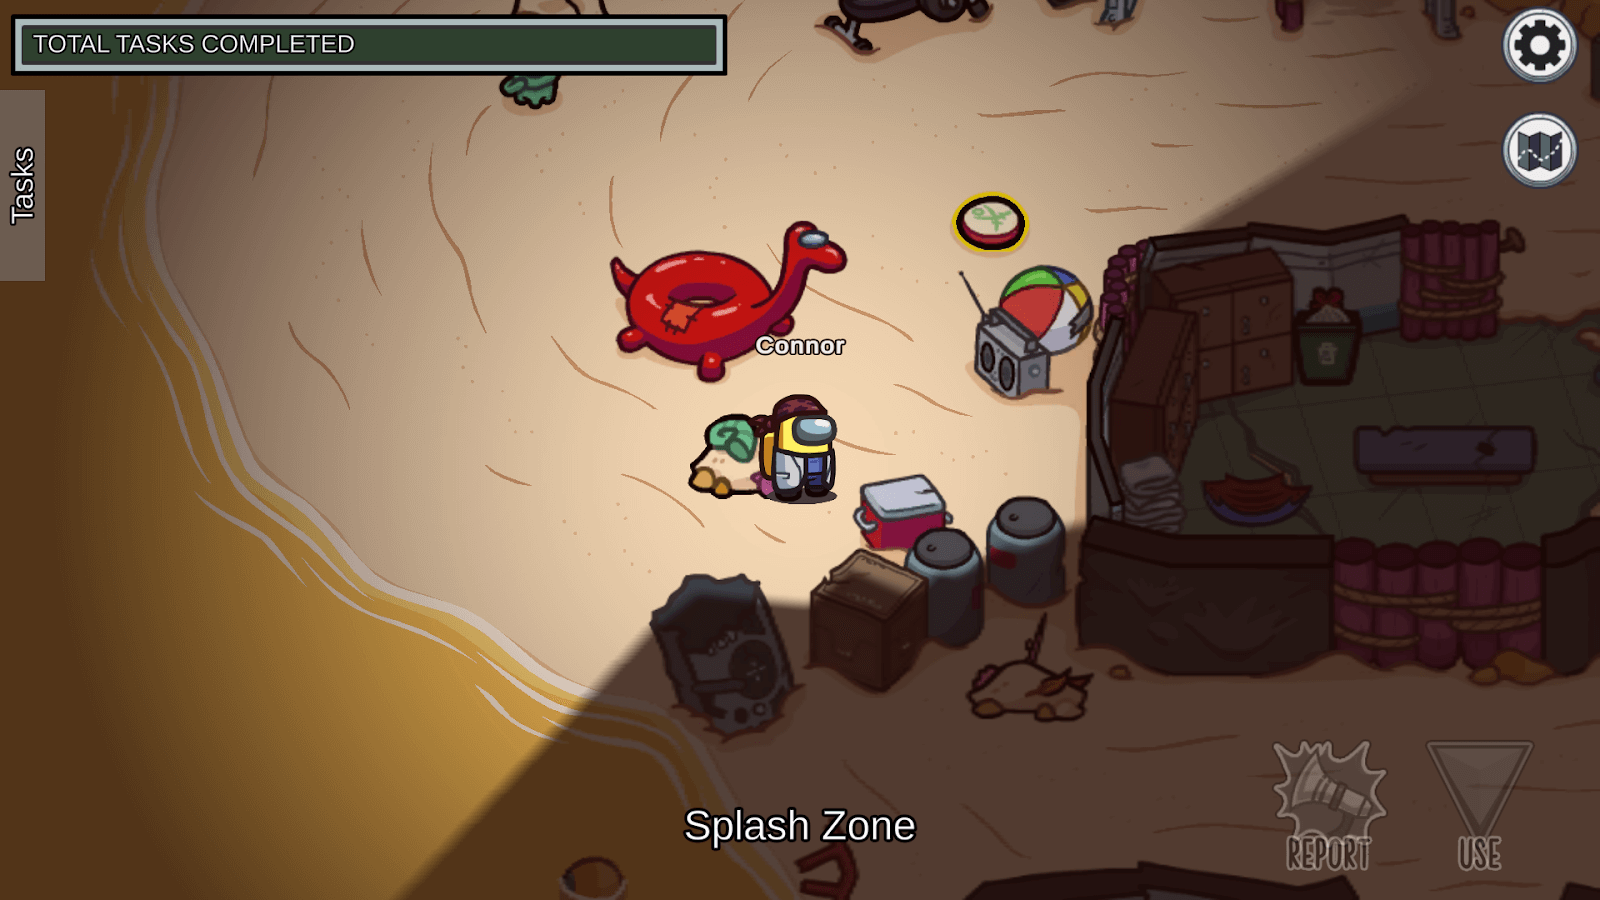
Right underneath the red crewmate floatie is one of four possible locations for the 'Collect Shells' task (more info on this in the Beach section).
Kitchen
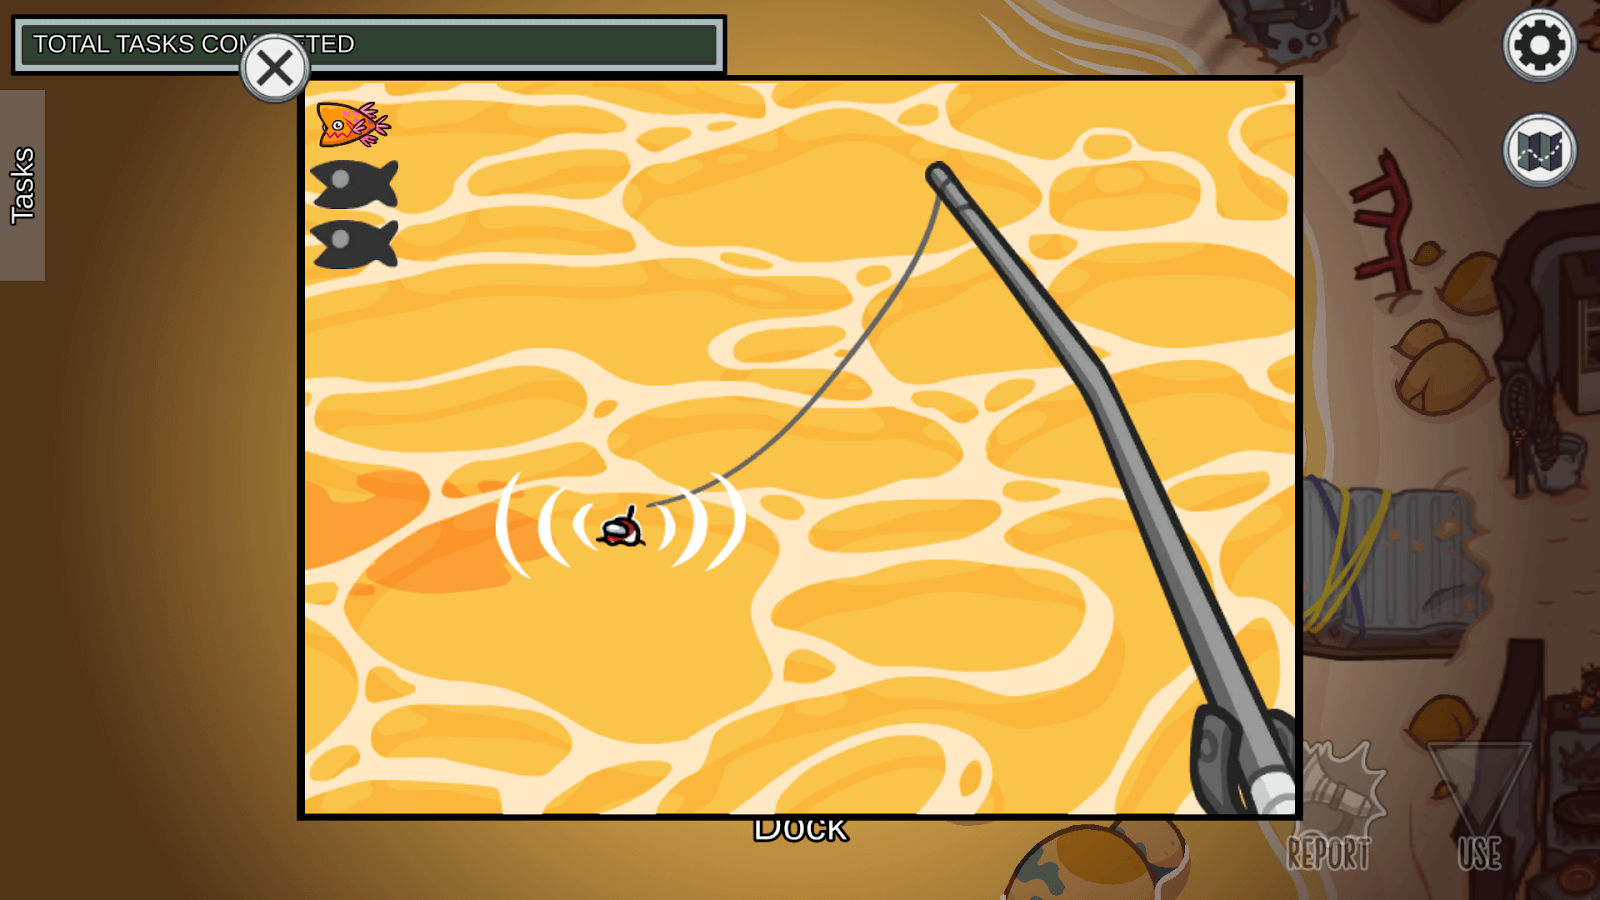
Although not technically part of the Kitchen itself, the 'Catch Fish' task is located on a small isolated part of the map (known as 'Dock' in-game, but not labeled on the map) close to the Kitchen and requires you to run through the building to access.
When you start the task, you will deploy a fishing line into the water, and a shadow of a fish will start to close in towards the line. When a fish has bitten your line, a red fish icon in a white pop-up bubble will appear. Once you see this, click right away. If you wait too long to click, the fish will eventually swim away. Once you catch three fish, you'll move onto the second part of the task.
The second part of this task is in the Kitchen proper. Click on each of the three outlines of the fish to place your fish on the grill. When you place all three fish on the grill, the game will display a 10-second timer. After this timer expires, click on each fish to flip them over and this will begin another 10-second timer. After this second timer expires, click on each of the fish and they will disappear.
No matter how long you wait, you are never in any danger of burning the fish. This means that you can theoretically leave the task after placing or flipping your fish to go do other tasks and then come back to this one later. The two nearby piles of sand where the 'Collect Stick' may appear as the 'Empty Garbage' task in Splash Zone are ideal for this as you can complete those tasks and then run back to the Kitchen in the allotted time it takes for the fish to cook. If you do choose to stand and wait it out though, be aware of the fact that the task is in very close proximity to a vent that the task screen covers entirely, which will put you in a vulnerable position to get killed by an Impostor and allow them to make a quick getaway.

Additionally, right outside the entrance of the room is another possible spot for the 'Collect Stick' task.
The Dropship
The only task in the room proper is one of two possible locations for the 'Fix Wiring' task which appears on every map. Compared to all of the other maps though, the task is very simplified here since it's just one stage that takes place on one of two locations. You will see four colored wires and all you have to do is simply drag the wires on the left side to the same-colored wires on the right.

I would've had a picture of the task itself here, but in Practice mode, it can only show up in Communications. So here's at least where the task is.
Outside the Dropship is another possible location for the 'Collect Shells' task.
The Beach
The outside area of the Beach itself contains two tasks, both of which share the same trait of taking place at one of four randomly chosen areas.
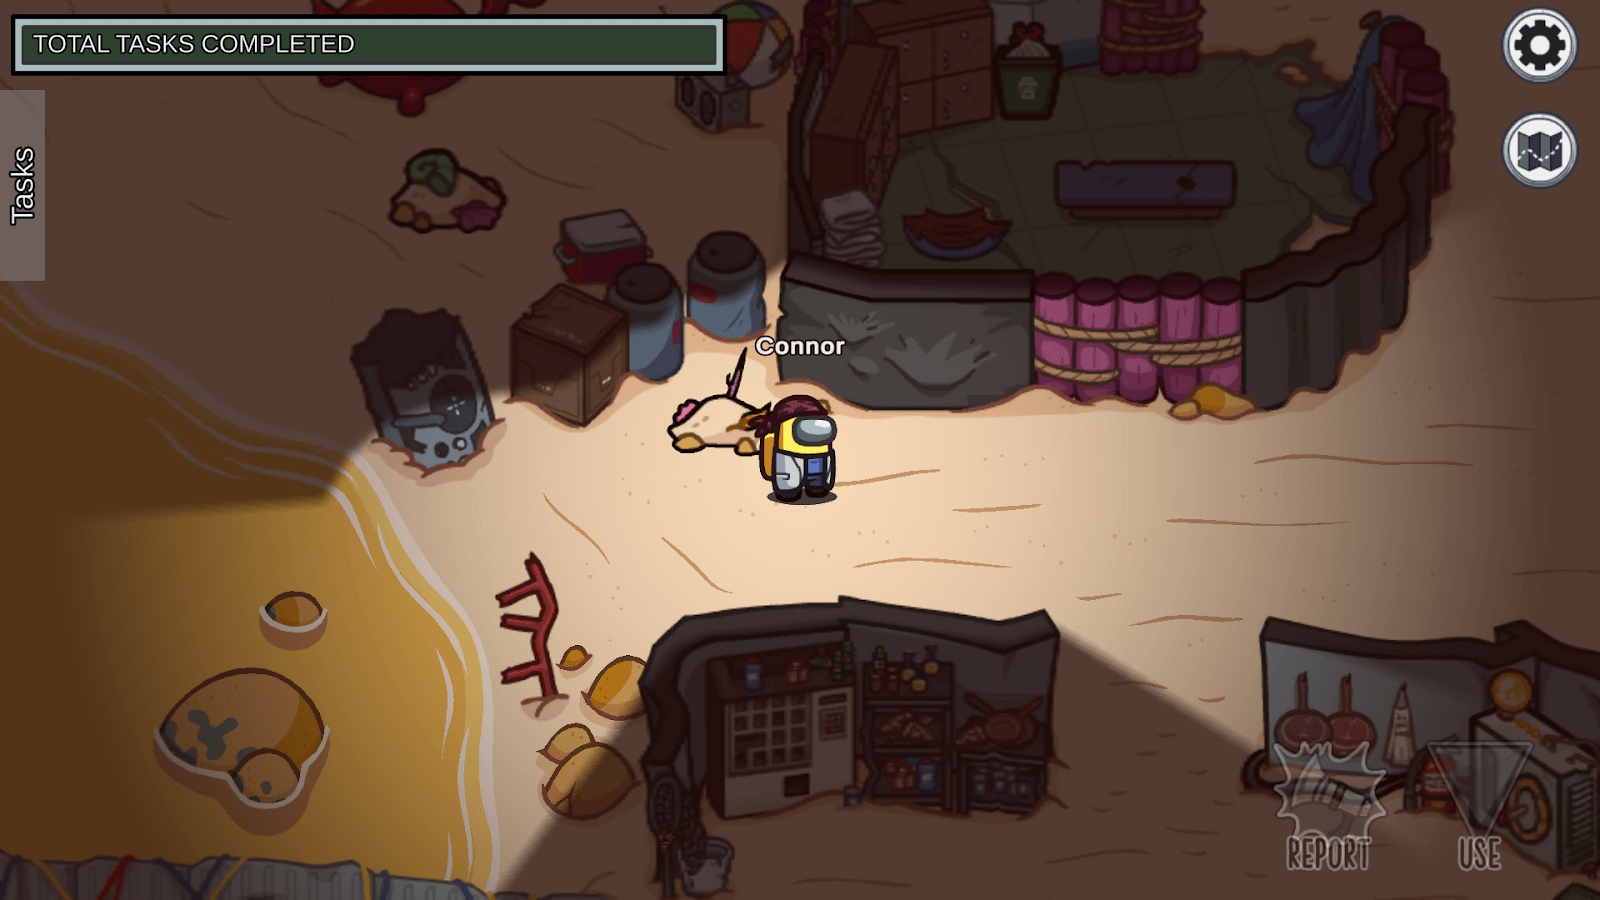
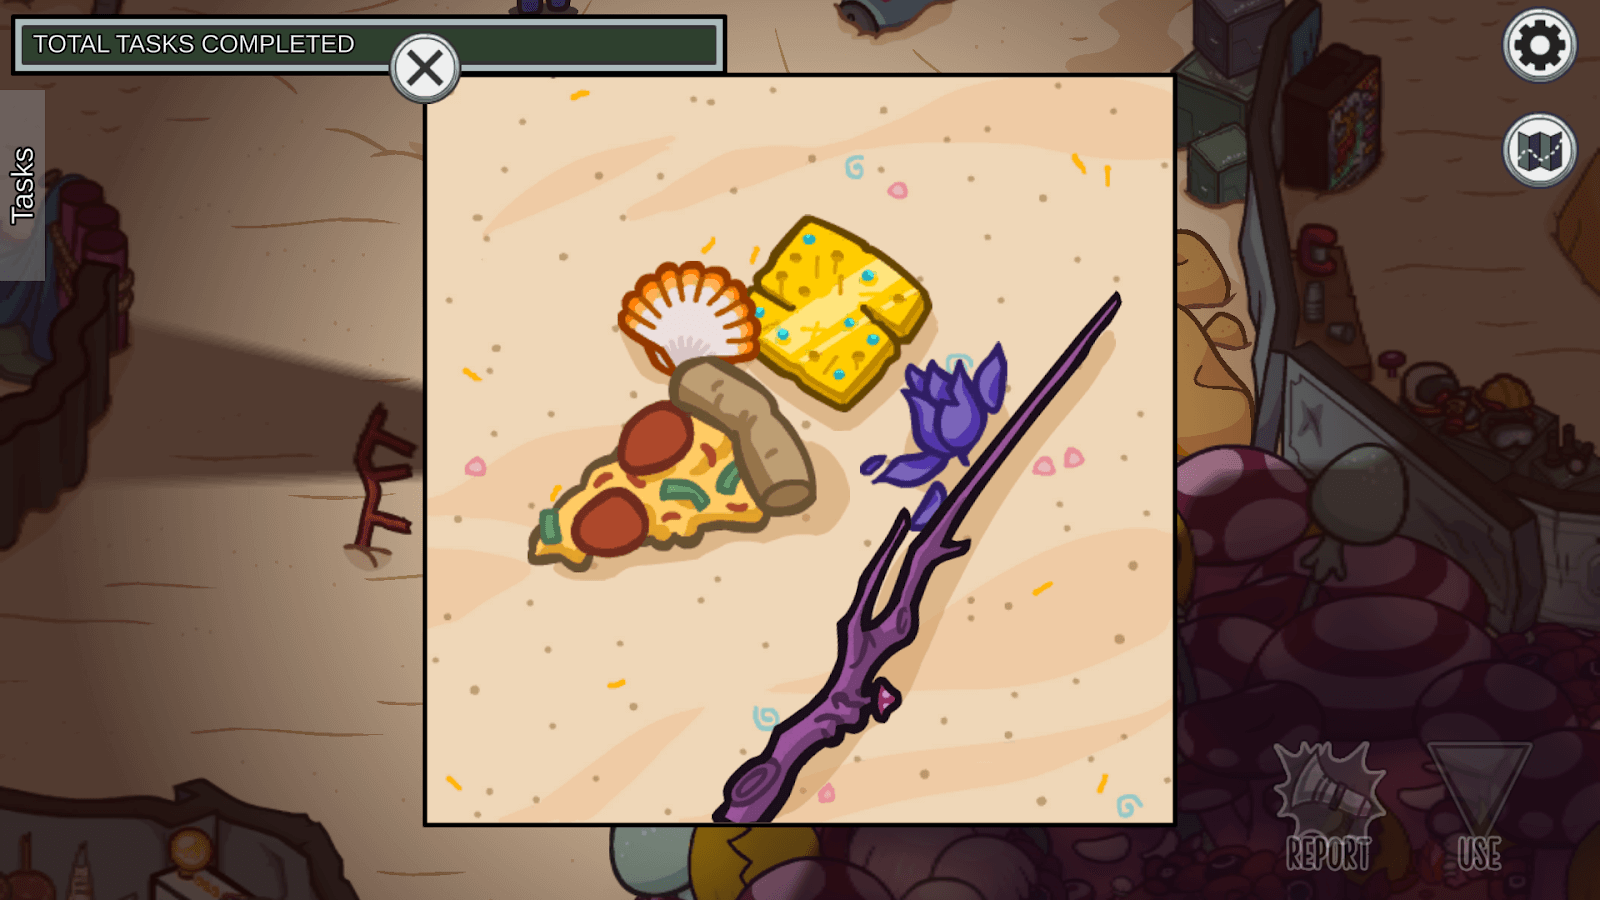
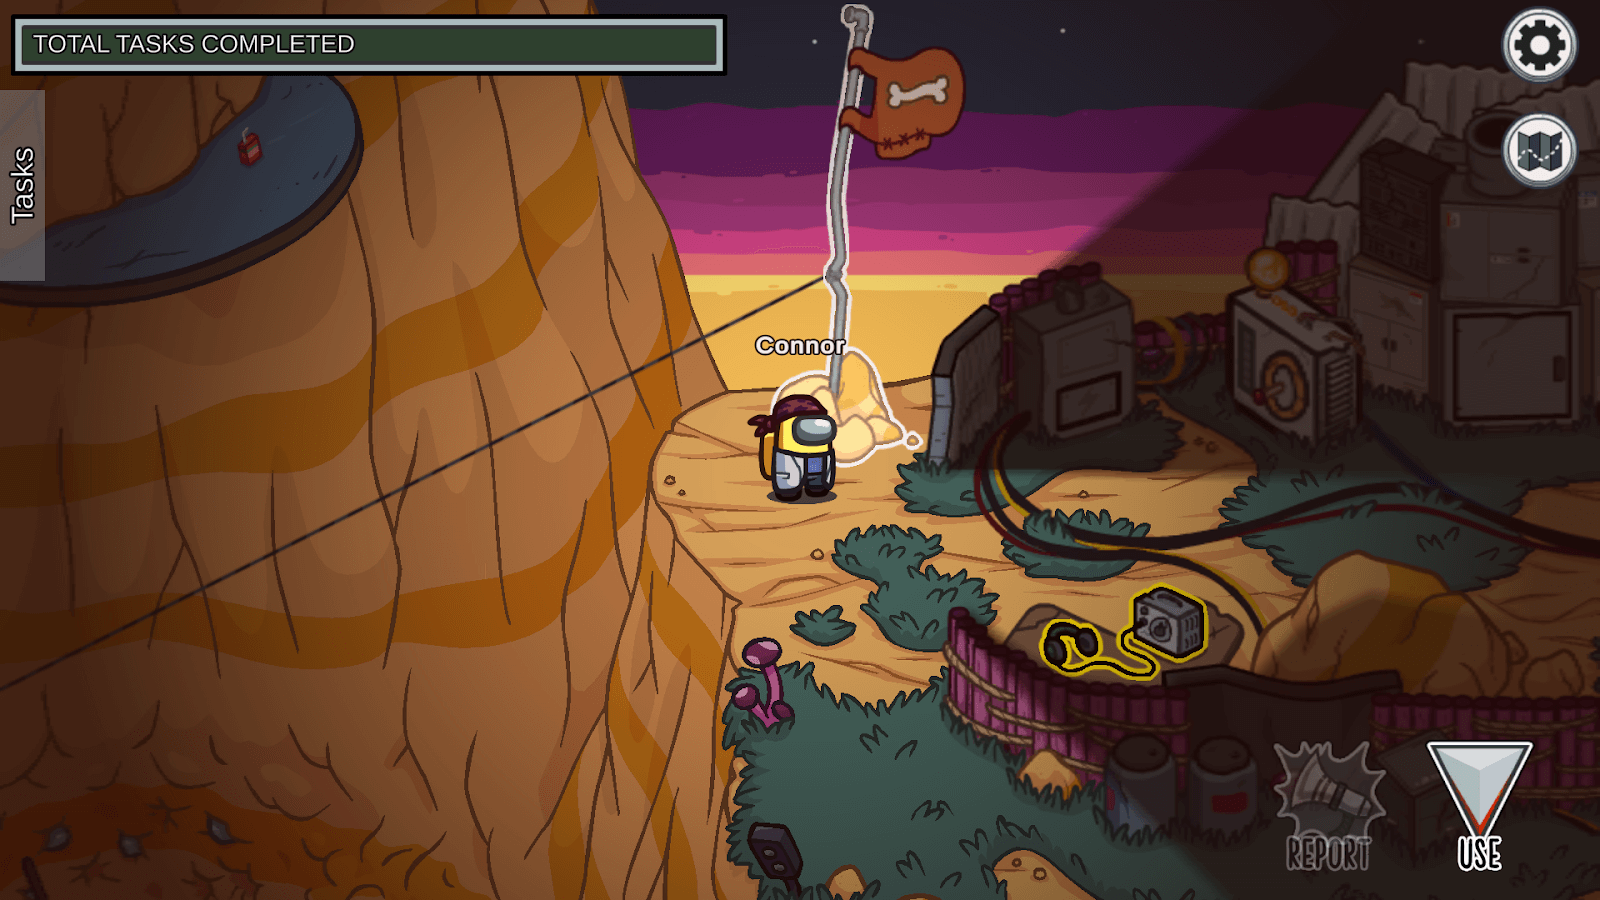
To complete 'Collect Stick', you will have to run towards a pile of sand containing leaves and a twig sticking out. When you open up the task, you will find a stick, a purple flower, a slice of pizza, a seashell, and a sponge on the sand. Click on the stick.
The game will then direct you towards the campfire where you spawned. Completing this part of the task requires you to click one specific marshmallow to put on the stick and then wait a few seconds for it to roast. It may not be immediately obvious the first time, but the correct marshmallow visually stands out from all of the others because it's shaped like a crewmate. During this time, the name of the task will change from 'Collect Stick' to 'Roast Marshmallow'.
Once you put the marshmallow on the stick, it will start to darken. Once it's golden-brown, gold sparkles will start to appear over it. This is your cue to click on the marshmallow and complete the task. Unlike with cooking the fish over at the Dock, you will burn the marshmallow if you wait too long. If this happens, click on the marshmallow and you'll just be brought back to the bag.

Collect Shells is basically the same as 'Collect Stick' in operation. When you arrive at the correct location for the task, you will be greeted with a screen like this containing what looks like multiple items buried underneath some sand. You may notice a patch of sand lighter than the rest of the sand, and this is your signifier that this is where you should dig. To dig, click and hold on the light patch of sand, and then move your mouse around the sand while still holding your click down. In a short amount of time, you should end up clearing all of the sand and uncovering all of the shells.

Storage
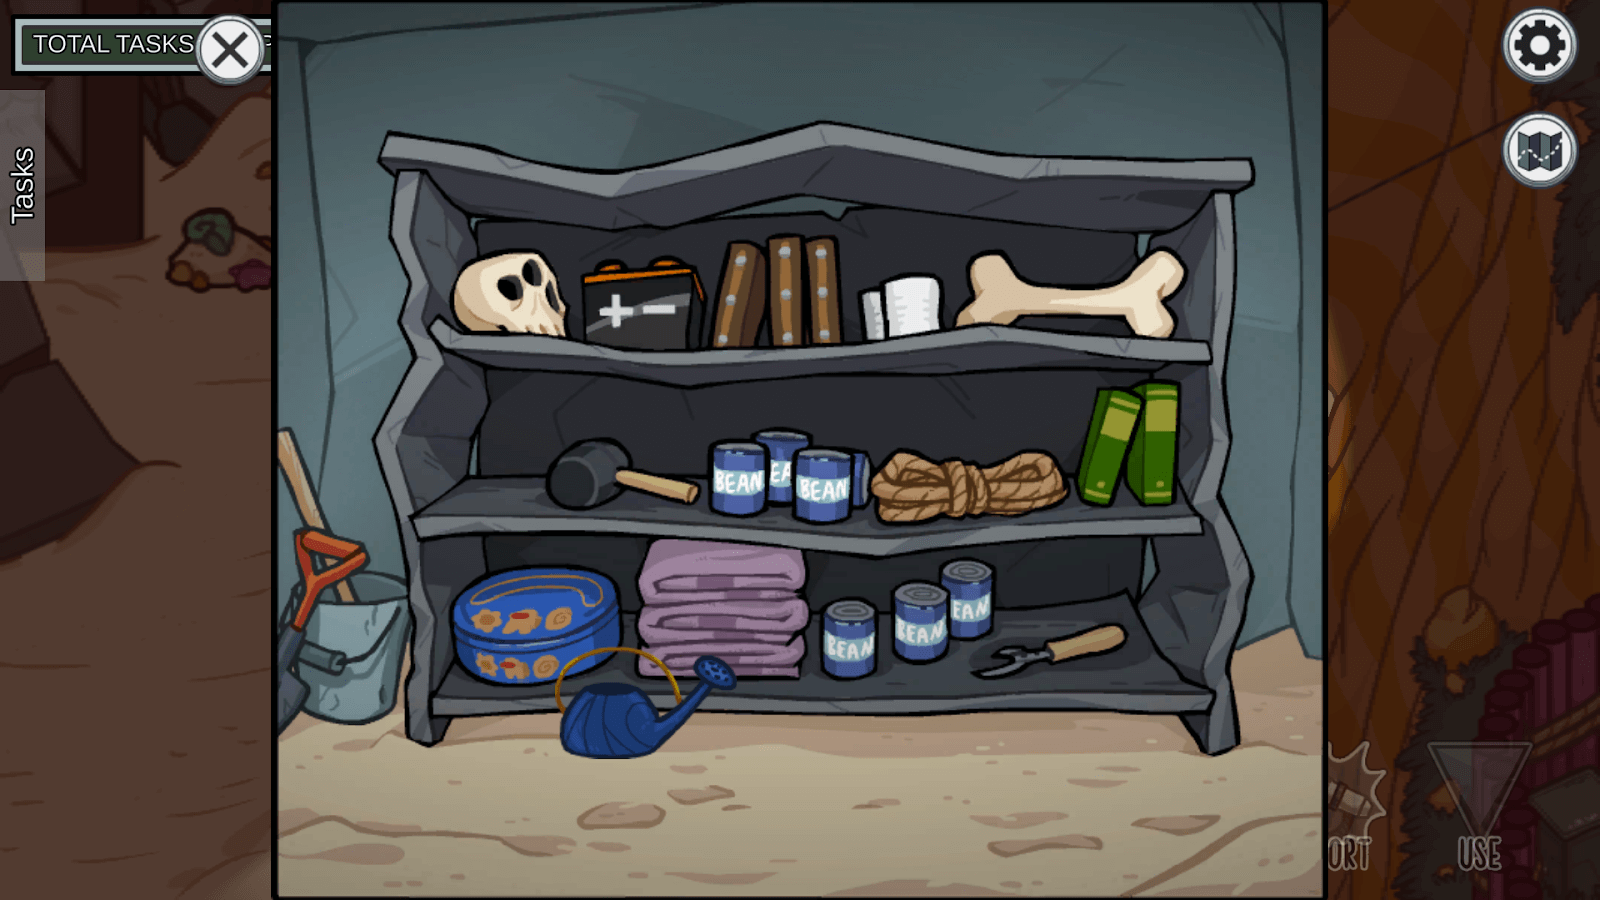
The 'Water Plants' task functions the same as the task on Mira of the same name. Once you reach the glowing watering can, you'll open up a static window of a backdrop with a shelf featuring a bunch of assorted items on it, and a watering can that seems to stand out in visual style compared to everything else. There are multiple different areas in the window where the watering can will spawn. To complete this part of the task, simply click on the watering can and the words "Watering Can Get!" will briefly appear on your screen.
Once you do this, run over to Laboratory where you will find another glowing watering can. This opens up a window of four wilting plants. Simply click on each of the plants to water them and complete the task.

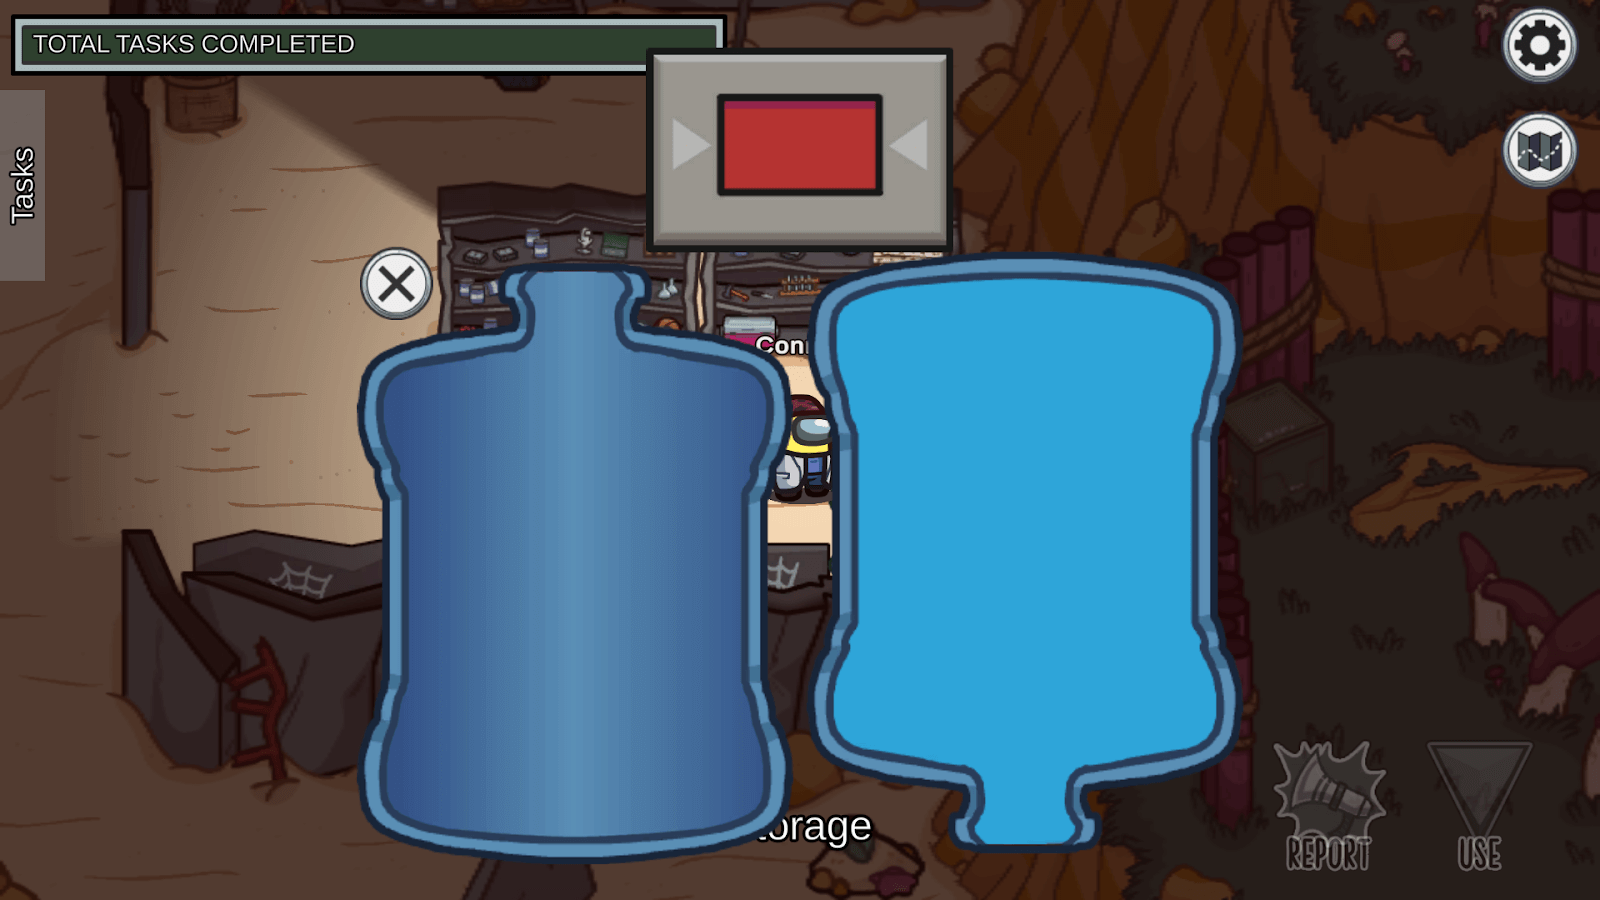
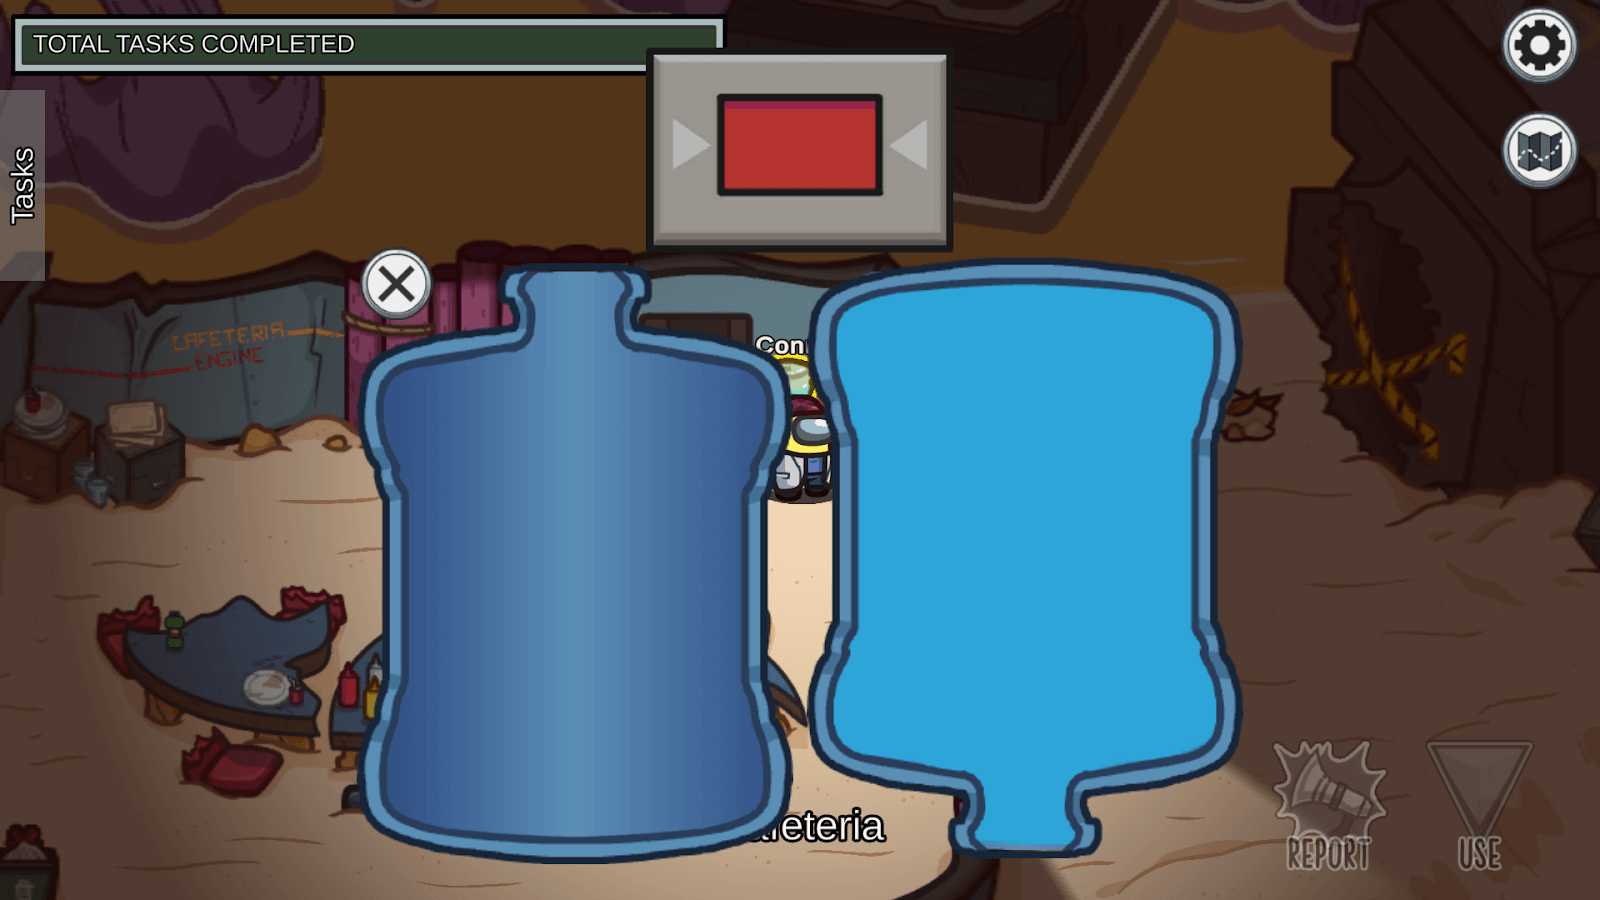
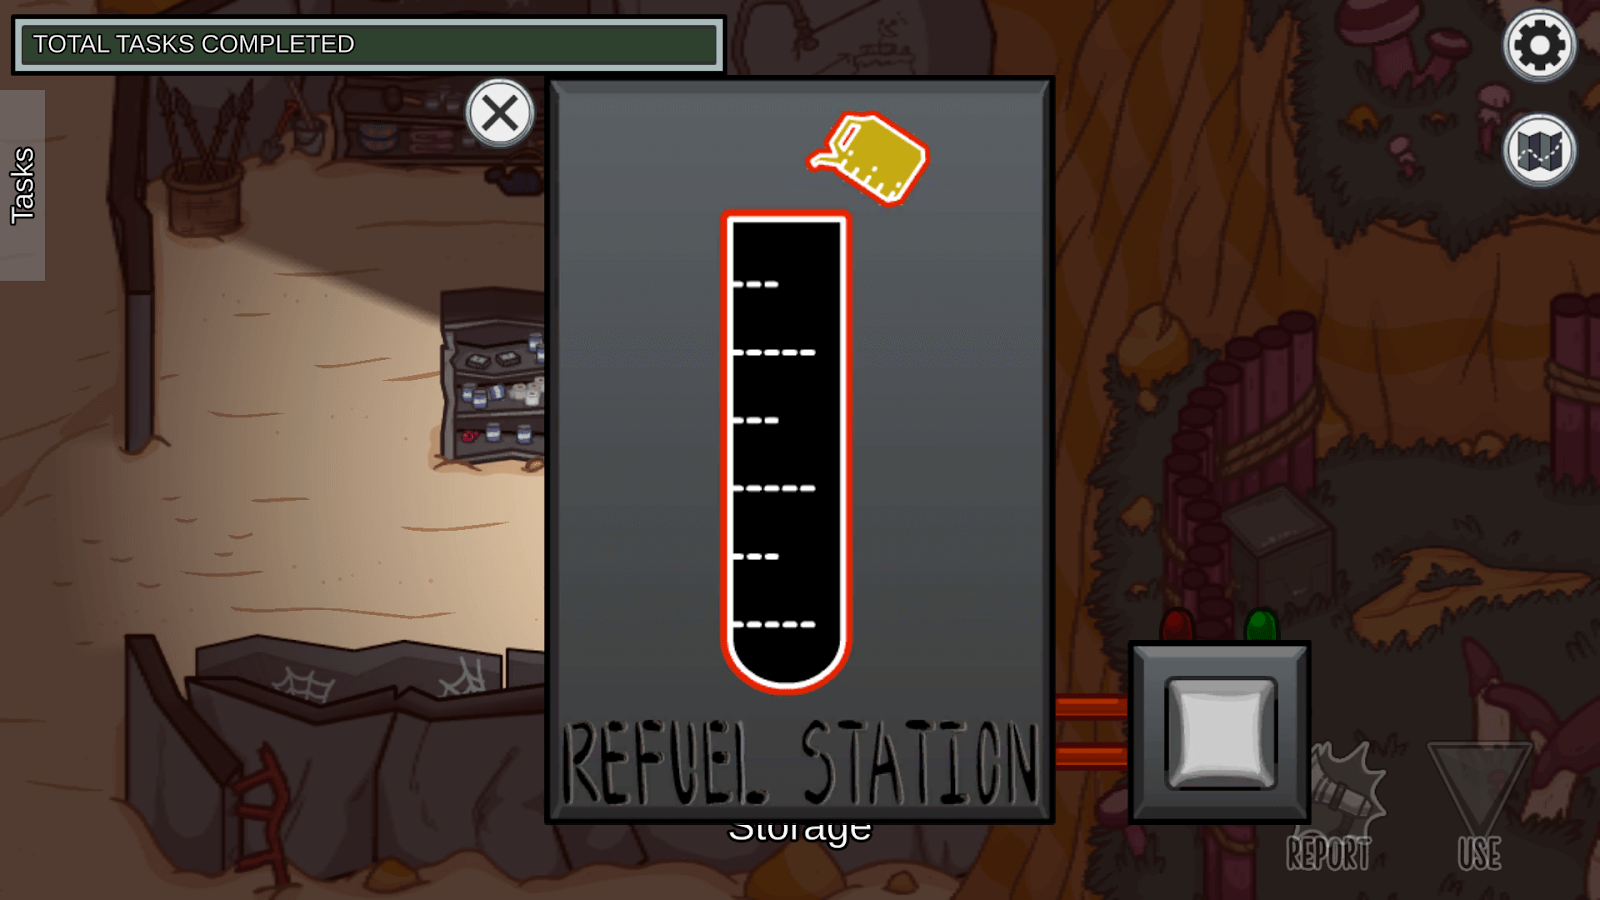
This task is the same as the task of the same name on Polus. It simply features one empty water jug, one full water jug, and a red button. Click and hold on the red button to transfer the water from the full water jug to the empty one.
After this, run to the Cafeteria, where you will simply do the same thing again. After this, the task is complete.
One of the most standout features of the map is the zipline system found in this room. Stand in front of this metal rod sticking out the sand with a rope attached to it and click "Use".

This will transport you up to Communications, which would otherwise require you walk a very considerable distance to reach. You can ride the zipline back down to Storage from here. Taking the zipline across these two rooms will also give you a view of the Mining Pit for a brief period of time, which might allow you to catch some suspicious activity when the Impostor won't expect it.

Emergency Room
The Emergency Room itself doesn't contain any tasks, but walking through this room is the only way to reach The Dorm. In the room proper is a conch shell which functions as this map's emergency button. The Dorm is to the right of the shell. Down from the shell is a pathway that runs to The Jungle. As a result of this, you will likely see players in the Emergency Room relatively often despite the room's lack of tasks.

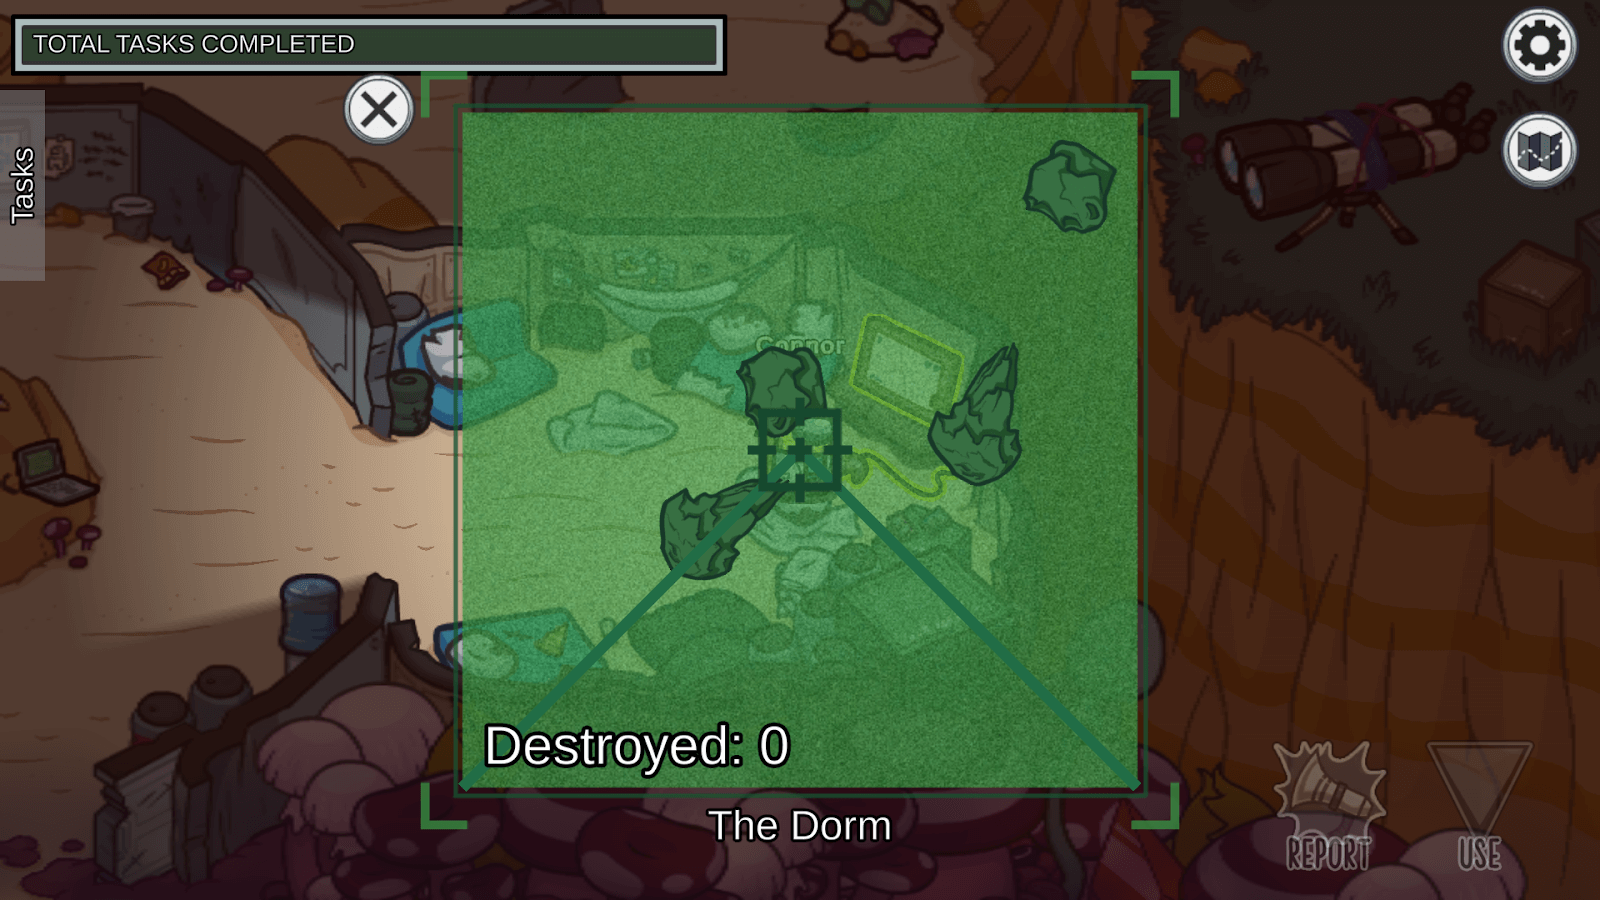
The only task in The Dorm is 'Play Video Game', which is just a renamed variant of the 'Clear Asteroids' task found on Skeld, Mira, and Polus. Click the asteroids as they appear on your screen to destroy them and once you've destroyed 20 of them, you complete the task.
Laboratory
The Laboratory contains two tasks that begin in this area, but chances are, you'll be coming here quite a bit since every task that begins outside in the Jungle will take you here.
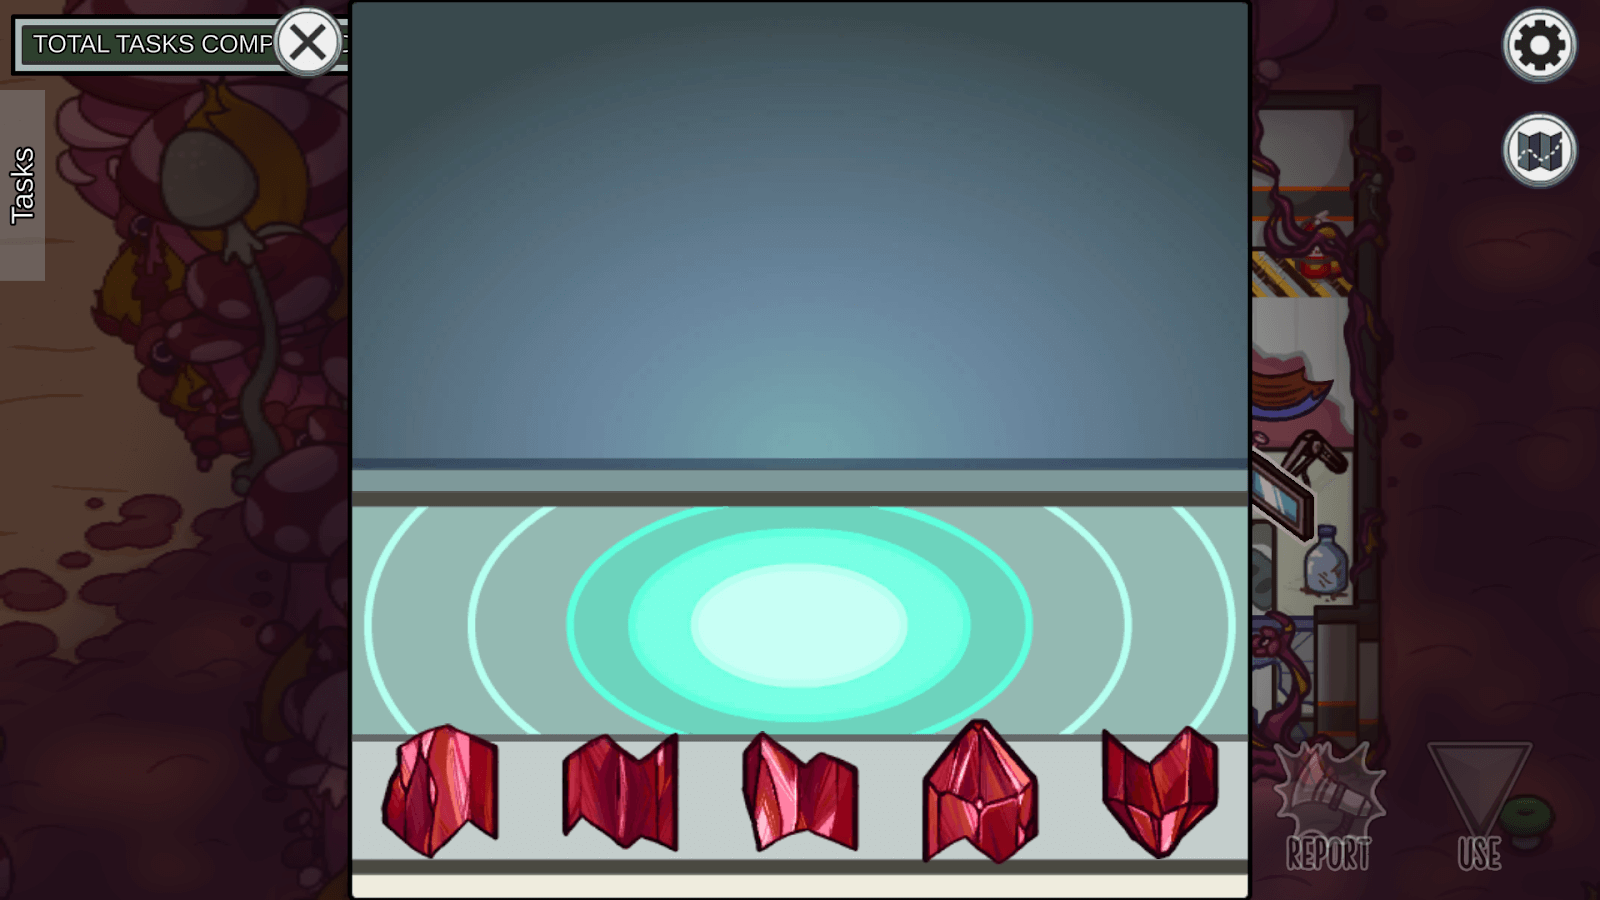
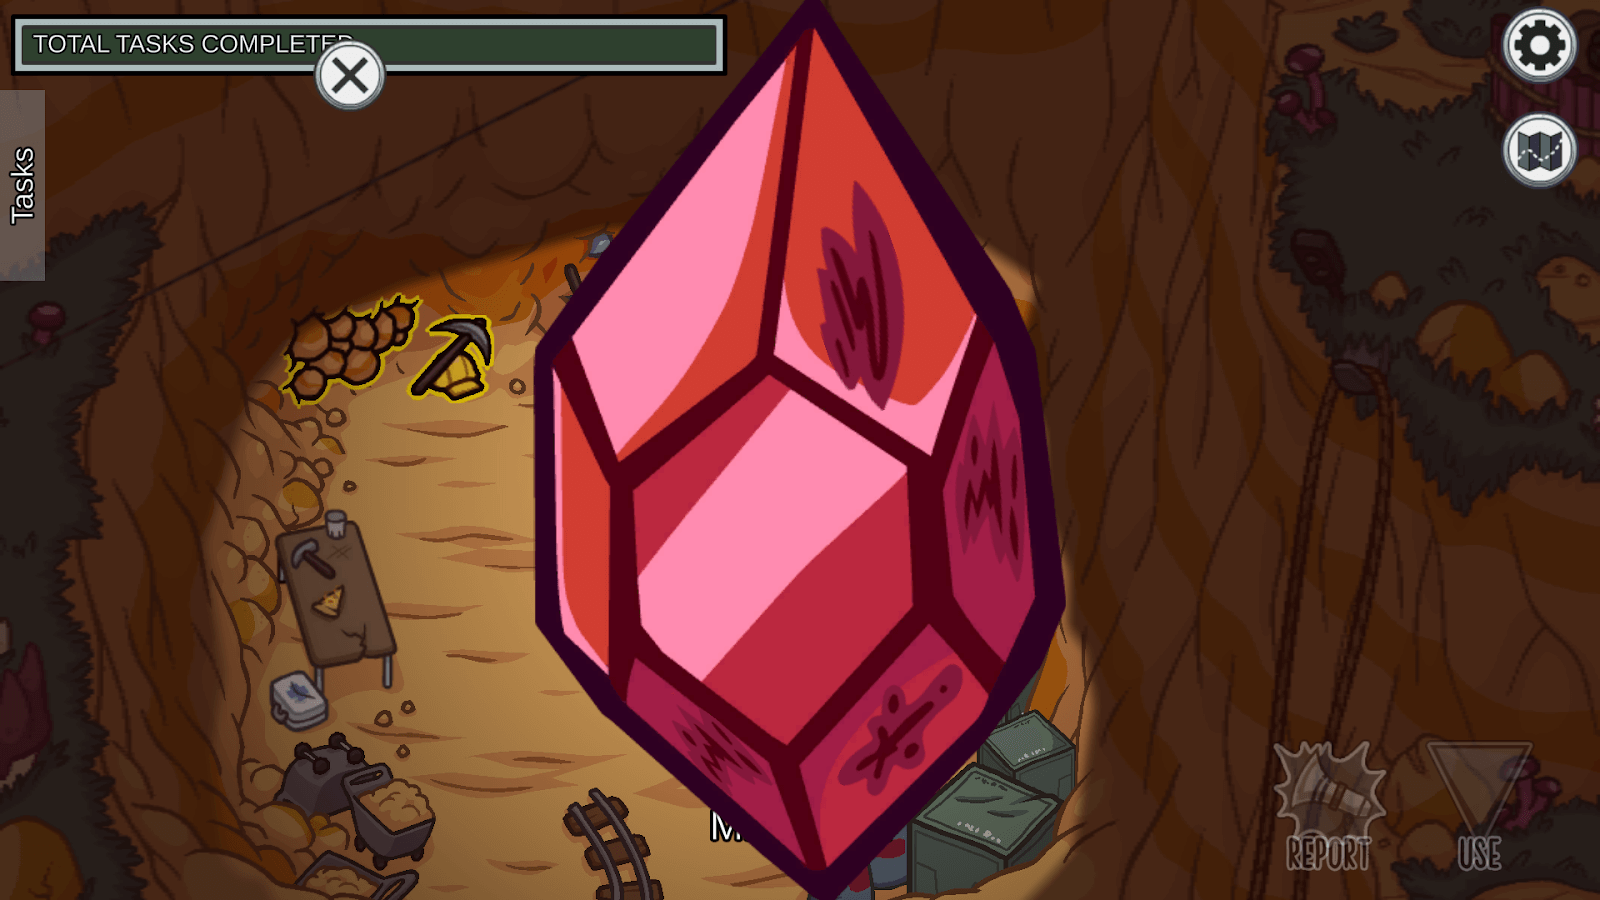
'Assemble Artifact' functions the same way as the task on Mira of the same name. The only difference is the crystal on this map is red instead of purple, but otherwise, the task is exactly the same right down to the shape of the shards. Start with the shard on the bottom and pay attention to the way the shards are cut to stack all five pieces on top of each other in the correct location to complete the task.
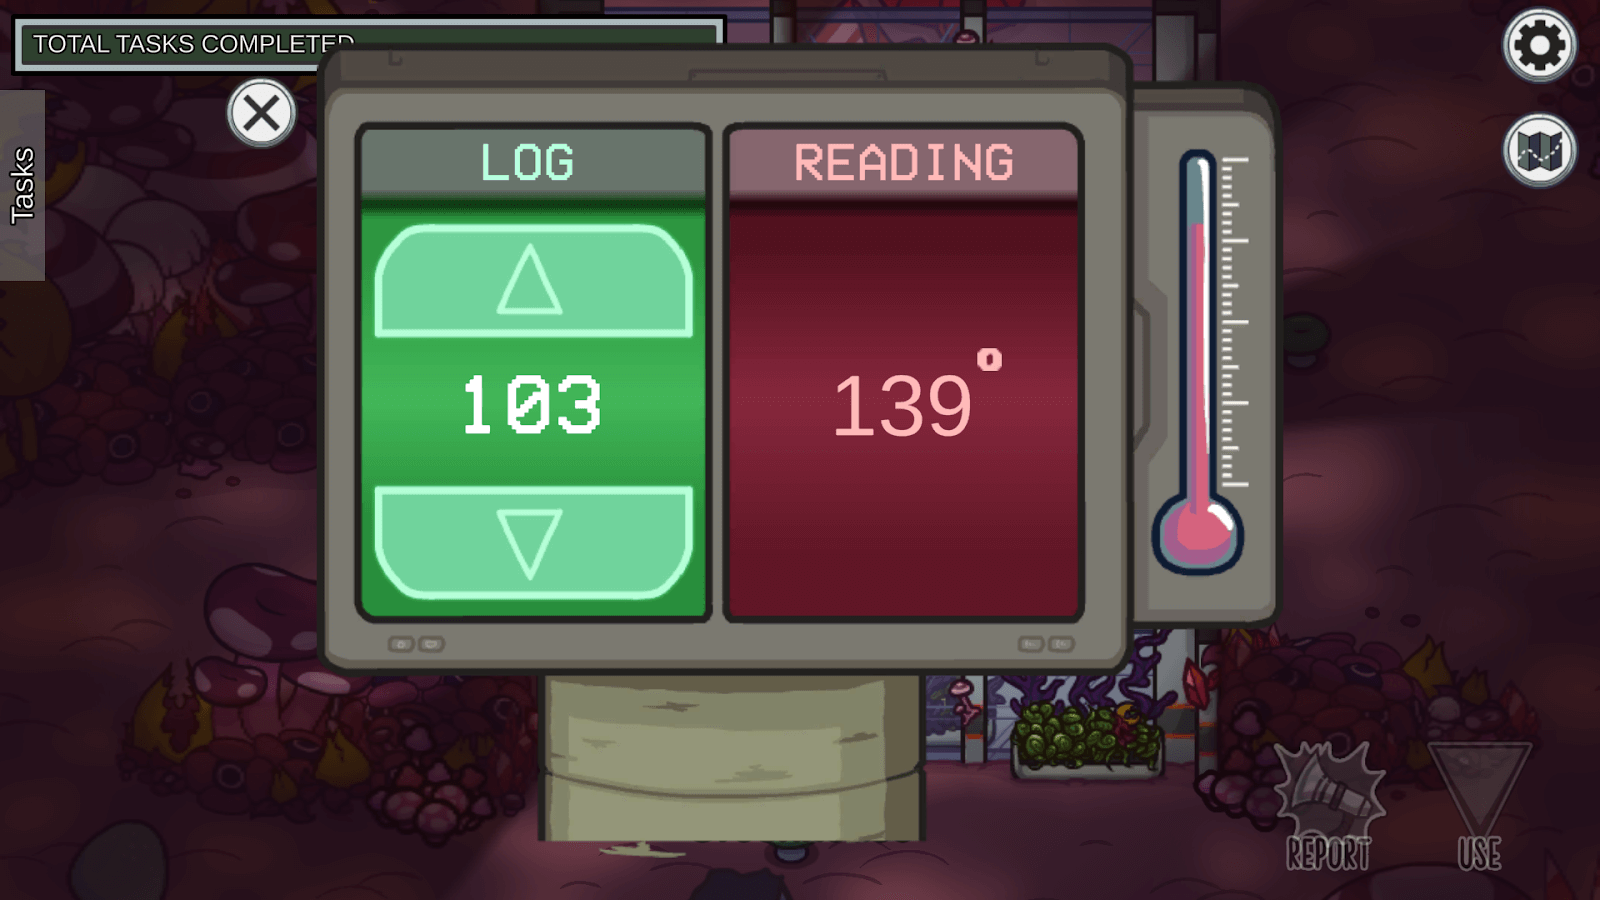
'Record Temperature' is the same as the task of the same name on Polus, and in fact both variations appear here as well. On this task, you'll have a "Log" number and a "Reading" number. Click the up or down arrows (in the Laboratory, the Log number will always start higher than the Reading number) next to the Log number until it matches the Reading number to complete the task. This task puts you in very close proximity to a vent and the task window will cover the vent.

Jungle
'Help Critter' requires you to find a specific pile of leaves (the game can choose one of three that all look the same). When you click on a leaf, you will remove it. You will need to remove the leaves to uncover an egg hidden beneath them. If you look closely, you may spot where the egg is before removing any leaves. This part of the task is cleared as soon as you uncover the egg and click on it. You do not need to remove all of the leaves.
For the second part of the task, you will find a tiny home for your "critter" to reside in. Click on the open hole to place the egg inside. After 30 seconds, the egg will hatch and the critter will then ask for either food or water. Click on the appropriate food or water areas to give the critter food and water. Once it's given both, the task will be complete.

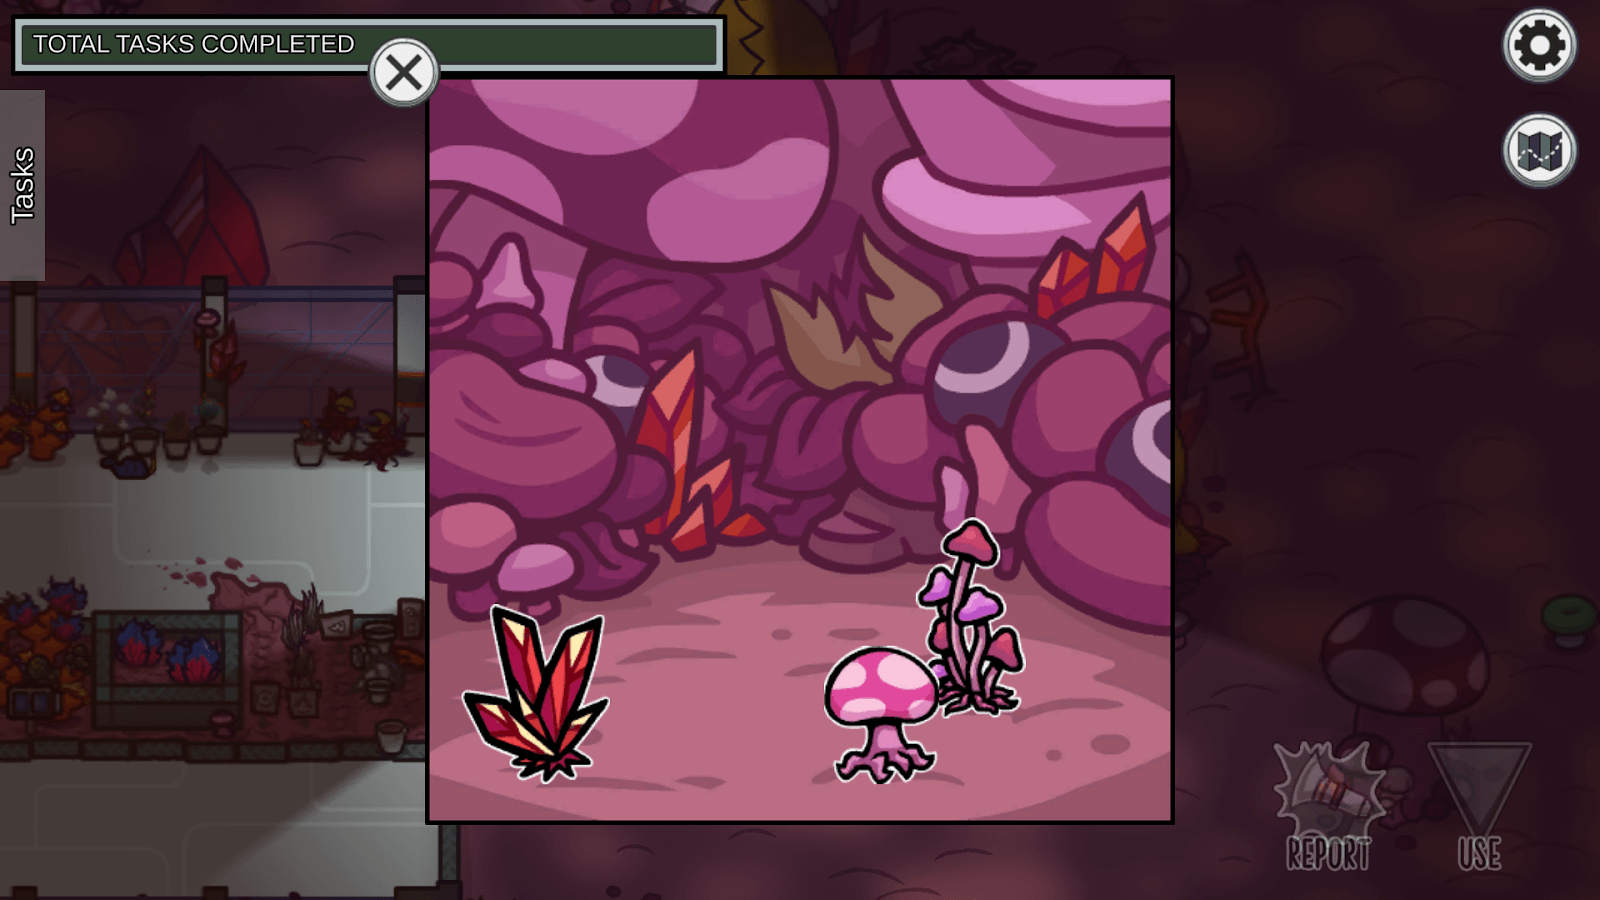
'Collect Samples' will require you to find one of several randomly chosen piles of mushrooms, just like the 'Help Critter' task. This will give you two mushroom plants and one crystal. Click on each of them to make them disappear.
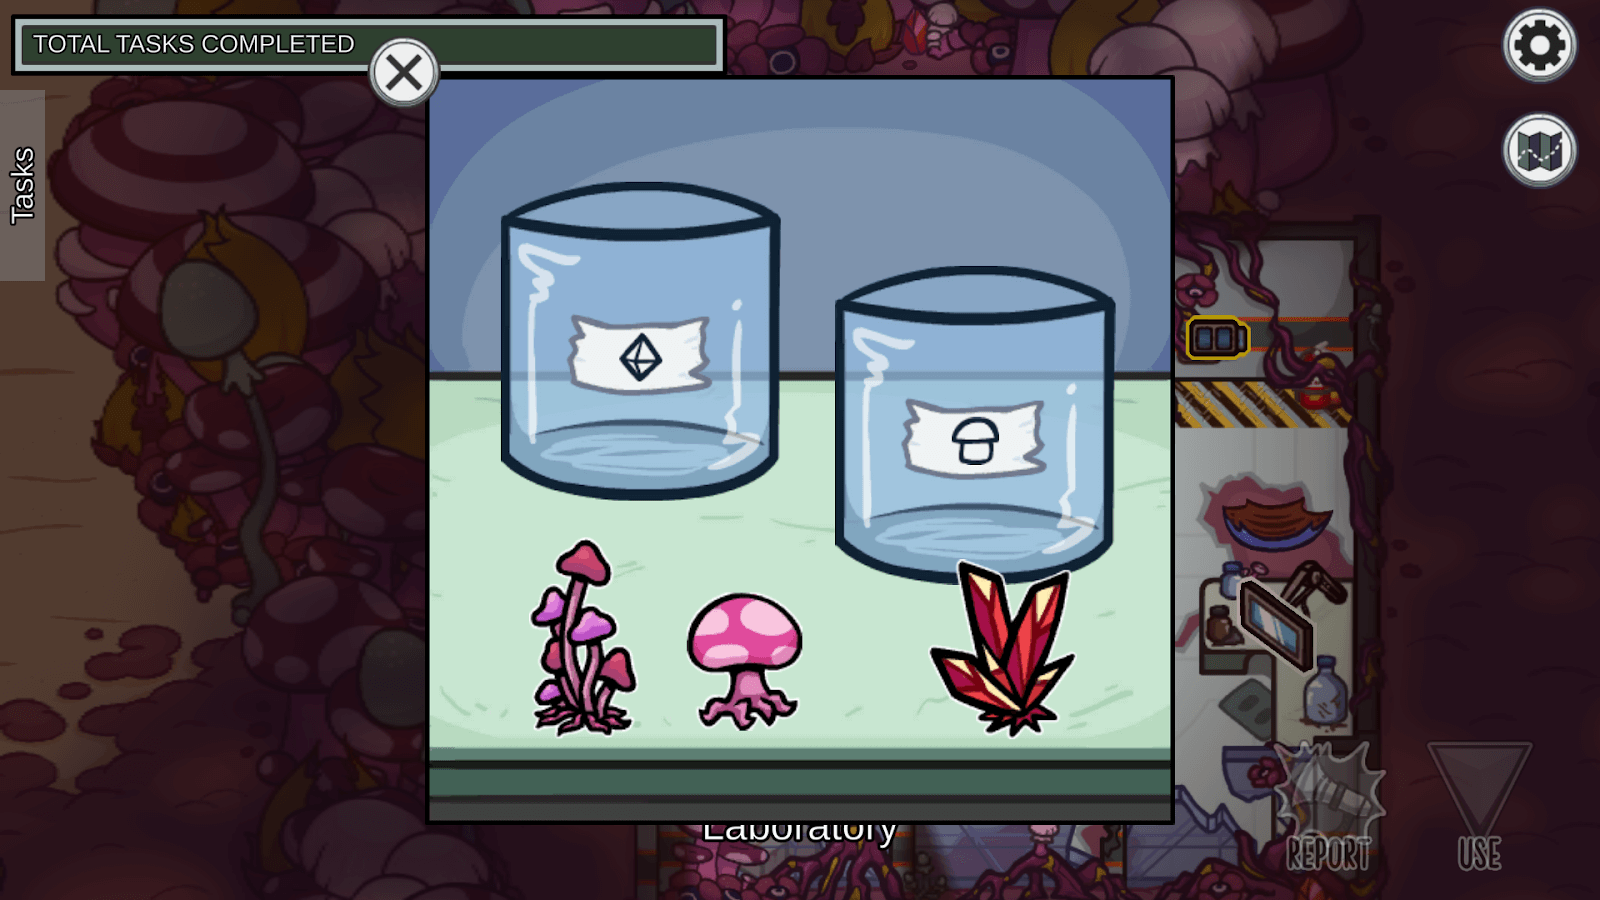
Once you do this, run back to the Laboratory to the two tiny glass jars. One will be labeled with a crystal and the other with a mushroom. Click and drag the samples over to the appropriate jar to complete the task.
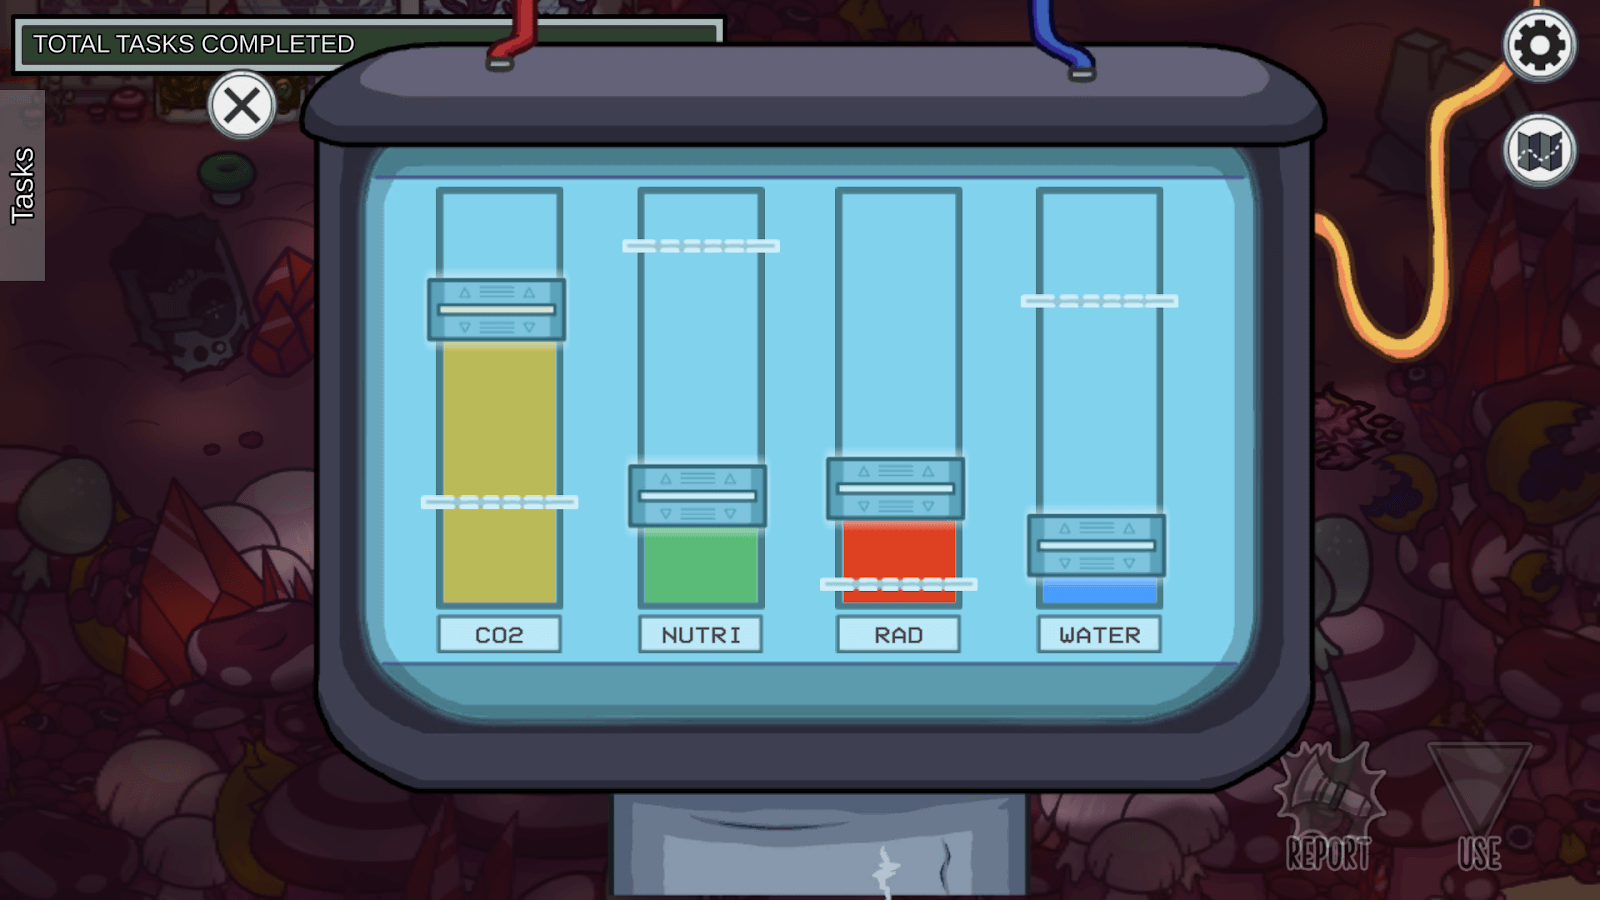
'Monitor Mushroom' is exactly the same as the 'Monitor Tree' task on Polus. You will find four gauges and a slider on each of them. Drag each slider over to the horizontal white line on each of the gauges to complete the task.
'Hoist Supplies' takes place at a giant container of crystals next to one of the ladders that leads to the middle cliff. To complete this first step, click and drag on the rope to move it until the crystals reach the top of the cliff.

After this, climb up the ladder to take you to the middle cliff. Next to the ladder that takes you to the upper cliff is where the next part of the task is and you just simply do the exact same thing again. After this, the task will be completed.

Greenhouse
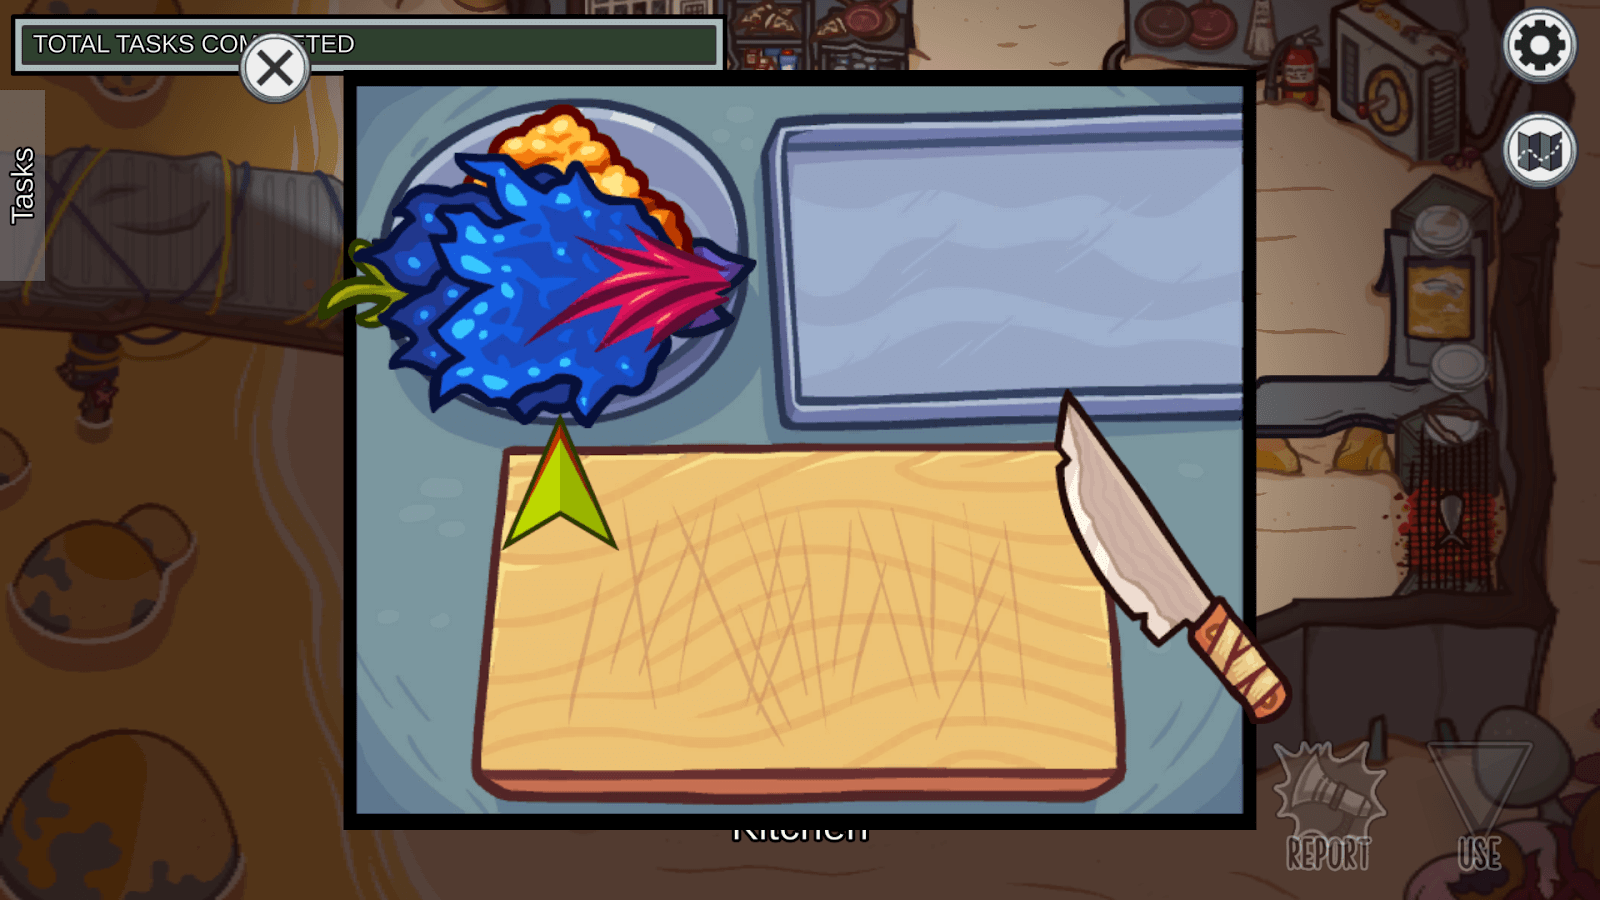
On the top half of the Greenhouse is 'Collect Vegetables', which requires you to grab three vegetables growing out of an orange plant. This is achieved by clicking on one of the vegetables and holding the click until you pull them out. Repeat this process for the other two vegetables.

After this, run to the Kitchen. The area of this task is located on the chopping board on the left side of the room. Click on a vegetable to place it on the chopping board and then click on the vegetable twice more to chop it up into three pieces. Repeat this process for the other vegetables and you've completed your task.
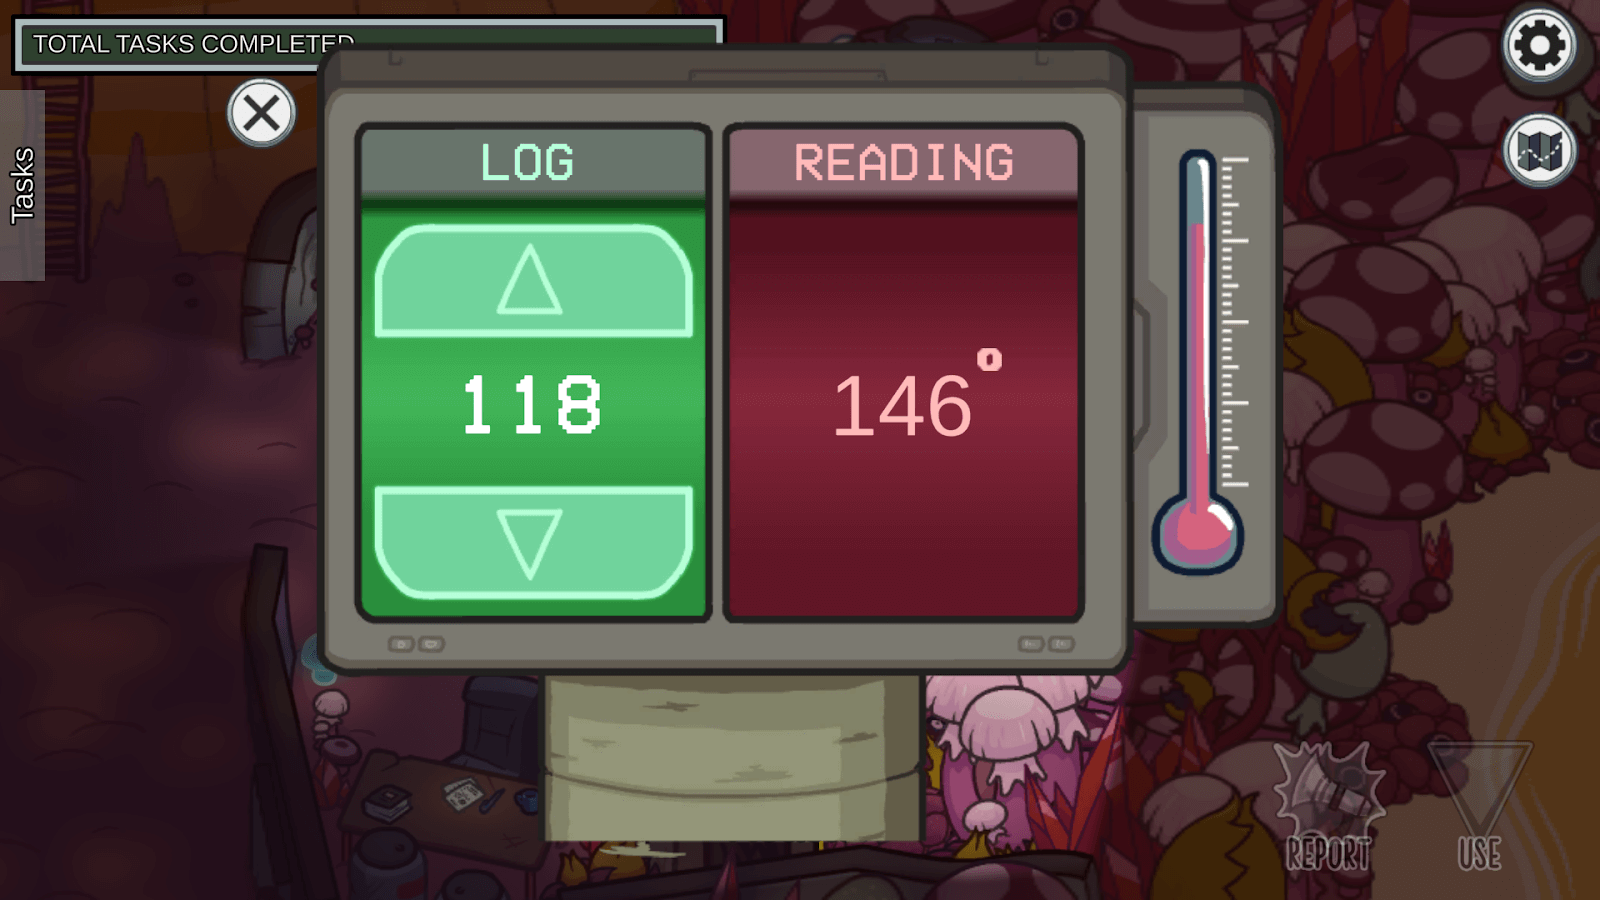
On the bottom half is another 'Record Temperature', this time the opposite of the version featured in Laboratory where your temperature goal is higher than the starting temperature instead of lower.
Reactor
Reactor contains yet another 'Record Temperature' task. This one is exactly the same as the one in the Greenhouse except that the numbers will be slightly different.
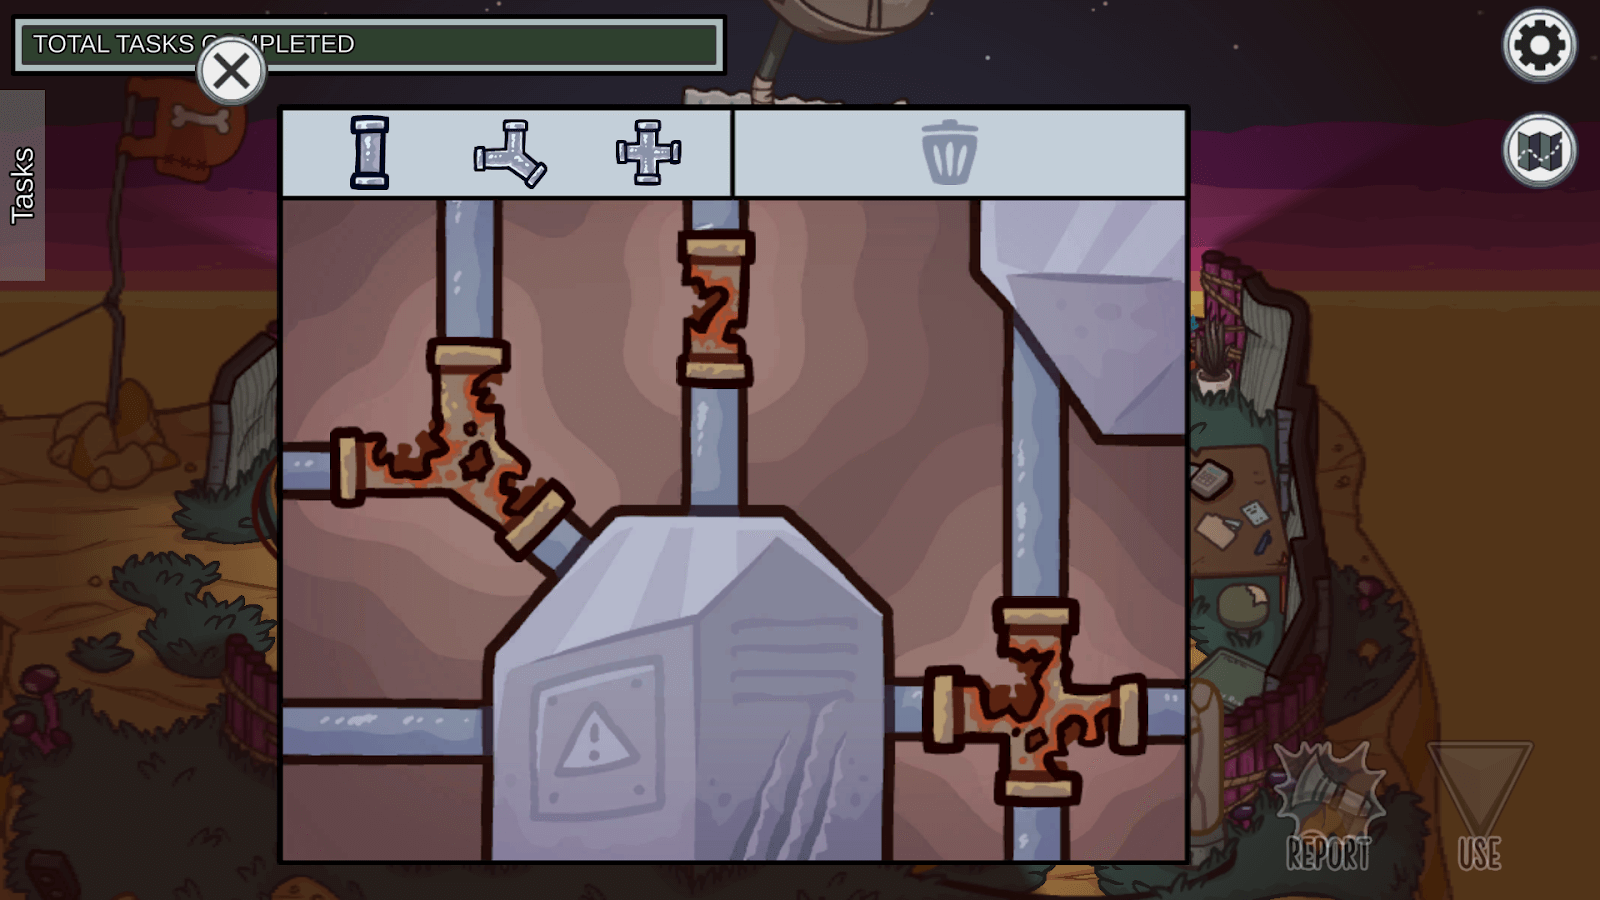
Reactor contains the first part of 'Collect Parts'. Head on over to what looks like a box at the bottom of the room, and the task window will reveal a blue toolbox. Click on this toolbox to open it and reveal three pipes. Click on each of the pipes to grab them.

Climb all the way up to the panel door in the center of the machine in Communications to open up this window. Your goal here is to replace the rusty pipes with the new pipes of the same shape. The way you replace the pipes though isn't immediately obvious. You need to drag each of the rusty pipes over to the trashcan icon in the top-right to remove them and then drag the new pipes over to the same position that the rusty pipes were originally in to replace them.
Lookout
Lookout only contains one possible task, but is an extremely useful room for spying on other players.
Lookout only contains one possible task, but is an extremely useful room for spying on other players. Its only task is 'Enter ID Code'. This is the same as the task of the same name in Mira and The Airship. Click on the ID card in your wallet to pull the card out to read the numbers and then click on the numbers in the correct order. When you enter the code, click on the checkmark to confirm your code to complete the task. You can reset the code by clicking on the X.
It is possible to read the code without taking the card out. In theory, this is faster, but is also more prone to making mistakes with numbers like 0 and 8.

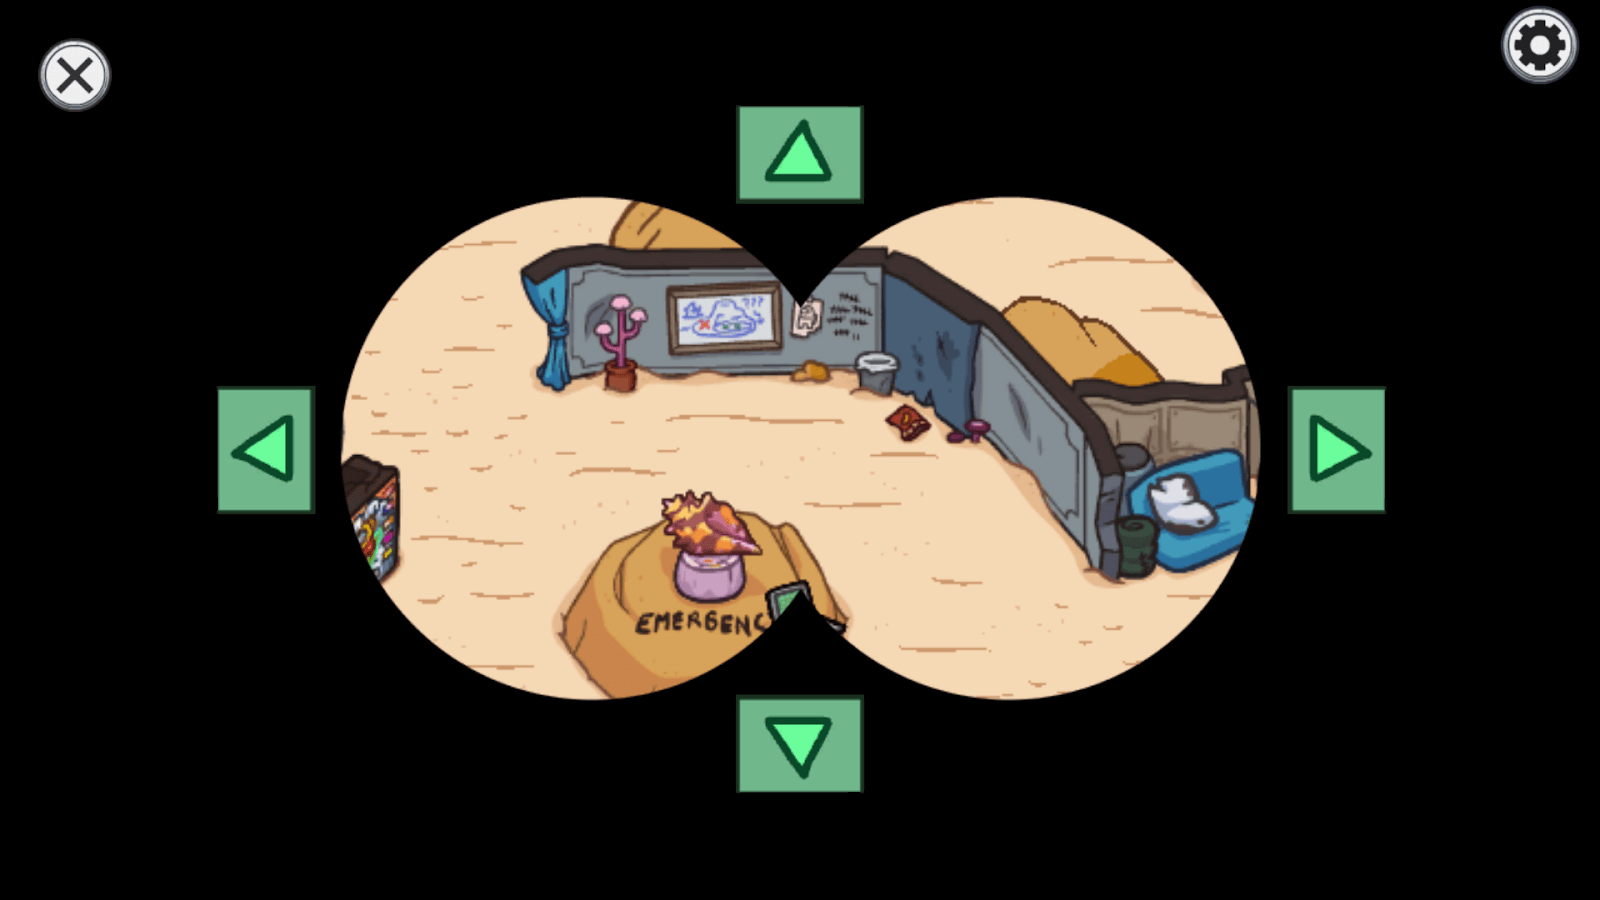
This map doesn't contain the same conventional Security system as seen on Skeld, Polus, and The Airship. Instead, Security is done by a telescope system which you move freely by yourself (the game gives you green arrows to click on, but using your movement keys will allow you to change directions much more fluidly).
This makes spying on other crewmates harder than in other maps since you can only focus on one location at a time and how quickly you can move to another one depends entirely on the time it takes to reach there. The big advantage of this system though is that it allows you to look absolutely anywhere on the map except for the middle and high cliffs on the right side of the map. As an Impostor, you may not ever be so sure if you're safe since anyone could by spying on you regardless of where you are.
Upper Engine
The only task in Upper Engine is 'Extract Fuel', which is found on every map, although it slightly differs depending on the map and on every other map, the task is called 'Fuel Engines'. Click the gray button in the bottom right to fill the jerry can with fuel.
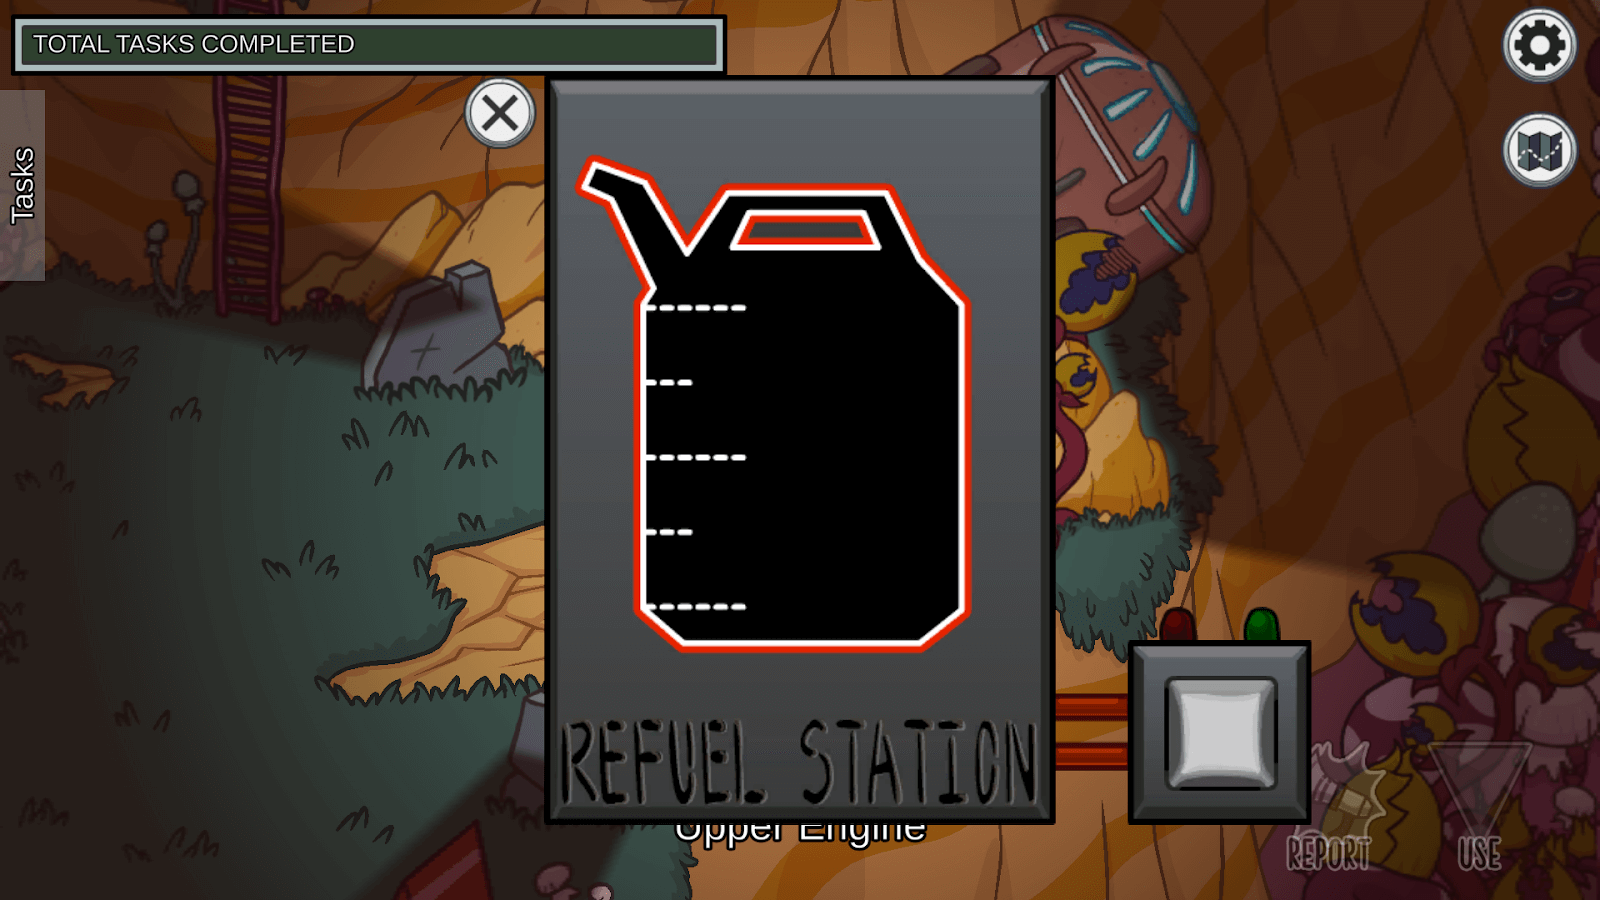
After this, go to the bottom-right part of Storage (hint: Use the zipline in Communications). Repeat the same process here to complete the task.
Mining Pit
On the top-left of the room is "Mine Ores" which will bring up a series of rocks to mine. This task might seem a bit confusing at first, but the goal of the task is to mine all of the artifacts out from underneath the rocks. This is achieved by clicking and holding anywhere on the rocks, and this causes a pickaxe and a quick-moving gauge to spawn. Ideally, you want to hold your click until the gauge reaches green and then let go. The closer it is to green, the more rocks you will clear with one pick swing. You do not need to remove all of the rocks as long as you mine out all of the artifacts first.

On the top-right is 'Polish Gem' which functions the same as the task of the same name on The Airship. Simply click and hold over the dirty parts of the gem to clean it, and the task will be completed once you've cleaned the gem completely.
Communications
Communications contains a whopping four tasks that start in this room. The one closest to the zipline is the most iconic task in the game, 'Fix Wiring'. Complete this task by dragging each wire on the left to the same colored wire on the right.
Here, I managed to receive the legendary "all straight wires" on my first try.
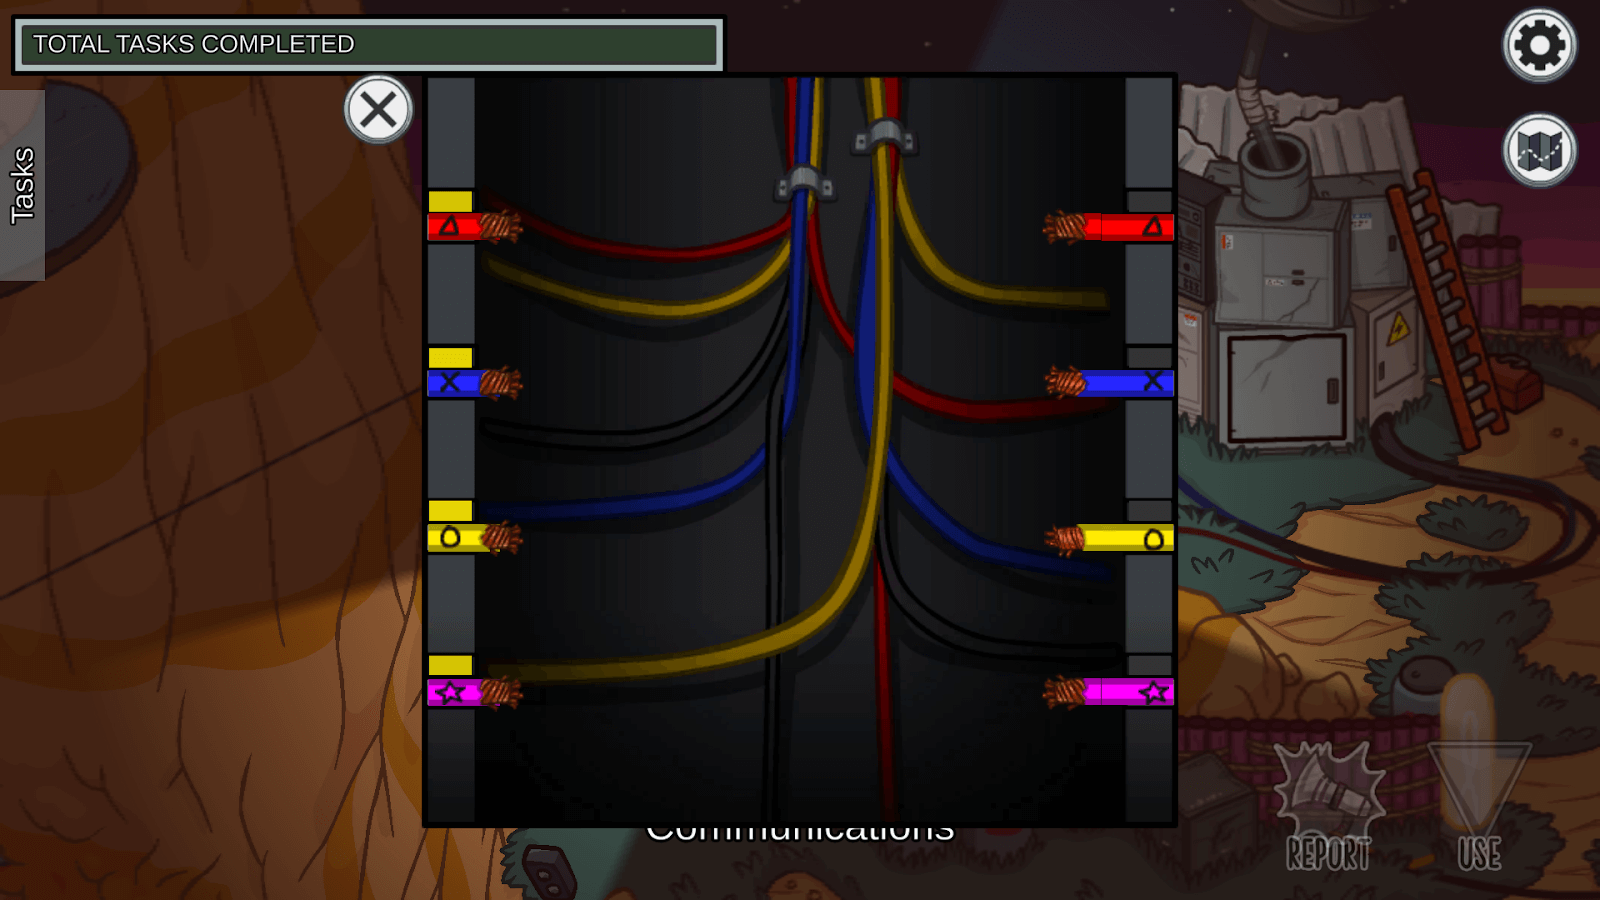
Now for you to actually SEE the task.
'Find Signal' functions exactly the same as fixing the Comms sabotage on Skeld, Polus, and The Airship. Click and rotate the gray dial on the bottom-right until the wavelength patterns on the right match the wavelength patterns on the left. The margin of error is quite small, so you may have to rotate slowly until you find the right spot.

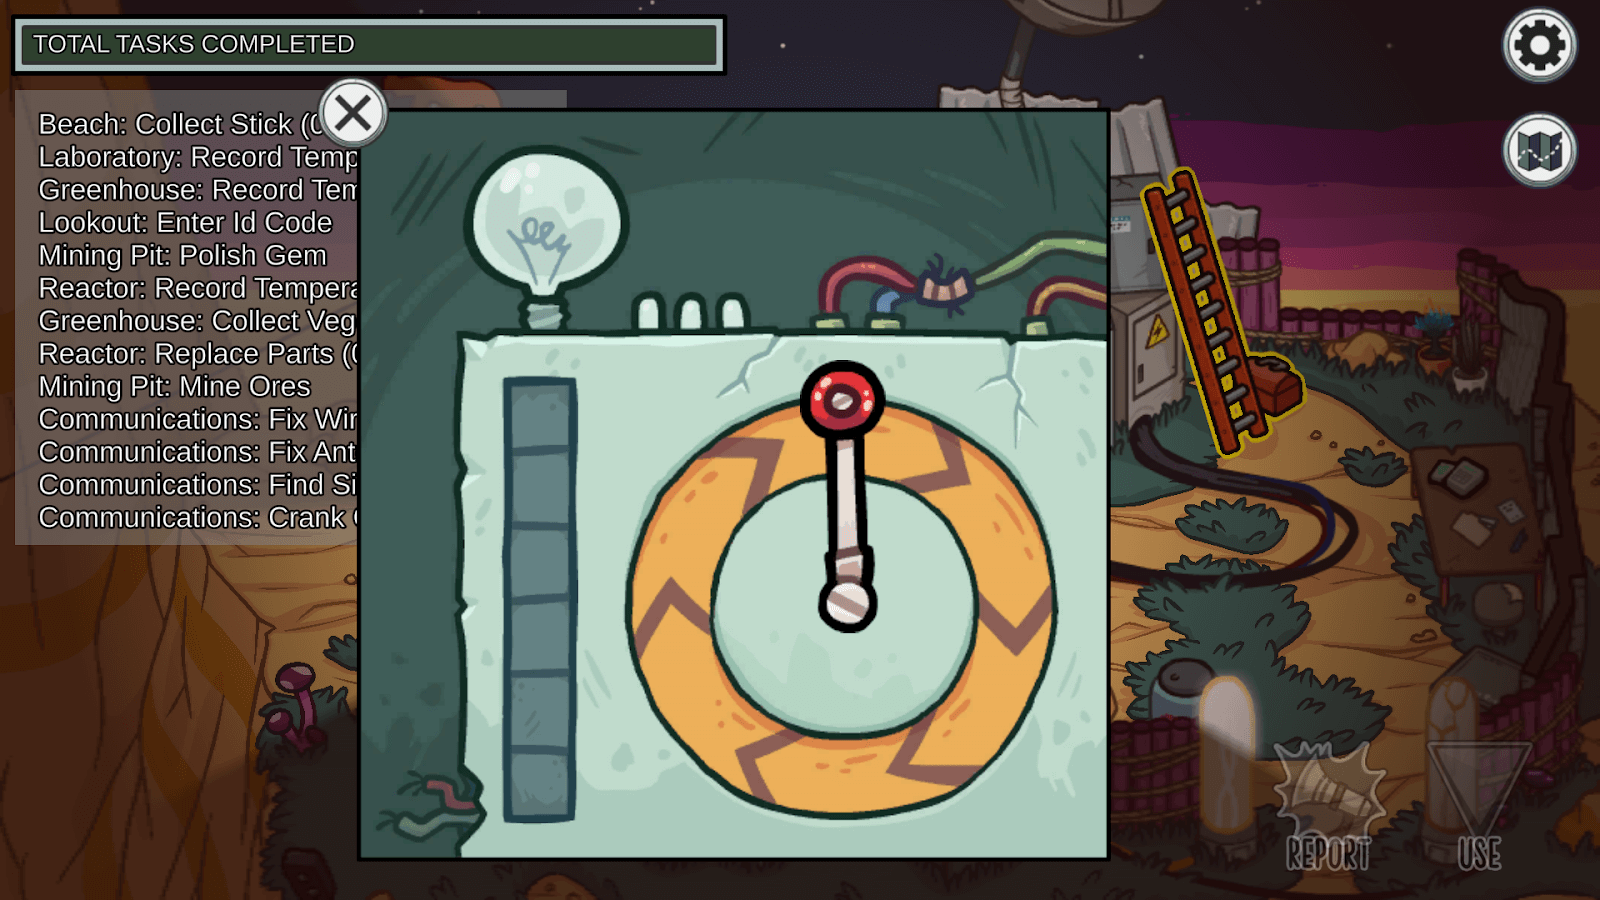
'Crank Generator' is a fairly straight-forward task. Click and hold on the red switch and move it around in a clockwise direction (in other words, follow the arrows) until the bar on the left fills up. If you stop rotating it at any point, the bar will start to empty.
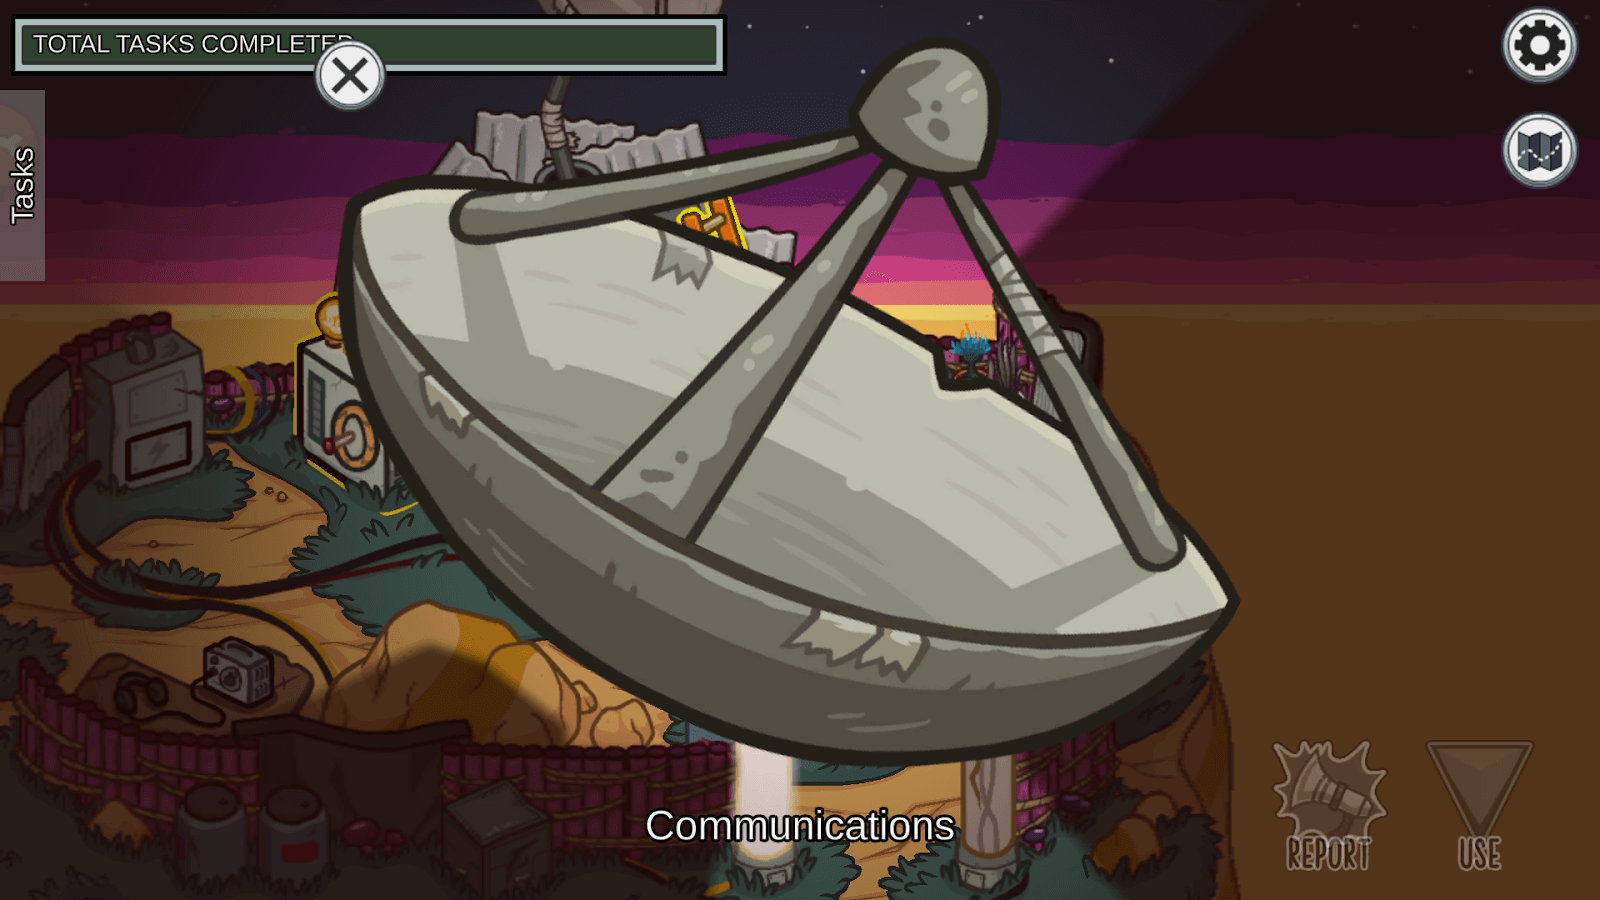
'Fix Antenna' is basically a visual reskin of the 'Fix Shower' task on The Airship. Click and hold anywhere on the satellite dish which will cause a hammer to appear and a gauge to start filling up. Once you release your click, you will move the satellite dish in the direction of the hammer strike. The intensity of this will vary depending on how full the gauge was when you released the click. The task completes once you've centered the satellite dish.
Additionally, you can also take the zipline from Communications down to Storage.
As An Impostor
Sabotages
You have four distinct Sabotage types available on this map.
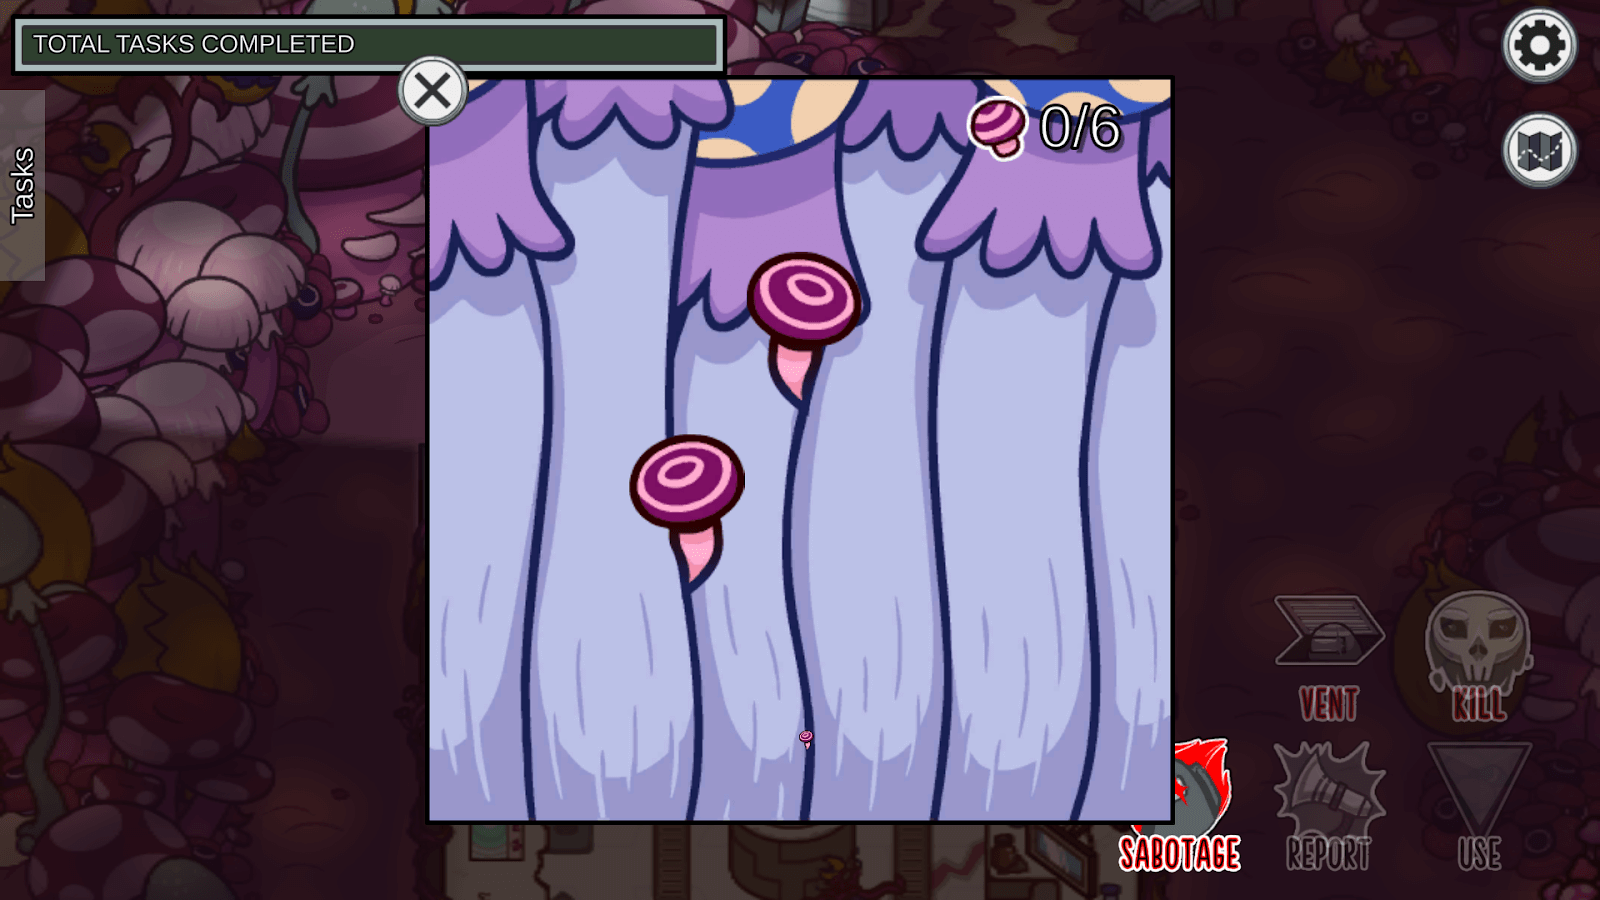
Doors are fairly self-explanatory since they appear on every map except Mira, but the way to fix them is very unique compared to other maps. Doors take on the form of mushroom walls and the way to get rid of them is by clicking on tiny mushrooms that appear and disappear intermittently on the wall. Once you click on 6 mushrooms, the wall will sink back into the ground.
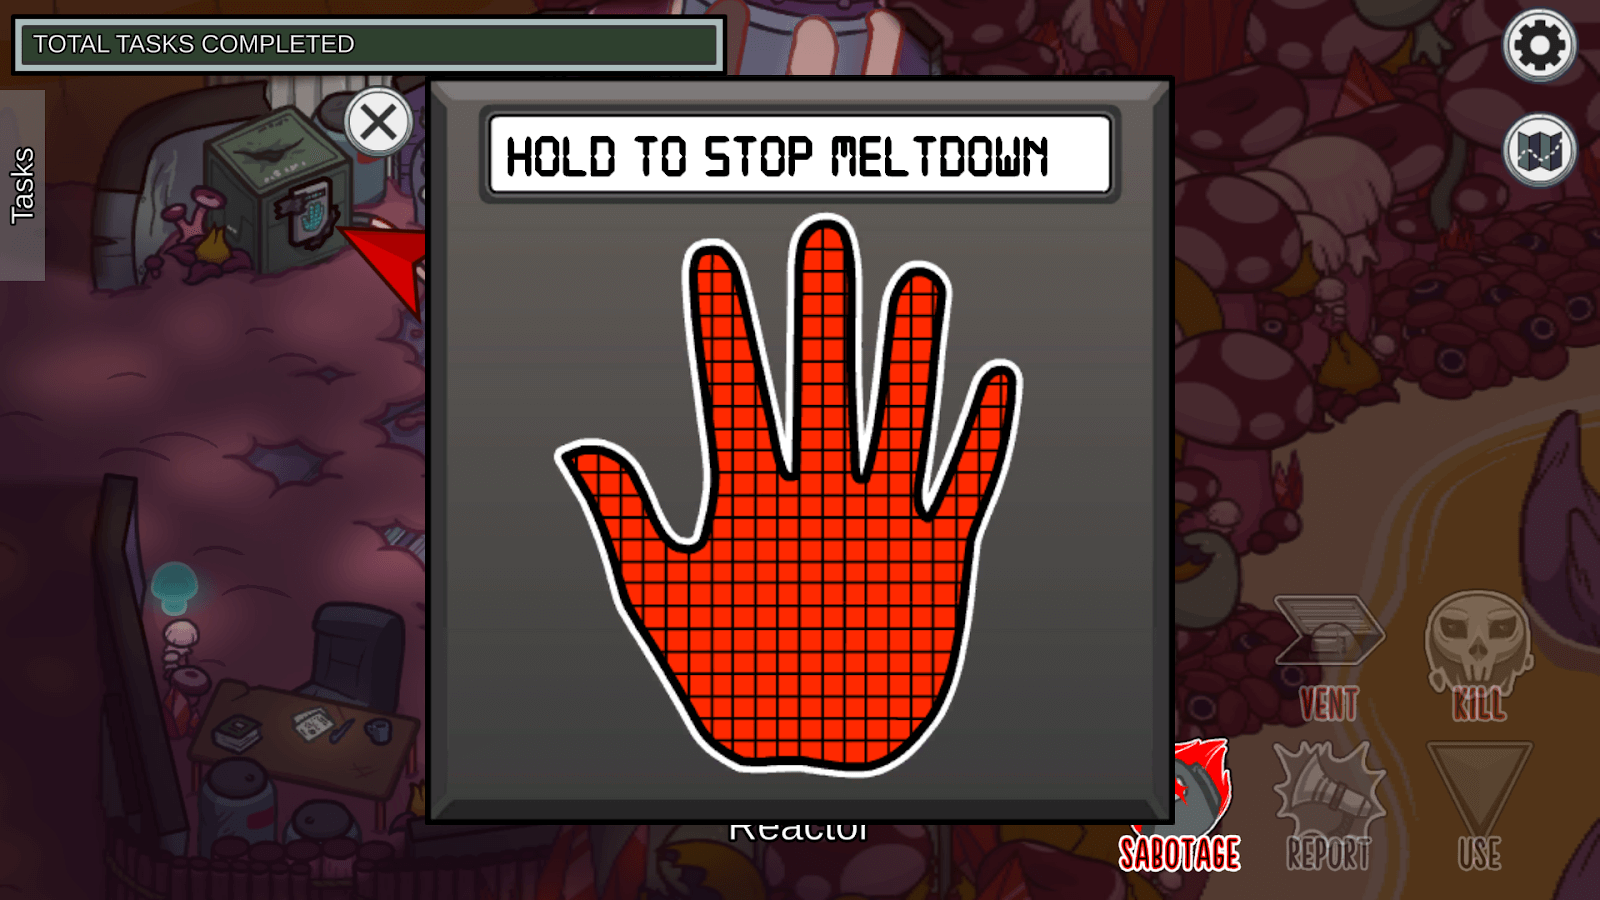
The Reactor Sabotage is exactly like it is on all of the other maps. There are two areas in the Reactor room for crewmates to hold clicks over the hand icon. They will need to hold their click continuously until both areas have been scanned by a player meaning that at least two people will be required to fix this. Players are given 60 seconds to fix this.
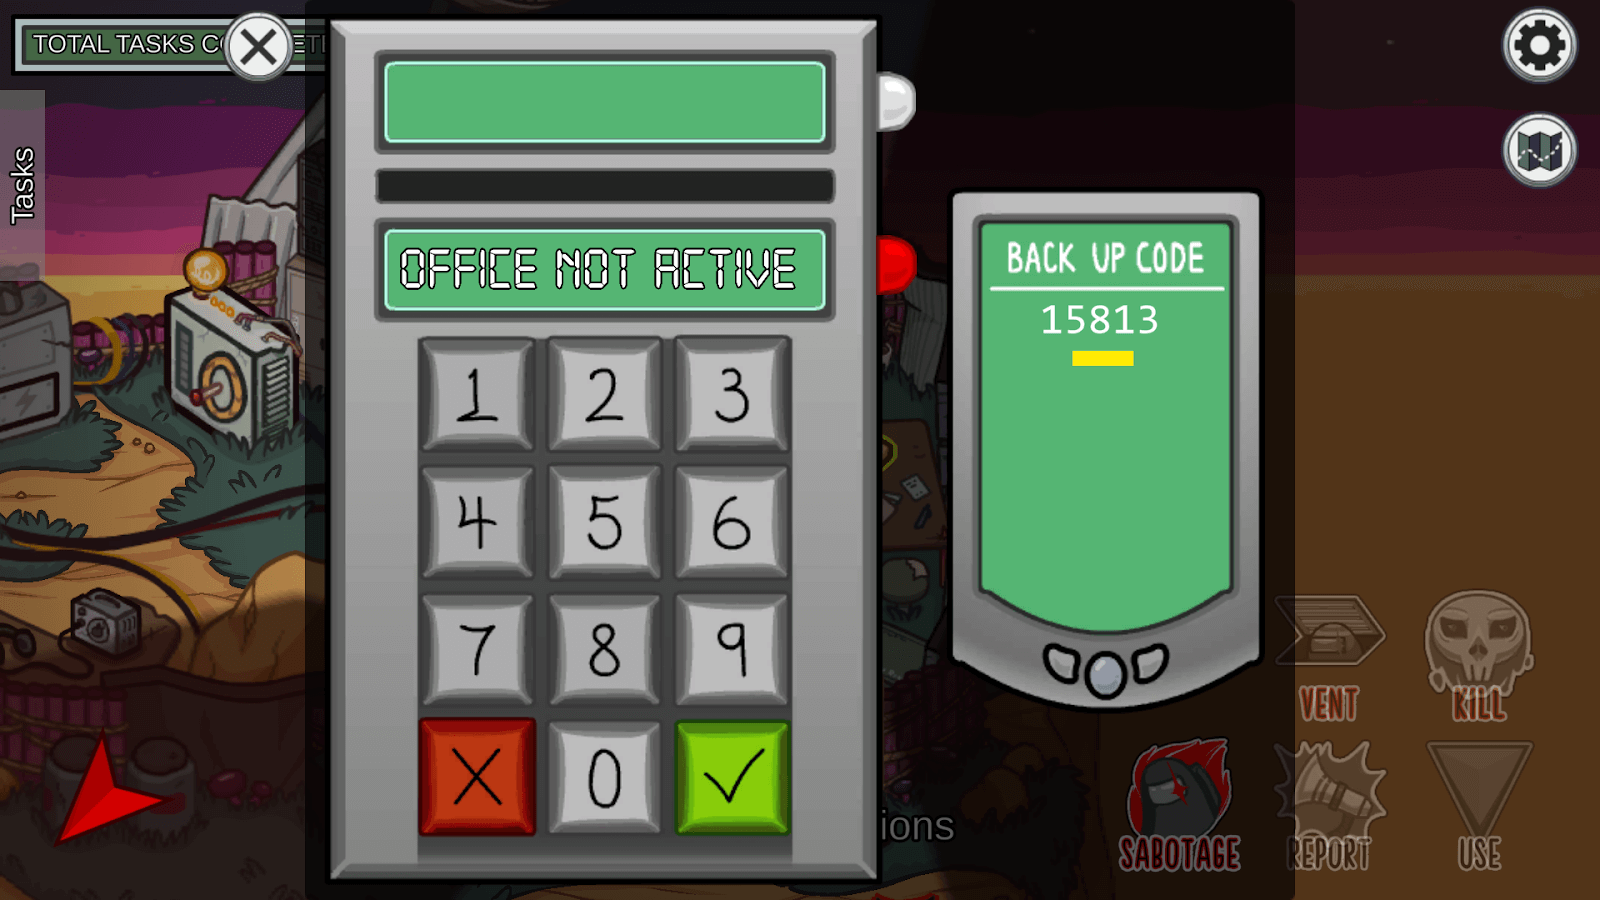
The Comms sabotage functions the same way as the Comms sabotage on The Airship. There are two keypads with codes to input: One in Communications and one in Lookout. The game tells you the code to input and a bar that slowly fills down. Both areas will need to have codes inputted before the bar runs out or the codes will change. While this sabotage is active, players will not be able to see what tasks they have left or the yellow exclamation marks on the map notifying where they are.
This will require two crewmates to complete in most situations, but it is possible for an Engineer to input both codes in each station in the time limit by themselves by using the vent to quickly transport to the other room.
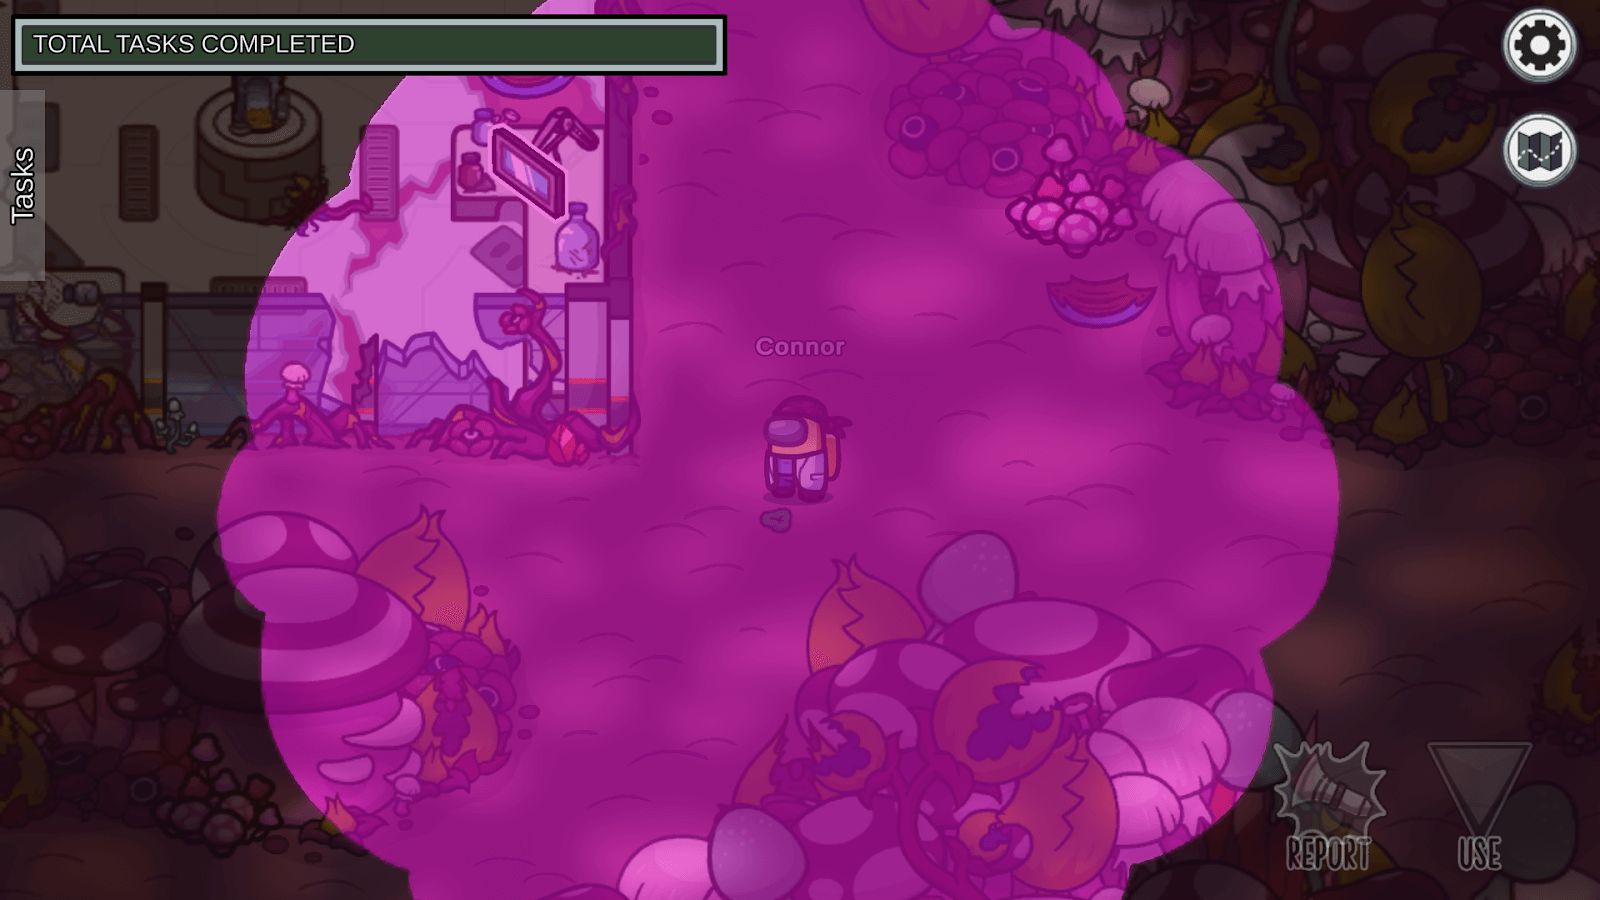
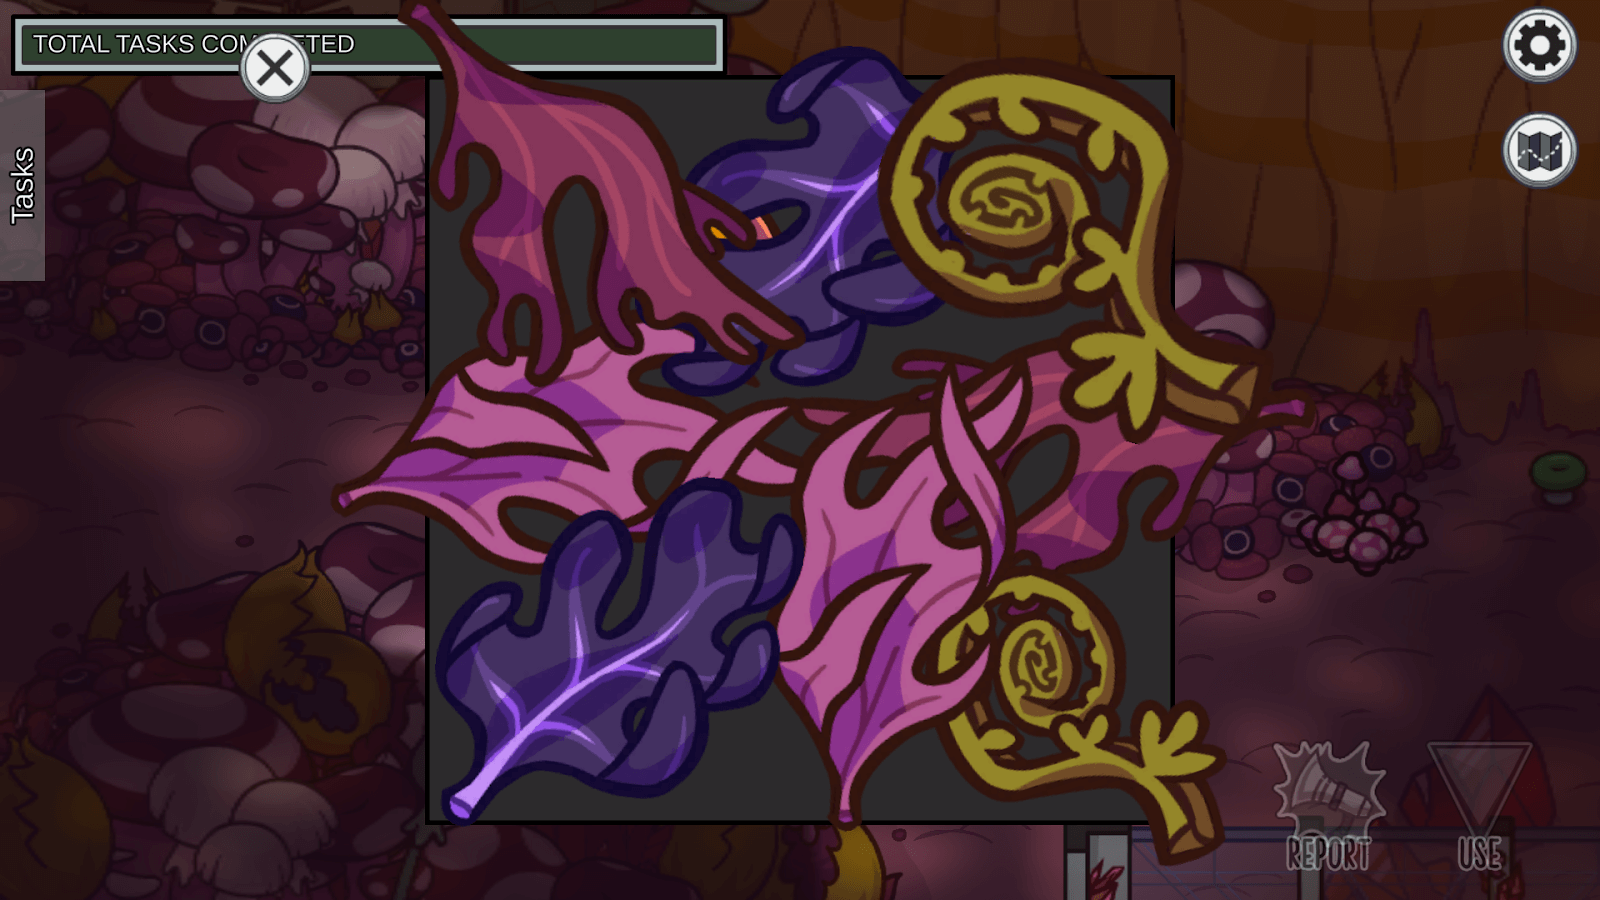
Mushroom Mixup is a sabotage that is unique to this map. While it is active, the screen will turn into a purple haze and all players will change their appearance from a random selection of both colors and clothing options. While this sabotage is active, players won't be able to see your name or have any indication as to who the person in the mix-up is (unless they saw that person shift when the sabotage was activated).
After 10 seconds, the sabotage ends and players will revert to their normal forms again. This sabotage is extremely important because this map doesn't feature a Lights sabotage meaning that they will need to rely on the mixup to freely roam around the map and kill. If Shapeshifter is active, this sabotage can be further combined with shapeshifting to continue to assume a new form after the sabotage ends.
Because the haze time is quite short, if you see a player kill while the sabotage is active, it may be a worthwhile strategy to not report the body right away and instead follow the player who killed until the sabotage wears off.

Vents
The map contains 10 vents which form three pathways for Impostors or Engineers to use.
The first pathway is a square-shaped path that runs from the outside of Cafeteria, to the alcove in-between Storage and The Form, to the Laboratory, to the inside of Splash Zone, and finally back to the outside of Cafeteria. The vent in Splash Zone has no line of sight to or from other players except for a tiny opening in the top-right of the room it's in, which makes it a good choice to enter the path. Venting from Splash Zone to Laboratory is a good move for covering up your tracks since the walking time between the two rooms isn't that short, both rooms have a lot of shadow to hide in, and Laboratory also has a lot of tasks.
The second pathway is a shuttle line that runs from Kitchen to two distinct points of the Jungle, one close to the Laboratory and the other next to the 'Monitor Mushroom' task. If you make a kill in Kitchen or Dock, taking the vent from Kitchen over to the vent farthest to the right is a great escape option since it not only covers a long walking distance in a very short amount of time, but that vent also contains a green mushroom plant next to the vent which can cover your character from view of other players after venting. This route is also good for Engineers since the 'Collect Vegetables' task starts in the Greenhouse and ends in The Kitchen, and the walking time can be cut short by grabbing the vegetables then taking either of the Jungle vents to the Kitchen.
The third pathway is a triangle-shaped path that runs from Reactor to Communications to Lookout. The biggest advantage here is that it cuts out all of the ladder climbing you'd otherwise have to do to reach all of the other rooms in this loop. A possible method of escaping might be to kill in Lookout or Reactor, then vent to Communications and then take the zipline to Storage. This pathway is extremely useful for Engineers since it allows one crewmate to fix the Comms sabotage by themselves by venting in-between Lookout and Communications after entering one of the codes. Its proximity to the hand scanners for the Reactor sabotage also means that players in this area of the map can vent right over to Reactor to start fixing the sabotage.
About_Author
Demonxz95 is the main "fan creation guy" on Out of Games, specializing in showcasing fan-made content from the Hearthstone community, with the occasionally unrelated article on the side. His love for card games started with Yu-Gi-Oh when he was a child and has since seen a resurgence with Hearthstone and MTG.
He can be reached through a PM on the site or on our Discord server.
More_Among Us_Guides
How Standard Rotations Work in Hearthstone - Year of the Scarab

Steam Wallet Pending Balance? Here’s Why Your Sale Funds Are Delayed
Top Money-Making Crops to Plant During Spring in Stardew Valley
// join_the_conversation
Sign in to share your thoughts, vote on comments, and connect with the community.
Comments
// no_comments_found
Be the first to share your thoughts!
Leave a Comment