
Path of Exile
Path of Exile: Betrayal League Mechanic Guide
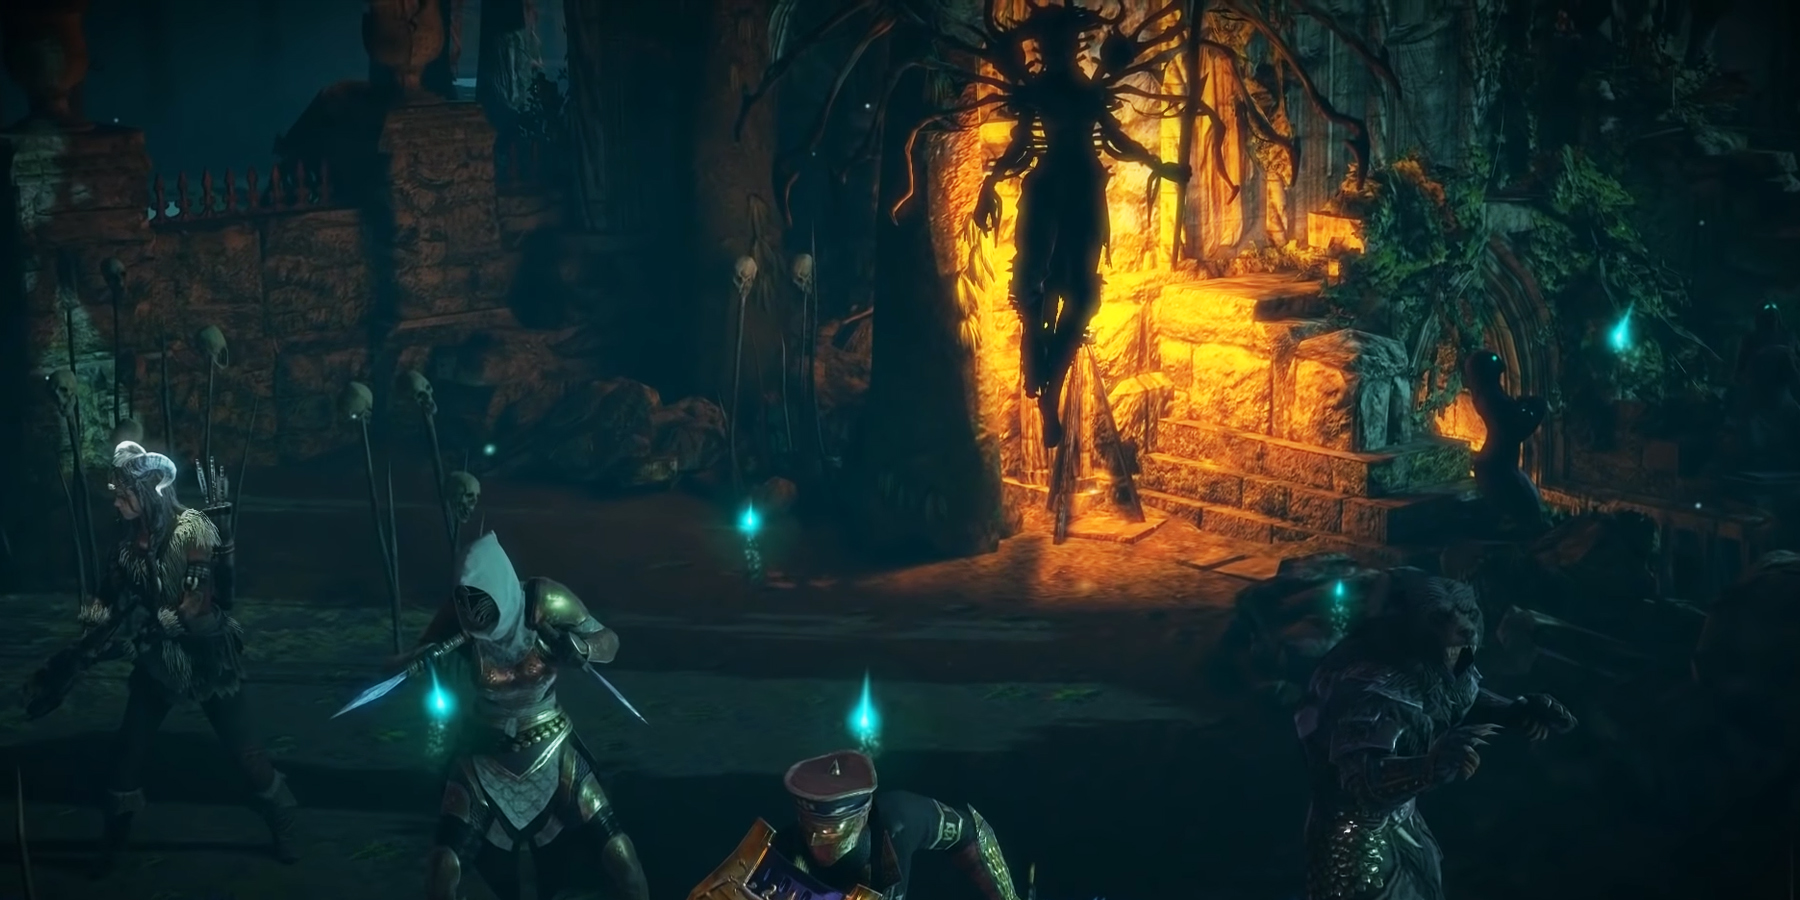
Welcome to the Betrayal league mechanic guide! This content is also commonly referred to as the Immortal Syndicate, the group of folks you'll be fighting left and right as you work your way up the conspiracy ladder and find out who is pulling the strings. Betrayal can feel pretty overwhelming at first glance, and it definitely takes a bit of practice to understand its intricacies, but rest assured we'll be touching on everything Betrayal in this guide: The map encounters, interrogations, rewards, the Syndicate Mastermind fight and lastly, ways to squeeze the most out of this mechanic!
Betrayal is considered Extra Content and can be naturally encountered in maps.
Our league mechanic guides are structured according to "Depth" - the deeper you go into the article, the more complex the mechanics get. If it all becomes too much, take a break from this guide, play with the league mechanic enough to master the fundamentals then come back and delve deeper!
Difficulty: Average
Complexity: High
The icon that denotes Betrayal content. It is also Jun's icon on the minimap.
- Betrayal League launched in Decembet 2018 and have been part of the core game since.
- Betrayal features the return of lots of minor characters from Wraeclast, including Hillock (the big zombie you first in the first zone of the campaign) and Gravicius (the super-tanky miniboss fellow in Act 3 on your way to the Lunaris Temple!)
- I'm sure there's more.
Depth 1 - General Overview
Before we get into the nitty-gritty, we should describe the mechanic at large, so we have an idea of where each piece fits in the grand scheme of things:
- Jun Ortoi is this league's NPC, and she will guide you through the entire league mechanic. You'll have met her in Act 9, where she explains a few things about Betrayal and gives you a taste of the gameplay loop.
- Your immortal enemies are the Immortal Syndicate, a group composed of the Syndicate Mastermind (the boss) and 17 Agents.
- You're tasked with defeating these agents and interrogating them as to the whereabouts of their Safehouses, and the Syndicate Mastermind's identity.
- The purpose of interrogations is to gather Intelligence. Intelligence is a resource bar that each Safehouse, as well as the Syndicate Mastermind, has.
- When Intelligence reaches 100% for a Safehouse, you can open portals to go raid it. The Safehouse Leader, once defeated, will grants you Intelligence toward the Syndicate Mastermind.
- Once the Syndicate Mastermind's Intelligence bar is full, you can open portals to the boss fight!
This is quite an oversimplification of the mechanic. Brace yourself, things are about to get hectic.
Depth 2 - Syndicate Encounters
There's roughly three components to every Syndicate encounter, and we'll tackle them one by one in the next section. Here, we'll talk about phase 1: The combat.
When Jun is in your map, you'll generally get 3 Syndicate encounters of different types. This means three different opportunities to gather Intelligence, and three opportunities for loot! Let's look at the basics of each encounter:
- Intervention: Syndicate Agents portal right on top of you and attempt to assassinate you. Kill them.
- Under regular circumstances, this is always one of the 3 encounters you'll face.
- It is usually the first one you'll encounter.
- The Syndicate has a tendency to spawn while you're already fighting other monsters, so be prepared!
- You can fail this encounter if you get killed. The Syndicate Agents will disappear.
video
- Research: Raid an underground base (sub-zone) and kill the Syndicate Agents before you run out of time.
- Under regular circumstances, this is always one of the 3 encounters you'll face.
- The encounter does not start until you enter the sub-zone.
- The research lab is a small maze filled with Normal, Magic and Rare Syndicate monsters.
- The Rare Syndicate monsters are actively damaging Research Containers. The UI at the bottom of your screen will show the containers' health.
- If too many Research Containers are destroyed, you will fail the encounter.
- If you die, you can still come back and try to finish the encounter, but your time left will be very short.
video
- Fortification: Break through a heavily fortified structure and kill the Syndicate Agents protecting it.
- Under regular circumstances, either this or the Transportation encounter will be your third.
- The fortress varies in size depending on the map you're in. You'll always have at least one destructible gate you need to break to make you way in.
- Atop the fortress' walls are invulnerable ballistae that shoot the ground. Keep moving! The ballistae are destroyed once you complete the encounter by defeating all Agents.
- While you're still on the outside, Agents from within will teleport out and attack you. When they lose a significant amount of health, they teleport back in and heal.
- Once you break the gate and enter, you'll notice healing totems arranged in a circle around the Syndicate Agent. Kill them to ensure your enemy won't keep healing.
video
- Transportation: Kill the Syndicate Agent leading the caravan before they reach their destination.
- Under regular circumstances, either this or the Fortification encounter will be your third.
- The caravan is led by an Agent and has a bunch of regular Syndicate monsters protecting it.
- The caravan slowly makes its way to another point on the map. You will fail if it gets there before you killed the main Syndicate Agent.
- If you die, you'll generally still have plenty of time to make it back and successfully complete it.
video
Right, so there's a few notions in this giant bullet point hell that should be further explained. First, let's talk about "under regular circumstances":
- Under regular circumstances, your Syndicate encounters will be one part Intervention, one part Reseach, and one part Fortification and Transportation.
- If any of these have their Safehouse Intelligence bar full, they won't be able to spawn.
- For example, if your Research Safehouse is ready to go but you chose to first run a map, and you bump into Jun, you'll get the following Syndicate encounters: Intervention, Fortification, Transportation.
- If both Research and Transportation Safehouses are ready to go, you'll only get two Syndicate encounters: Intervention and Fortification.
- Safehouse Intelligence will decay down to 90% if you do not raid the Safehouse within 3 turns of it reaching 100%.
- A turn is an encounter. If you complete, say an Intervention encounter, that's one turn.
- The Syndicate Mastermind's Intelligence does not decay.
Another thing we need to iron down is, how many Syndicate Agents are you actually fighting? That depends, and we'll get into it soon, but there's some ground rules we can list here:
- You'll always be fighting at least one Syndicate Agent. Most encounters will start with just one.
- Oftentimes, once the main Syndicate Agent has been damaged a bit, more Syndicate Agents will portal in and help kill you.
- Once a Syndicate Agent is defeated, the rest will prepare to flee. You have a very short amount of time to defeat them as well, or you lose out on the opportunity to interrogate them.
- In Transportation, the main Syndicate Agent will keep leading the caravan regardless of how many other Agents are defeated.
Well, that was something, wasn't it? We're just getting started.
Depth 2 - The Interrogation Phase
The next part of each Syndicate encounter is interrogating the Agents. You'll see they've got portraits next to their bodies. Clicking them will open up the Syndicate board, where you will have three options to decide the fate of an Agent. This section is closely linked with Depth 4, where we'll expand on a lot of concepts introduced here:
- Interrogate: Imprisons the Agent for 3 turns and grants you Intelligence towards a certain Safehouse each turn. The higher the Agent's Rank, the more Intelligence you'll get. This option is always available.
- While the Agent is being interrogated, they will not show up in any Syndicate encounters.
- Agents have 5 Ranks. Interrogating them reduces their Rank by 1.
- If a Rank 1 Agent is interrogated, they become Rank 0 and they will no longer be part of any Safehouse. A 'free agent', if you will, who may spawn in any Syndicate encounter.
- If you're interrogating a Safehouse Leader outside the Safehouse encounter, they will be removed from the leadership position and replaced by another random Safehouse member of the highest Rank.
- You can only interrogate up to three Agents at once. A fourth Agent you choose to interrogate will immediately release the least-recently interrogated member from the prison.
The second option is one of the following three choices. Each Agent may have a different one available based on past choices you've made. What's more, whenever you make a choice for an Agent, the second option for subsequent Agents may change based on it:
- Execute: Kill the Agent and increase their Rank by 1. If they were Rank 0, they will be assigned to the Safehouse whose encounter you just completed. The max. Rank and Agent can get through execution is Rank 3.
- The Agent will also be granted a new item if they have fewer than three. Items make Agents stronger - you can see their effects on the Syndicate board.
- This option is always available if three or more members are present. Like we said, this option can change into something else depending on the order in which you handle each Agent.
- Betray: Sabotage another member in some way and become Rivals with them. This option is only available while there are two more members and they're not already Rivals. When two Agents are Rivals, it means that either one may show up in another's encounter.
Open the box below to see all the possible choices you get for betraying:
- Gain Intelligence on another Safehouse.
- Steal Ranks from another Agent while removing their Rank.
- Become the new leader of a Safehouse.
- Remove another Agent from the Immortal Syndicate; they will be replaced by someone else. There are always more Agents than there is space for them on the Syndicate board. We'll talk more in Depth 4.
- Destroy all items of Agents from another Safehouse.
- Raise the Rank of all members of the Agent's Safehouse and lower the Rank of all Agents of another Safehouse.
- Bargain: Gain a reward of some kind. This option shows up when only one Agent is present.
Open the box below to see all the possible choices you get for bargaining:
- Gain Intelligence on a Safehouse.
- Recruit an Agent with Rank 0. This raises their Rank to 1, adds them to the Safehouse and you become 'trusted' with them, meaning you can get better choices in your second option. NEEDS CITATION
- Switch Safehouses with another Agent.
- Leave the Immortal Syndicate; they will be replaced with an Agent that wasn't currently on the board.
- Immediately complete all interrogations; your prisoners are released, you gain all the Intelligence you had left to squeeze out, and the Agents' Ranks are reduced by 1.
- Destroy all items of Agents from the same Safehouse as the Agent you're bargaining with.
- Remove all Rivalries from the board.
- Drop either currency, a map, a Unique item, a Scarab or a Veiled Item.
The third option is to release the Agent without getting anything in return. This is useful if you want to keep all the puzzle pieces on your board in a certain position, such as keeping an Agent in a particular Safehouse to make sure you get their reward. I don't recommend using this until you have a good understanding of Betrayal.
When you're interrogating a Safehouse Leader inside a Safehouse, your only option will be to interrogate them for Mastermind Intelligence.
This brings us to the third part of our Syndicate encounters...
Depth 3 - Veiled Items
The coolest reward type of Betrayal are Veiled Items. These items are Rare, and have a Veiled modifier. It looks like some fancy runic text, you can't miss it. Syndicate Agents tend to drop a Veiled Item or two fairly often, but you can also guarantee it by bargaining with them if you have the option. A Veiled item lets you choose one of three modifiers to replace that trippy runic text. Here's how you go about it:
- A Veiled Item will drop. You'll see it has an icon next to its name, indicating it's different.
- You pick it up, and you talk to Jun, either in your map, or later in your hideout.
- She has an option to Unveil your item.
- Place the item in the box, click the button, and you'll be presented with three modifier options. Choose one!
- This will add the modifier to your item, replacing the runic text.
- You will also unlock a less potent, but still good, version of this modifier as a craft you can apply at your Crafting Bench on a variety of items.
- Some Veiled Items come with two Veiled modifiers!
Here's a short video showing the whole process:
video
Note there are a lot of Veiled modifiers to discover and learn to craft yourself. Some can only be learned by Unveiling items that drop from specific Agents. You can see who drops which craft by going to your Crafting Bench and hovering over any unlearned Veiled craft.
Right, at this point we've tackled the main components of what you'll be dealing with in maps regarding the Syndicate. And yet, what we know is a drop, what we don't is an ocean. Let's go deeper...
Depth 4 - The Syndicate Board
Innocence aid us. The Syndicate board is the interface you use to try and make sense of this entire mess. It's perhaps a little more complicated than it should be. Thankfully you can toggle some strings on or off by ticking a box hidden in the "Betrayal Help" button at the bottom-right corner of your screen. Now, let's set some ground rules:
- First of all, until you actually fight an Agent, their portrait card will show a question mark. You need to discover who you're dealing with through battle.
- The portraits outlined in red are those of each Safehouse's leader.
- Below the portrait you'll see the Intelligence bar that must be filled to enable raiding a Safehouse. When it hits 100, you can talk to Jun, open the board, and click on the button that takes the Intelligence bar's place to open portals to the Safehouse in your map device.
- Agents that are part of a Safehouse are connected to it through a yellow string. Agent that trust each other are connected through green strings. Rivals are connected through red strings.
- Agents that don't belong to a Safehouse casually hover about, waiting for the opportunity to belong. They have no yellow string connecting them to anyone.
- The portrait cards will move about depending on which options you choose during the Interrogation Phase.
- There will always be a Safehouse Leader.
Now, hovering over a portrait, you will see the following:
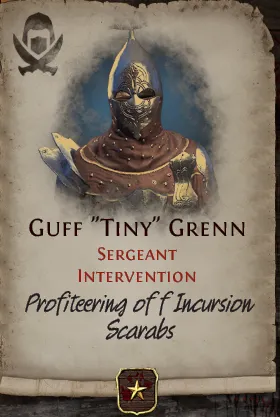
The name of the Agent, their Rank (denoted by the amount of stars they have; Sergeants are Rank 1), the Safehouse they belong to, and the reward they'll give you when you defeat them in the Safehouse. We'll talk about those in Depth 6.
Most actions you take during the Interrogation Phase will be reflected here. Now, there's a few more things you can figure out when you look at the board:
- Agents who trust each other are more likely to assist each other in combat, meaning when you fight one, the other has a chance to portal in and help.
- Similarly, Rivals are more likely to attack each other, resulting in more loot for you.
- A Safehouse Leader never appears as the primary Agent in an encounter. They can only show up to help or attack another agent.
The board can change in a major way in the following two situations:
- After you raid a Safehouse:
- The Safehouse Leader is imprisoned for 3 turns and grants Syndicate Mastermind Intelligence.
- The rest of the Agents that belong to that Safehouse have their Ranks reduced to 0, and a random Rank 0 Agent will become the new leader of the Safehouse.
- After you defeat the Syndicate Mastermind:
- The entire Syndicate board is shuffled, and everything but Safehouse Intelligence is essentially reset, meaning Agents are randomly redistributed.
As we previously stated, there are 17 Agents in the Syndicate if you don't count the Syndicate Mastermine. Only 14 of these have space on the board, meaning that, unless you swap some out, you're locked out of the three benched Agents' rewards.
Depth 5 - The Safehouses
Once you gather enough Intelligence for a Safehouse, you can open portals to it by talking to Jun. The Safehouse can be divided into three parts: Initial Encounter, Agent Fight, and Reward Rooms. Note that Safehouses are a pretty good source of experience! The Safehouse's area level will be equal to the highest level of the Syndicate encounter you've faced for that Safehouse. If you completed a Syndicate encounter for Intervention in a Tier 16 map, the Intervention Safehouse will be area level 83.
Initial Encounter
This part is a map full of Syndicate monsters, whose layout varies depending on the Safehouse you're raiding. Push through it and reach the end to enter the Safehouse proper and fight the Agents.
- The Intervention Safehouse is similar to the Strand Map and has you fighting lots of monsters that spawn out of thin air as you traverse the beach.
- The Research Safehouse is somewhere in Sarn and has you traversing narrow, high pathways. Barrels and glass cases can be broken to release rats, worms and other disgusting experiments for extra experience.
- The Fortification Safehouse is similar to the layout of Tul's Domain (Tul's Breachstone) and has you pushing through several fortifications, destroying gates that are guarded by ballistae.
- The Transportation Safehouse takes places in a desert and has you bumping into traveling caravans that spawn Syndicate monsters as they come out of one portal and leave through another.
Agent Fight
Once you're reached the end of the initial area, you'll enter the Safehouse sub-zone. Approach the Safehouse Leader. After a few choice words, the battle will begin:
- Immediately, all other Agents that belong to the Safehouse will portal into the room.
- Here, they do not flee once you defeat one Agent.
- Once all Agents are defeated, [only] the Safehouse Leader's portrait will show up.
- Click it to bring up the Syndicate board, where you only choice is to interrogate them and gain Syndicate Mastermind Intelligence.
Reward Rooms
The fighting is over, it's time to loot! For every Agent that belonged to a Safehouse, there will be a room in the north-western corner of the Safehouse that contains rewards. The rewards:
- Depend on the Agent. Each Agent has a different set of rewards from another Agent.
- Each Agent's rewards are different depending on which Safehouse they are part of.
- Each Agent's rewards are better the higher Rank they are.
Let's talk about some rewards! The main ones you're looking for are generally going to be the reward rooms, which we'll discuss in the next section. There are, however, some Unique items that can only drop from defeating Safehouse Leaders in a Safehouse raid. These are:
| ITEM | Paradoxica | Vivinsect | The Crimson Storm | Hyperboreus |
| SAFEHOUSE | Intervention | Research | Fortification | Transportation |
Depth 6 - Safehouse Rewards
We've established that Betrayal has a crazy amount of rewards that you can target by carefully working on your Syndicate board. There's a total of 68 different rewards, and all of them can be better or worse depending on each Agent's Rank (1-4). This is all quite a lot to take in, so we've made this chart / cheat sheet to help you out:
gigachad cheat sheet
Depth 7 - The Syndicate Mastermind
Welcome to the big bad of Betrayal. Once you've gathered enough Mastermind Intelligence you can open portals to the Mastermind's Lair, where you'll be fighting Catarina, Master of Undeath. This is a long encounter, with several phases. The area level of the encounter will be equal to the highest area level Safehouse you've completed leading up to the fight.
Introduction (The Forbidden Vault)
Here we meet Catarina. You get a taste of some of her abilities, and it's nothing too hard. Dodge her attacks, kill Jun's family, bring her down to around 30% health, and she'll flee.
Intermission (The Unearthed Hideout)
A casual trek through the graveyard. Fight a whole bunch of Syndicate monsters as you make your way to the proper boss arena.
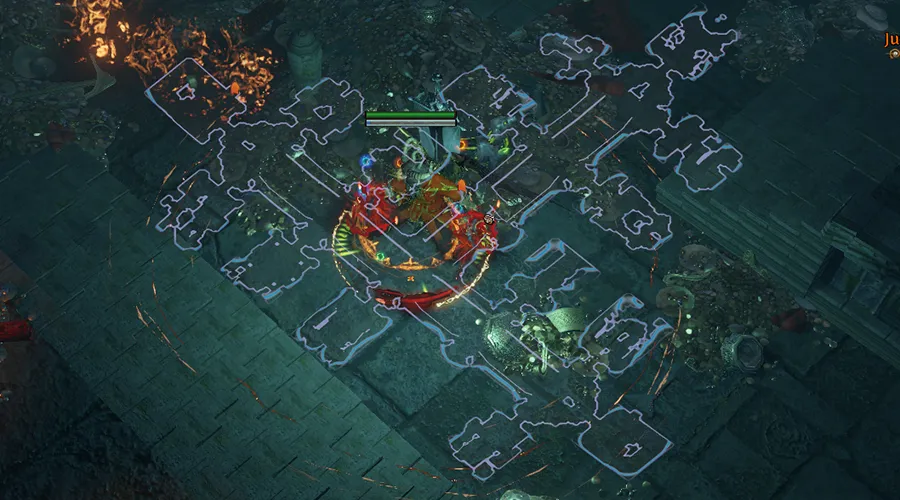
Finally, The Boss Fight (The Sculpture Garden)
Catarina's boss battle is quite complex, and might take a little getting used to. The fight is quite long, and monsters are scarce, so gaining flask charges could become a problem if you're heavily reliant on Flasks.
Here's how the fight goes, in broad terms:
- You fight Catarina for a bit, dodging her attacks, until she becomes invulnerable. She turns to the central statue, heals herself back to full, and releases one of the four trapped Safehouse Leaders to attack you.
- Once you kill the Safehouse Leader, the central statue will start casting a spell that releases a wave of damage on a walkway. This continues, for the most part, until the end of the fight, with the statue casting its spell on walkways in a clockwise direction.
- To progress the fight once you killed a Safehouse Leader, wait for Catarina to charge up one of the totems in the corners of the arena. You'll know it's charged up when there's a faint green effect that "pulls" you in its direction.
- Go to the totem and hang around it for a couple seconds. This will destroy it. Now quickly, leave the square area as you will start taking a lot of damage as soon as the totem dies and releases a deadly fog!
- The fog persists throughout the rest of the fight.
- Damage Catarina again until she goes invulnerable again and releases a trapped Safehouse Leader again.
- Rinse and repeat this until you've killed all Safehouse Leaders.
After you kill the fourth and final Safehouse Leader, Catarina won't charge up the last totem. Instead, she'll teleport to it and destroy it herself. Now, you've finally made it to the final phase, where you've only got Catarina and the central statue's wave attacks to contend with, but the arena is very tiny thanks to the totems' fog. Kill her!
Once she's defeated, her portrait will appear on the ground, but there will be no bargaining today! Click the portrait and Jun will kill Catarina, releasing her loot to the floor. We'll talk about loot in our next section. With regards to Catarina herself throughout the encounter, she's got a couple abilities you should really watch out for:
- Catarina will charge up her staff and deliver a giant slam on the ground in front of her. Don't be there when it lands. However, the more you run away, the harder it'll hit once she catches up to you!
- At low life, she might summon a large amount of Volatile Skeletons.
- These are small, "only torso and up" skeletons that can't be targeted.
- Walk over them while they still look like eggs to destroy them, quickly!
- Any Volatile Skeletons that manage to "hatch" will chase you for an extended amount of time before they explode.
- If they explode next to you, they deal a lot of damage and can be quite deadly.
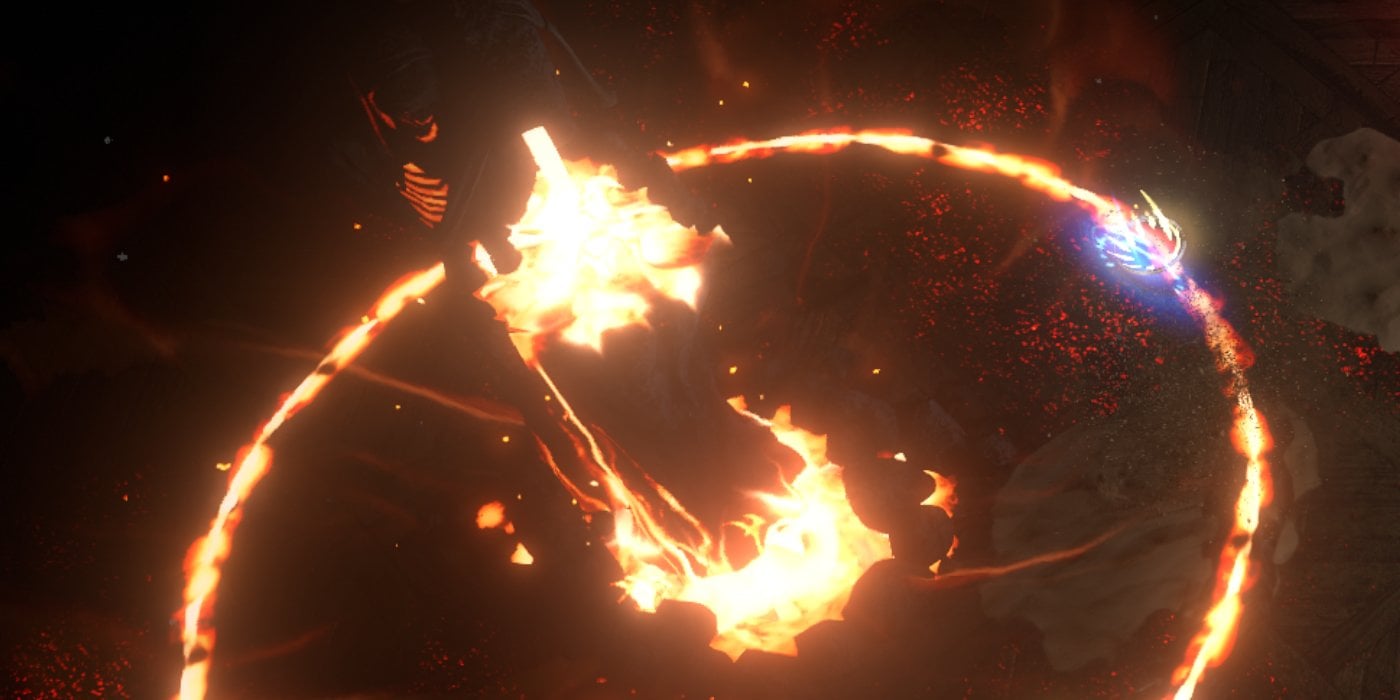
Here's a video of a totem build of mine blasting Catarina back to the grave. Note these totems do a ridiculous amount of damage. As always, your best defense in Path of Exile is so much damage that you don't give the enemy enough time to queue up a response! Regardless, you'll get a good idea of the flow of the encounter, and just how long and convoluted it is
Video: Path of Exile - Catarina Encounter
Depth 8 - Mastermind Loot
Like everything in Betrayal, even loot can be complicated, so we're dividing it into two parts.
Catarina's Loot
Catarina will drop a whole bunch of nice stuff. She'll drop more of it the higher level she is. Some of these nice things can be:
- Veiled Orb (bascally an Annulment Orb followed by a... Veiled Exalted Orb?)
- Several Veiled Items
- The Nook's Crown Divination Card
In addition, Catarina is guaranteed to drop one of the following Unique items, which come with Veiled modifiers:
| ITEM | Cinderswallow Urn | Bitterbind Point | Cane of Kulemak | The Queen's Hunger | The Devouring Diadem |
| ESTIMATED DROP CHANCE | 45% | 20% | 15% | 15% | 5% |
The Big Safehouse
Under the arena, you will find a sub-zone that contains many, many rooms. Each Agent that was present on the Syndicate board and part of a Safehouse prior to Catarina's death will have a reward room here! What's more:
- Each room's rewards are treated as if the Agent was one Rank higher. This is the only way to access Rank 4 rewards.
- You can find your stash here, because there's a lot of loot to pick up.
This is the reason why your Syndicate board is reset once you kill Catarina - you're getting rewards from all the Agents!
That's a lot of rooms!
Depth 9 - More Syndicates & Betrayal Scarabs
What's this? You can't get enough of this mechanic? Say no more:
- You can use the Betrayal Scarab to guarantee Jun, and the Syndicate encounters, will show up in your map.
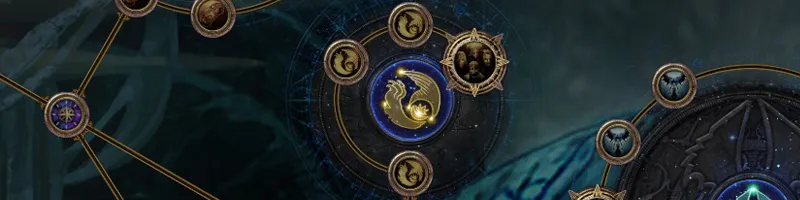
- Allocating certain passives nodes on the Atlas Passive Tree will increase the chance and eventually outright guarantee you'll get Syndicate encounters in every map. Here's a link to a Passive tree that highlights all the chance increasing nodes: LINK
In addition, Betrayal benefits from 3 additional Scarabs that you can use to squeeze more out of the league mechanic. Note that these don't guarantee Syndicate encounters; to avoid wasting them, make sure you use them in conjunction with one of the options listed above.
- Betrayal Scarab of Intelligence - Gets you to Safehouses faster!
- Betrayal Scarab of Reinforcements - Increase the chance of fighting more Agents!
- Betrayal Scarab of Perpetuation - Who ever said no to more Scarabs? Note you can use 2 Perpetuation Scarabs per map!
Depth 10 - Betrayed Atlas Passive Tree
later
Other Considerations
they can get pretty rippy
About_Author

Nox is a senior editor at outof.games, with a 20-year history of playing video games. While you won't find him finally playing GTA V after having bought it many years ago, you may occasionally stumble upon one of his 3000-word essays on the front page.
More_Path of Exile_Guides

A Guide to MARVEL SNAP's Token Shop
Latest_Path of Exile_Guides

// join_the_conversation
Sign in to share your thoughts, vote on comments, and connect with the community.
Comments
// no_comments_found
Be the first to share your thoughts!
Leave a Comment