
Path of Exile
Path of Exile: Expedition League Mechanic Guide
Welcome to our Expedition league mechanic guide! Expedition content is one of the more complex activities in the game, with lots of various sub-mechanics to interact with. In this guide we'll go over everything, starting with the in-map Expedition encounter, the various rewards you can get, Expedition Logbooks & their bosses, and we'll end with a look at the many ways you can squeeze the most out of Expedition. Let's get to it!
Expedition is considered Extra Content and has a baseline 8% chance of being randomly encountered in maps.
Our league mechanic guides are structured according to "Depth" - the deeper you go into the article, the more complex the mechanics get. If it all becomes too much, take a break from this guide, play with the league mechanic enough to master the fundamentals then come back and delve deeper!
Difficulty: Average to High.
Complexity: High

The icon that denotes Expedition content and rewards of the Expedition type.
- Expedition league launched in July 2021 and has been part of the game since.
- It is the only league to introduce an entirely new defense stat that can roll instead of the usual Armor / Evasion / Energy Shield on armor items.
Depth 1 - General Overview
There's lots to talk about with this league, so instead of our usual guide structure, we'll first take a look at Expedition as a whole:
- Expedition has lots of components to it, first and foremost being the in-map mechanic.
- Expedition Logbooks are special maps that expand on the in-map mechanic's concept, similarly to what Blighted Maps do for Blight.
- Rewards are divided into four categories, based on the Expedition faction they belong to.
- Each Expedition faction is represented by an NPC:
- Gwennen (Gambling) represents the Druids of the Broken Circle.
- Tujen (Haggling) represents the Black Scythe Mercenaries.
- Rog (Crafting) represents the Order of the Chalice.
- Dannig (Logbooks & Currency Exchange) represents the Knights of the Sun.
- Each NPC sells you a service or an item, which you can buy with Artifacts.
- Each NPC has four Artifacts associated with them, of four qualities: Lesser, Greater, Grand, Exceptional.
- Each NPC, or rather Expedition faction, also has a corresponding boss.
We'll go through each of these aspects. There's lots of ways to approach Expedition, whether you want to focus on any NPC's wares in particular, chase Expedition-exclusive gear or loot anything and everything you can. I encourage you to experiment with the mechanic - it offers you great flexibility in choosing the level of difficulty and reward you're comfortable with!
Depth 2 - Expeditions in Maps
You'll have already been introduced to this mechanic in the Campaign, but it's good to go through it again and solidify its concepts. In your maps, you'll sometimes come across one of the league's NPCs, chilling next to a detonator and surrounded by lots of unearthed remnants and skulls and flags that indicate buried chests. You'll notice:
- The chest flags have different sizes and colors to indicate their rarity. Go for the ones that look more rewarding if you can, they drop more Artifacts! White < Yellow < Red.
- The unearthed remnants have a tooltip with two types of modifiers: One that sounds good (loot!) and one that sounds bad (buffs to monsters!)
- Skulls. These are monsters, buried and lying in wait!
You'll notice in the bottom-left corner of your screen that you have a new button. It shows you how many explosives you've got available to place around the area. You can click on the button to begin placing an explosive, but you can also use the default "league mechanic" hotkey 'V'. Let's go into a little more detail:
- You've got a limited number of explosives, so you can't just go ham and blow up the entire archeological site.
- Your first explosive can only be placed a limited distance from the detonator. Subsequent explosives can only be placed the same limited distance from the previous detonator.
- Once you place all your explosives and press the detonator, each explosive will detonate in sequence, with a short delay between each one.
- Each explosion will unearth whatever was in its range when it was placed: Monsters, chests or both. It will also apply any Remnant modifiers.
Now, what are we looking for here in terms of maximizing loot? There's three components that determine how rewarding an Expedition encounter will be:
- Runic monsters. You'll want to blow up as many of those as you can. You know an unearthed remnant is contains a Runic monster when it's a "skull on a stick". Prioritize those! The bigger the skull, the better!
- Runic monsters can drop Expedition Currency and Expedition Logbooks. Non-Runic monsters do not drop these.
- Remnants. These are the pedestals with a tooltip that adds modifiers. You'll want to make sure your build can handle the negative mod before you place an explosive over it!
- Some Remnants come with modifiers like "Monsters are Immune to Cold Damage". Seriously, make sure you read before you detonate!
- We'll talk more about these shortly.
- Chests. Chests aren't generally too rewarding on their own, but with the right Remnant modifiers they can provide pretty decent loot.
- Chests may drop Expedition Currency, but cannot drop Expedition Logbooks. These drop exclusively from Runic monsters.
Right, so what of the modifiers? There's two ways to approach how you prepare an Expedition encounter, depending on what the dig site spawns with:
- If your dig site contains lots of Runic monster markers, you'll want to prioritize blowing up Remnants with modifiers that increase monster loot, such as:
- 200% increased Rarity of Items Dropped by Monsters.
- 25% increased Pack Size.
- 50% increased Quantity of Expedition Logbooks dropped by Runic Monsters.
- If you dig site contains lots of chest markers, you'll want to prioritize blowing up Remnants with modifiers that modify chest loot, such as:
- 50% increased Quantity of Artifacts Found in Excavated Chests.
- 300% increased Rarity of Items Found in Excavated Chests.
- Excavated Chests have 50% chance to contain additional Currency Items.
Now, the most important part: Each time you blow up a Remnant, its modifiers will be applied to the monsters that are released at the same time. It will also apply to monsters released in subsequent explosions. Your final explosion will release monsters that are affected by ALL the Remnants you previously blew up. Remember how these mods stack so you don't get overwhelmed by nigh-unkillable monsters!
No one Expedition encounter will be identical to the other. The random assortment of markers, modifiers and even the map's layout will require you take a different approach each time. Balancing risk vs. reward is key to being successful in Expedition, as we'll keep seeing.
After you complete your first Expedition encounter, you'll unlock the Expedition Locker Hideout Decoration! Place it in your hideout, it will hold all Expedition-related Currency as well as Expedition Logbooks.
Depth 2 - Runic Monsters & Ward
Right, so what are these Runic monsters anyway? Usually, monsters introduced in a league aren't so different that they need a guide section of their own, but these guys have a rather unique ability: Ward!
Ward is a defense stat exclusive to Expedition. It reduces damage taken from a hit equal to the amount of Ward a monster (or you!) have, then it goes on cooldown for 4 seconds. Unlike Energy Shield, taking damage will not reset Ward's recharge cooldown.
The cool part about Ward? It reduces the final damage of the hit, after all other sources of damage reduction and avoidance have been calculated. What's more, if you've got, say, 1000 Ward, and you're hit for 700 damage, you won't take damage and Ward won't go on cooldown! On the other hand, Ward has no interaction with damage over time - you'll still be set on fire, as normal.
Runic monsters have Ward, which'll be visible by an overlay effect on their name plate. When their nameplate "looks normal", it means you've broken their Ward and they'll take normal damage until Ward is recharged.
Would you like some Ward? Great, because Expedition introduces a bunch of Runic Base Type items that can drop from Expedition monsters in both maps and Expedition Logbooks. Check them out:
| Runic Crown | Runic Gauntlets | Runic Sabatons | Iron Flask |
There's also some fancy Unique Ward items you may come across in the same fashion:
| Faithguard | Nightgrip | Olroth's Charge | Medved's Challenge |
There's a few more, but they only drop from Expedition bosses, which we'll tackle in Depth 5!
Depth 3 - Expedition Vendors
Let's talk about the most unique part of Expedition: its vendors! As we discussed in our general overview, there's four of them, and each one does something different. Before we get into each one, here's all the currency associated with them, for reference:
| GWENNEN | TUJEN | ROG | DANNIG |
| Lesser Broken Circle Artifact | Lesser Black Scythe Artifact | Lesser Order Artifact | Lesser Sun Artifact |
| Greater Broken Circle Artifact | Greater Black Scythe Artifact | Greater Order Artifact | Greater Sun Artifact |
| Grand Broken Circle Artifact | Grand Black Scythe Artifact | Grand Order Artifact | Grand Sun Artifact |
| Exceptional Broken Circle Artifact | Exceptional Black Scythe Artifact | Exceptional Order Artifact | Exceptional Sun Artifact |
| Astragali | Exotic Coinage | Scrap Metal | Burial Medallion |
Lesser Artifacts are more common, while Exceptiones one are rare, of course. Fancier things will cost more Artifacts, or rarer Artifacts. You'll also notice four currencies we haven't discussed yet: Astragali, Exotic Coinage, Scrap Metal and Burial Medallion. These are Refresh Currency, and they're used to refresh each vendor's wares. Additionally:
- Artifacts aren't itemized. You automatically collect them when they are dropped, no clicking required.
- Refresh Currency is itemized, and can be traded.
- When you encounter one of these vendors in a map, monsters will only drop their type of Artifacts and Refresh Currency!
Gwennen (Gambling)
Arguably the most worthless of the Expedition Four, Gwennen is the biggest scammer this side of Wraeclast. If you've ever been burned by Gheed in Diablo II's Rogue Encampment, know that Gwennen is no better. Her mechanic is very simple:
- There's a bunch of items in her vendor window that cost a set amount of Artifacts.
- All their modifiers, rarities and so on are hidden. You only know the item type.
- When you buy an item, its true form will be revealed! An extremely rare Unique item? Perhaps a strong Rare bow with a Fractured modifier? I mean sure, but it'll most likely be a Magic item with terrible modifiers.
Yeah, she's not much of a loot pinata.
Tujen (Haggling)
Well, here's someone actually useful! Tujen sells non-equipment items such as currency, maps, gems, various splinters and other things that only take up 1 square of inventory space. Lovely! His mechanic is just slighly more work than Gwennen:
- An item has a price, but the price is negotiable.
- When you want to buy the item, you'll be asked to make an offer. Never buy anything for its listed price!
- If your offer is at the listed price or not low enough, Tujen will gladly accept your Artifacts and you'll be left wondering if you got scammed.
- If the offer is low, Tujen will make a counteroffer. He will also reduce the price range you can negotiate in. You can continute negotiating until he accepts your offer, usually not more than 3-4 attempts in.
- If at any point you make an offer or a counteroffer that is insultingly low, Tujen may outright refuse and remove the item from his vendor window! Don't play with fire, especially if you're negotiating for stuff like a Divine Orb or an expensive gem!
Don't worry, you'll get the hang of this system pretty fast once you interact with it for a bit. Once you figure it out, Tujen is an absolute goldmine of so-called "bubbegum currency". Here's a short video showing the mechanic in action:
video
Rog (Crafting)
Rog sells rare equipment. No bullshit. What you see is what you get. Once you buy an item for its listed price, however, you've got two options:
- Take the item!
- Let Rog apply some fancy crafting techniques on the item. Let's discuss.
Rog can be seen as a lightweight crafting simulator. He only crafts on items you buy from his shop. He'll offer you a bunch of different, random crafts in a row, one by one, that you can apply to your item. You:
- Can't choose which crafts show up. They are entirely up to Rog.
- Each craft requires a small amount of a certain type of Artifact as payment.
- Each craft clearly says what it does, and you can see what part of the item is modified because it is highlighted in orange. Example crafts:
- Add a suffix modifier.
- Remove the lowest tier modifier.
- Reroll prefixes 6 times, keeping the best result. This means it does the craft six times, and only adds the combinations of prefixes with the highest tiers out of those six attempts.
- Add a suffix 6 times, keeping the best result. This means it does the craft six times, and only adds the highest-tier suffix modifier out of those six attempts.
- You can choose to do the craft by clicking the Upgrade button, or use the Skip button to move on to the next one.
- When you use the Skip button, the next crafting offer will cost more Artifacts.
- You cannot skip two crafts in a row.
- Once you're happy with your item, or if Rog is done offering you crafts, take the item and enjoy the fruits of Rog's labor!
Here's a short video showcasing this process:
video
Dannig (Logbooks & Currency Exchange)
Dannig is your neighborhood Western Union. His inventory is divided into two parts:
- The 'permanent' part at the top of the vendor window that is not affected by the Burial Medallion Refresh Currency. Here, you can trade Sun Artifacts for other Artifacts from different factions, of the same tier, at a 1:1 ratio.
- The 'refresh' part, at the bottom of the vendor window, that can be refreshed with Burial Medallions. This is what we're here to talk about!
Every time you refresh Dannig, he'll offer you two rows of items:
- The top row will contains a set amount of Artifacts from different factions that you can buy at a better exchange rate.
- The bottom row will offer Refresh Currency for the other three vendors, and occasionally even an Expedition Logbook!
Dannig is also the one you need to talk to in order to open Expedition Logbooks, which we'll talk about next!
Depth 4 - Expedition Logbooks
Expedition Logbooks are a map-wide Expedition dig site. Much like maps, they can be crafted to Magic or Rare quality to add more modifiers, item quantity and item rarity. Each Logbook:
- Will offer 2-3 Expedition areas to explore. You can only choose one.
- Each Expedition area belongs to an Expedition faction. That means, if an area contains Black Scythe Mercenaries remains, you'll only find Expedition Currency associated with Tujen within it!
- Each Expedition area will have different implicit modifiers, such as Increased Explosive Placement Range, Increased Explosive Radius or Increased Number of Remnants. Some may even guarantee you'll find a boss!
- You can reroll the range of these implicit modifiers with a Blessed Orb!
Once you're happy with the modifiers on your Logbook and have selected one of its areas to explore, Dannig will open portals to it through your map device. Once inside, you'll notice your map is absolutely littered with little icons that show the locations of:
- Remnants, to strengthen monsters and rewards.
- Reward chests with loot that is league-specific.
- Shrines.
- Underground Area entrances.
- Boss markers (the angry icons).
Open the box below for a better look at each icon:
BOX
Literally all of these can be blown up. You already know how Remnants and chests work. About the rest:
- Shrines can only be activated if they're blown up.
- Underground Areas, once blown up, lead to a small sub-zone that contains a random assortment of additional reward chests.
- Boss markers either lead to an underground arena that contains a boss, or the boss spawns right then and there. We'll talk about bosses in the next section!
Now, grab a fresh cup of coffee and start checking out the zone:
- Read the Remnant modifiers and note the locations of those that are most rewarding & don't completely brick your build.
- Note the locations of reward chests you are most interested in. If you're enjoying a particular vendor's wares, you'll want to prioritize the Expedition chests for lots of Artifacts!
- Look around for suspiciously closed-off areas on the edges of the map. There may be a wall you can blow up to access hidden reward chests!
After you've finished your coffee, you should have a pretty good idea of which chests you want to open, and which Remnant modifiers you want to target. Remember, each Remnant modifier stacks onto monsters from subsequent explosions, so the last explosions will release quite difficult foes!
You've got, on average, somewhere around 15 explosives per Logbook, possibly more depending on the area's implicit modifiers. The trick to maximizing your loot here is pathing:
- The later an explosion is in the detonation chain, the more rewarding it will be. You'll want either your most desired reward chests or the biggest masses of Runic monster markers near the end of the chain.
- Some Remnant modifiers that, for example, grant monsters a chance to drop Legion Splinters, might be worth picking up early so more monsters can take advantage of the modifier.
- There's no right or wrong here, except that the more Remnants and chests you can fit in every explosion, the richer you'll get.
- You should always prioritize blowing up Underground Areas or boss markers. For the latter, take into account where they are on the detonation chain, as all previously detonated Remnants' modifiers will affect them.
Godspeed! Here's a video that shows an entire Expedition Logbook encounter:
Depth 5 - Expedition Bosses
Let's first break a few things down:
- There's one Expedition boss per faction.
- Each boss is affected by all Remnant modifiers detonated before its release.
- For each Remnant detonated, bosses gain about 5% increased amount of Artifacts and Reroll Currencies dropped.
- Naturally, they only drop Expedition Currency associated with the faction they belong to. They drop a boatload of it, too!
- They also quite reliably drop Rare items with Ward.
- Unless guaranteed by a Logbook implicit modifier, Expedition bosses have a 20% chance to naturally spawn in an Expedition Logbook area.
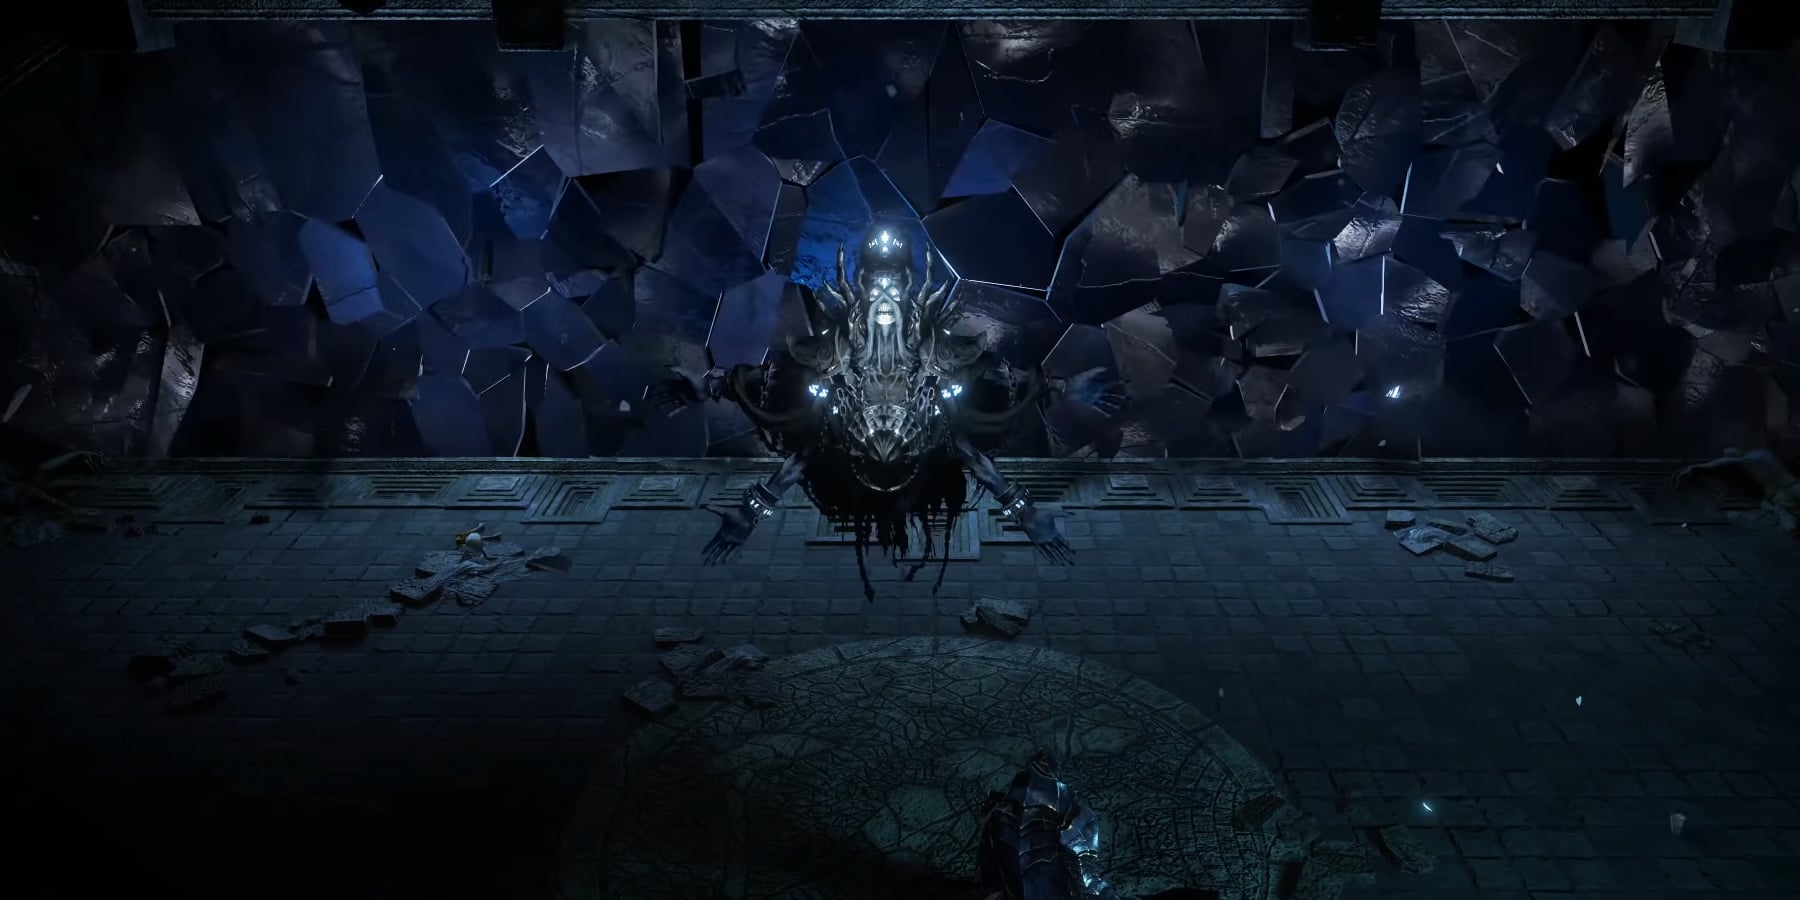
Medved, Feller of Heroes (Druids of the Broken Circle, Gwennen)
Medved can only appear in Expedition Logbooks of area level 68 or higher. He doesn't have a boss arena; he just sort of pops out of the ground, and the boss fight immediately begins. While he's rather agile, able to leap and attack while traveling in a line, he's the easiest of the Expedition bosses and the only one you can run away from.
Medved drops Elixir of the Unbroken Circle.
itemimg Elixir
Vorana, Last to Fall (Black Scythe Mercenaries, Tujen)
Vorana is awesome. She can only appear in Expedition Logbooks of area level 68 or higher. Like Medved, she doesn't have a boss arena; instead, she creates it. As soon as she's released from the ground, she'll create an eerie black fog around her location. The fog applies a stacking debuff that will very quickly kill you. In its center, in a clearing, lies Vorana. Immediately move to the clearing to avoid dying, and the battle begins.
Vorana isn't particularly complicated to fight, but there's a few things you need to keep in mind:
- Around the clearing, orbiting stars will rotate and periodically fire projectiles at your location, so stay on your toes!
- Periodically, Vorana will vanish inside the fog. She'll also disappear off the minimap. Seconds before she attacks, her icon will reappear on the minimap so you know which direction she'll charge you from. Dodge!
- It's best to keep moving behind her between her melee attacks to safely damage her.
Vorana drops Vorana's Preparation.
itemimg Vorana's Prep
Uhtred, Covetous Traitor (Order of the Chalice, Rog)
If Vorana is awesome, Uhtred is metal. He can only appear in Expedition Logbooks of area 75 or higher. He does have a boss arena. Fun fact, you can fight a more dangerous version of Uhtred in the Tier 17 map Citadel!
The arena is a wide rectangle with a large mirror. After you beat Uhtred down for a bit, you'll enter the first intermission phase, which spawns monsters. Once they're dead, he returns. The fight continues as follows:
- After the first intermission phase, white lasers are activated until the end of the fight.
- The lasers will come out of the mirror and fire in random directions. Movement Speed and Travel skills are crucial to avoid their hits.
- The lower Uhtred's health becomes, the wider the lasers' beams. Yikes!
- The lasers will always fire either straight or diagonally from the mirror.
One more mechanic you should be aware of, which begins when Uhtred yells "No escape", is Rotating Cold Beam: Uhtred will rotate ~3.5 times, channeling a dangeous black beam of death!
To top things off, Seeking Stars will summon a white ice shard that follows you for 10 seconds before exploding and creating a ground effect that Chills you.
Uhtred drops Starlight Chalice and Altered Perception.
Olroth, Origin of the Fall (Knights of the Sun, Dannig)
Olroth can only appear in Expedition Logbooks of area 81 or higher. He also has a boss arena. This fight is a little more chaotic, but still quite doable if you know what to do. First, let's discuss the arena's features:
- The walls are host to Runic Gateways. One such gateway opens each invulnerability phase and spawns adds. The gateway can be detonated with explosives you'll find around.
- Exterminating Flame: This annoying laser will keep firing on the ground, slowly making its way to you. Don't stay in one place for too long. The laser is disabled during each invulnerability phase.
- Crystal Stars: Like Runic Gateways, this crystal is only active during invulnerability phases. Being near it will Blind you and you'll take damage from its Righteous Fire. Can also be detonated by explosives.
Alright, let's talk about Olroth. First up, he's got three lives. Each time you bring him down to 0 health:
- He will turn invulnerable and revive to full life.
- He'll remain invulnerable until you detonate either a Runic Gateway or a Crystal Star with an explosive.
- There are two invulnerability phases.
Otherwise, he's not too crazy! One thing to keep an eye out for is when he shouts "Purify", which will create a circle lined with 6 lasers that quickly closes in on your location then expands, dealing damage in the ring. Make sure to dodge that.
Olroth can drop:
| Olroth's Resolve | Cadigan's Crown | Vorana's March |
Depth 6 - More Expeditions & Expedition Scarabs
Can't get enough of Expedition? Here's how you can guarantee some more:
- Using the Expedition map crafting option, which costs 6 Chaos Orbs, guarantees your map will contain an Expedition encounter. Doesn't guarantee which vendor will be there.
- The Expedition Scarab will have the same effect.
- Allocating certain passive nodes on the Atlas Passive Tree will increase the chance and eventually outright guarantee you'll get an Expedition encounter in your maps. Here's a link to a Passive Tree that highlights all the chance increasing nodes: LINK
In addition, Expedition can benefit from 4 additional Scarabs that you can use to squeeze more out of the league mechanic. Note that these don't guarantee an Expedition encounter; to avoid wasting them, make sure you use them in conjunction with one of the options listed above.
- Expedition Scarab of Runefinding - More Runic monsters means more Artifacts and more Logbooks! You can use up to 2 of these per map!
- Expedition Scarab of Verisium Powder - More explosives, bigger explosives!
- Expedition Scarab of the Skald - Literally paying Dannig to come check out this dig site you'll stumble on. Does not guarantee an Expedition encounter by itself!
- Expedition Scarab of Archaeology - Sure, the monsters are more dangerous, but they, and the chests, will have even more rewarding modifiers applied to them!
If you're looking for Expedition loot in other content, there's not much out there. There's only really one option:
- The Kalguuran Incubator will hatch into one random Refresh Currency of any type.
Depth 7 - Expedition Atlas Passive Tree
later
Other Considerations
later
About_Author

Nox is a senior editor at outof.games, with a 20-year history of playing video games. While you won't find him finally playing GTA V after having bought it many years ago, you may occasionally stumble upon one of his 3000-word essays on the front page.
More_Path of Exile_Guides

A Guide to MARVEL SNAP's Token Shop
Latest_Path of Exile_Guides

// join_the_conversation
Sign in to share your thoughts, vote on comments, and connect with the community.
Comments
// no_comments_found
Be the first to share your thoughts!
Leave a Comment