
Welcome to the Delve league mechanic guide! Delve is an oldie but a goldie, the first ever Path of Exile league mechanic that added a mostly separate (to maps) endgame progression system. Its depth (hehe) and variety make it one of the more fun things you can spend entire days toying with, which also makes this guide take entire days to read! We'll take you through everything you need to know about Delve, from the basic mechanics to hidden loot, fractured walls, fossils, bosses, biomes and all the rest. Buckle up!
Delve is considered Extra Content and has a chance of naturally spawning in maps with no effort on your end.
Our league mechanic guides are structured according to "Depth" - the deeper you go into the article, the more complex the mechanics get. If it all becomes too much, take a break from this guide, play with the league mechanic enough to master the fundamentals then come back and delve deeper!
Difficulty: Average to Extreme, depending on how far you push yourself
Complexity: Average-High
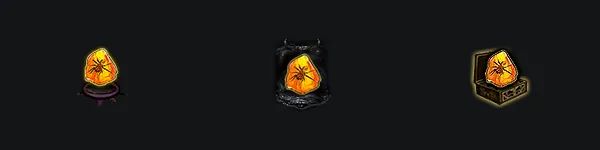
The icon that denotes Delve content.
- Delve league launched in August 2018 and has been part of the core game since.
- Delve is the first league mechanic that introduced a vast endgame system that is parallel to maps.
Depth 1 - General Overview
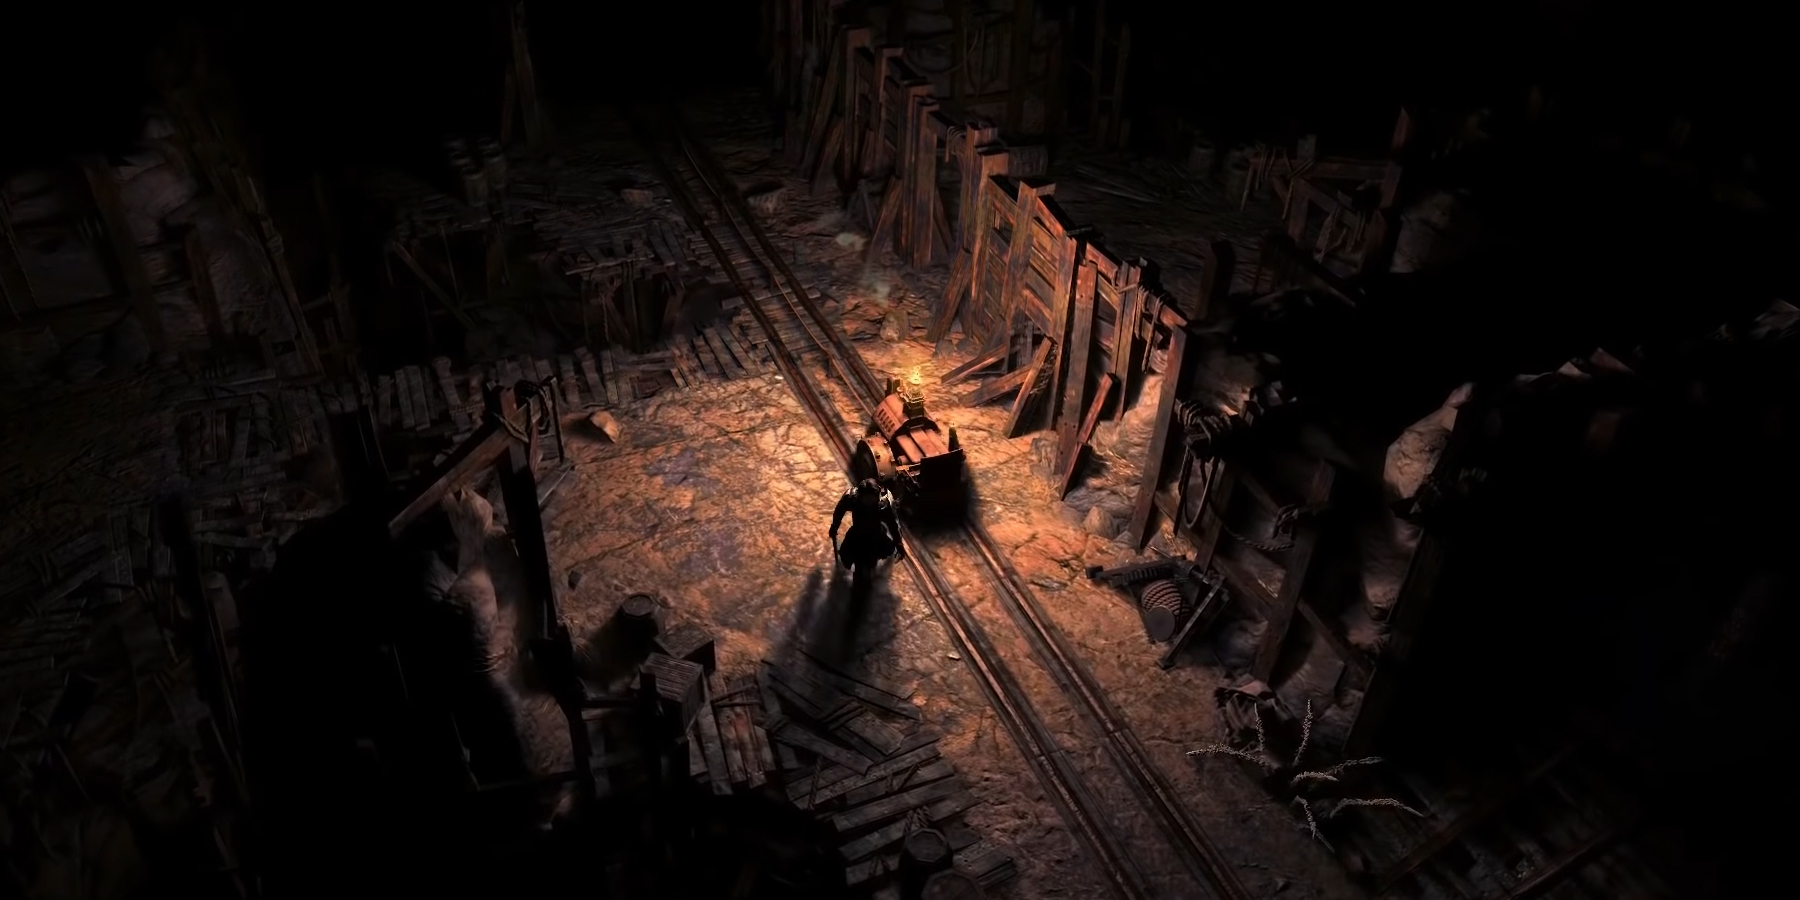
There's a whole lot to talk about in Delve, so a general overview of the mechanic in less detail, more vibe, will be useful to contextualize the rest of the guide. You'll have already met Niko, this league's helpful NPC, in Act IV of the campaign and given a brief tutorial of the basics if you followed him back to the Azurite Mine. Let's recap that, but in the context of maps:
- In your maps, you may come across three Voltaxic Sulphine Veins littering the area.
- Clicking on them with make Niko show up. He'll collect the Sulphite for you.
- Sulphite is one of the main currencies of this league. You need Sulphite in order to traverse the Azurite Mine. It's your cart's fuel.
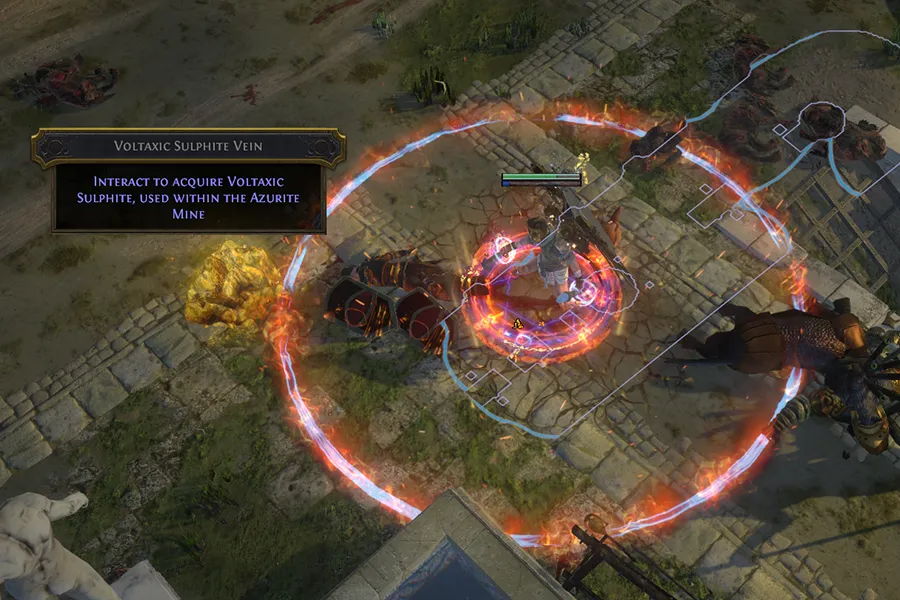
Click to grab!
This is basically it when it comes to Delve mechanics in normal content. You can keep Delving forever, as long as you keep doing maps to replenish your Sulphite. Now that we've got some Sulphite, we can talk to Niko to visit the Azurite Mine or teleport to it using a Waypoint.
- Right outside the Azurite Mine we've got Niko, next to the Voltaxic Generator
- Niko will give you some additional quests that point you to interact with some other mechanics of Delve that we'll discuss later: Upgrades, equipment, fractured walls.
- The Voltaxic Generator has two uses:
- Crafting equipment which helps you traverse the subterranean depths: Flares and Dynamite.
- It's where you upgrade several facets of the mechanic, such as light radius, maximum equipment you can carry at a time, maximum Sulphite you can have, darkness resistance and more.
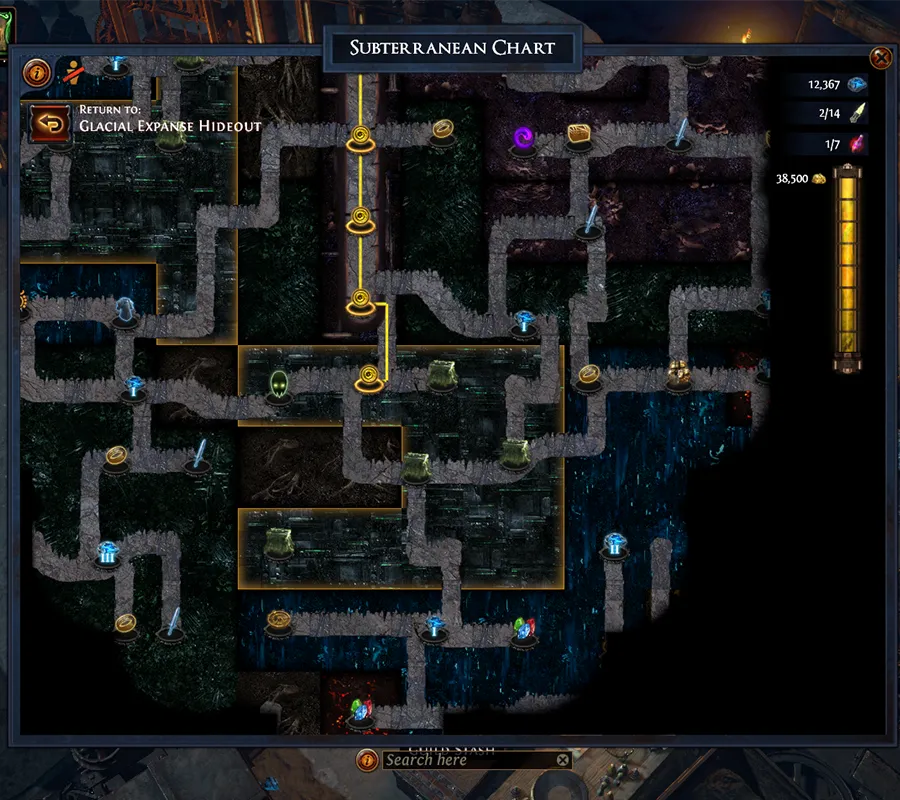
- When you're ready to Delve, click on the "Subterranean Chart" thing on the floor that's shaped sort of like a Waypoint, which will bring up, well, the Subterranean Chart.
Alright, so we've opened the Subterranean Chart and we're greeted with what seems like an endless labyrinth of pathways that lead to nodes with various rewards.
- It is in fact, infinite!
- Each player, or rather, all the player's characters in the league will share the same Chart layout.
- Each player's layout is randomly generated and different from another's.
- In its center lies the Mineshaft. This Mineshaft acts like a catch-up mechanic and extends deeper into the Mine depending on your highest-level character in the league.
- The Mineshaft can only extend down to depth 101, or highest-character level 90.
- Basically, you can ignore the mechanic entirely for a while and the game will drop you at a decent spot in terms of difficulty and area level that matches your strength.
- From here, you can select a node on the Chart and start Delving! You'll follow the mine cart for a while, after which you'll have to do a special encounter, and you get the loot!
It's a lot to take in at first, I know.
This is Delve in a nutshell. Of course, there's so much more. This is, after all, our longest league mechanic guide. You use Sulphite to travel to nodes, and Azurite (found only in the mine) to upgrade stuff at the Voltaxic Generator.
Depth 2 - Sulphite & Delve Scarabs
Keeping things familiar for now, we'll first tackle Delve content you find in maps. As we previously mentioned, you may randomly encounter Sulphite Veins, but there's also a couple ways to guarantee them:
- Using the Sulphite Scarab will guarantee you find Voltaxic Sulphite Veins in your maps.
- Allocating certain passive nodes on the Atlas Passive Tree will increase the chance and outright guarantee you'll get Sulphine Veins in your maps. Here's a link to a Passive Tree that highlights all the chance increasing nodes: LINK.
In addition, Delve can benefit from 2 additional Scarabs that you can use to squeeze more out of them Veins. Note that these don't guarantee the spawning of the Sulphite Veins; to avoid wasting them, make sure you use them in conjunction with one of the options listed above.
- Sulphite Scarab of Greed - More Sulphite for less work!
- Sulphite Scarab of Fumes - say something here lol
You may also rarely encounter Sulphite Veins in certain Expedition Logbook areas, such as Volcanic Island.
Before we move on, there's two things I'd like to mention:
- Depending on the map, you may find a Sulphite Chest instead. These are functionally the same, but make more thematic sense as opposed to finding a Sulphite Vein sticking out of the floor in someone's house.
- You'll notice whenever you click on a Sulphite Vein that a bar shows up in the top-right corner of the screen. That tracks how much Sulphite you've got in the 'bank'.
- Make sure you use some up. If you don't have space for more Sulphite, it goes to waste!
- Sulphite storage can be upgraded by quite a bit. We'll talk about this in Depth 7!
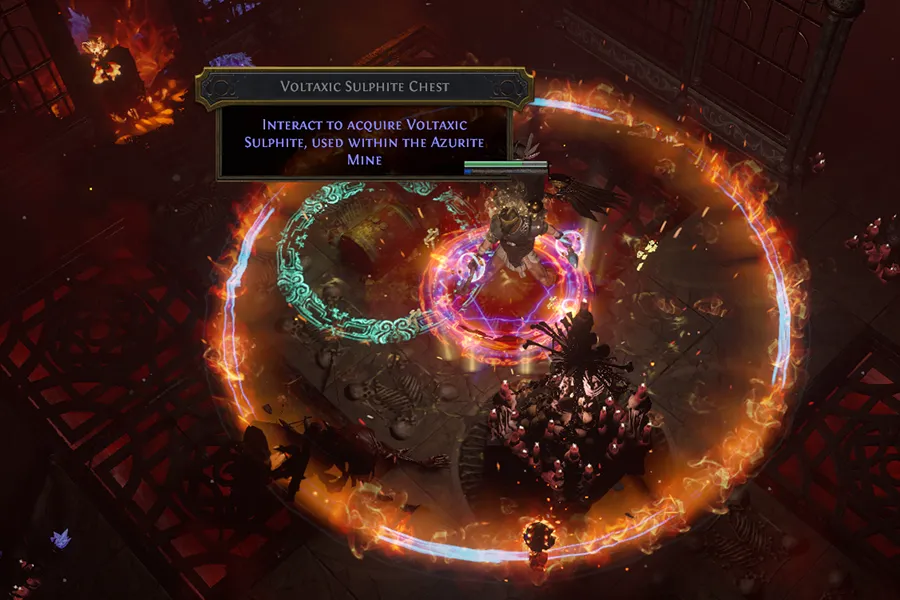
Who filled this chest with Sulphite?
Depth 3 - Delve Atlas Passive Tree
later
Depth 4 - The Core Gameplay Loop of Delve
You've gotten yourself some Sulphite and you're ready to go, great! You open up the Subterranean Chart. First things first:
- If this is the first time in a long while you've interacted with the Chart, follow the Mineshaft all the way down. That's where content appropriate for your level will be found.
- Select a node to explore!
- You can only select a node that is adjacent to a node that has already been explored, or adjacent to the Mineshaft.
- Basically, your cart has to be able to make the trip to the node without passing through any other nodes on the way, explored or not.
- Once you've selected a node, you'll be teleported to the nearest completed node in the Azurite Mine, where you'll start your journey to your node of choice.
- You'll see a shiny circle in front of your mine cart (known as the Crawler). Stepping over it will get the mine cart moving, and you're officially Delving now.
What follows is very imporant, so pay close attention:
- The mine cart is making its way to the destination node. If you go far ahead of it, it'll go faster. If you're lagging behind, it will slow down. Too far away in any direction, and it will stop.
- Stay close to the mine cart. Venturing off into the darkness will apply a stacking damage debuff on you and if you're there for too long, you'll die. Light is life, darkness is death.
- Aside from Flares, the Crawler is your only source of light in the Azurite Mine.
- On the way to the destination node, you'll encounter numerous packs of various monsters. Try and kill them, but don't lag behind the cart or you'll be thrust into the darkness!
- One type of monster has the ability to smoke out the mine cart's light for a few seconds. The mine cart will stop mid-transit, for a few seconds, until it continues its journey.
- When monsters are in the darkness, you can't deal damage to them. If you're in mortal danger, use a Flare!
- When you finally reach the destination node, you'll be confronted with one of three major types of event:
- An event you must activate by clicking on something first, such as an Azurite Vein.
- An event that begins the moment the mine cart stops, such as Rogue Exiles coming out of their tents and attacking.
- You've reached an abandoned camp, and don't have to do anything else but loot!
- Once you complete the event, you'll get whatever rewards the node promised you on the Subterranean Chart, as well as an explosion of loot around the Crawler, from all the event-related monsters you just killed.
Thought we were done? Wrong! What if you *gasp* die?
- When you die, you can't return to the same spot and loot that Divine Orb you forgot to pick off the floor. You can return to the same spot you died, but it will be in a different instance than the one you died in.
- If you die before you reach your destination node and complete the event:
- You still can't come back and loot that Divine Orb.
- Any Sulphite you consumed on the journey is not given back.
- You can attempt travelling to the same destination node again, but you will be teleported to a new instance of the same layout.
Wow, we're not even halfway! Feel free to take a break at any time, play some Delve and solidify some of these concepts before returning to the guide and delving deeper into the next sections.
Depth 5 - Hidden Loot, Equipment, Fractured Walls
While traversing the inky depths of the Azurite Mine on the way to your next destination node, keep an eye out! The darkness hides more than monsters - it hides loot!
Hidden loot in the darkness is not visible on the map, and its tooltips don't even show up unless you're pretty close to it. There's five major types of loot you'll find:
- Azurite Veins of varying sizes that give you some nice free Azurite.
- Chests of various regular loot.
- Fossil Remains, fancy-looking chests that drop Fossils! We'll look at Fossils in the next section.
- Resonator Stashes that contain Resonators, a crafting item we'll talk about in the next section.
- Chests that contain Flares and Dynamite.
Some of these may be hiding pretty deep in the darkness. We recommend you explore the side-passages you crossed on the way to your destination node after completing the node. For this we have Flares! When pressing the default key '6', you'll drop a Flare on the ground, which will light up the surrounding area for a while. You can use these when you're going deep into a side-passage for a brief island of safety.
Dynamites are used to blow up fractured walls. You'll notice, exploring the same passages, you'll sometimes come across what looks to be an icy wall - it even shows up on the minimap. These take one Dynamite to destroy, and generally lead to several hidden loot chests.
Aside from finding Flares and Dynamite in hidden chests, you can craft them at the Voltaxic Generator quite cheaply, with Azurite. More on this in Depth 7.
This Node Has No Paths Leading to It! Help!
Fractured walls may sometimes also lead to nodes that have no naturally generated path. Nodes that are "stuck in the walls of the mine", if you will.
If you come across such an isolated node on the Subterranean Chart, it means you'll need to find a fractured wall that, when blown up, will open the path to the hidden node. You can return to any previously-completed nodes and explore the surrounding side-passages in hopes of finding that one fractured wall you need. There is a method to this madness.
The fractured wall that leads to the isolated node will always be found on a side-passage from a nearby node. Now it'll get a little more complicated. To find this hidden path more easily, you'll first want to use your mind eye and superimpose a grid on the map, as such. Now, the most important rule to keep in mind:
- A fractured wall can only appear in spaces on the grid that are not occupied by a node.
- This means that you won't find the path to the isolated node between two nodes that don't have an empty space between them.
If that rule hasn't... ruled out all possible solutions but one, it will at least have given you a list of all the possible grid squares where the fractured wall and hidden path can be. With this list, apply the following additional rules:
- A node will always have 1, 3 or 4 paths connecting to it. A node with exactly 2 connecting paths only occurs occasionally, when the mine generation tries to create a path that is too long. This node will almost always have a fractured wall blocking a third, hidden path nearby it.
- It is possible, though rare, for an apparent dead-end node - a node with only one visible path connecting to it - to have two hidden paths leading to two different nearby isolated notdes.
- Paths never overlap with each other, and they never intersect (other than at nodes). If the space between a visible node and a nearby isolated node is already occupied by a path, there cannot be a hidden path between those nodes.
- A node cannot have more than one path leading away in a given cardinal direction.
Depth 6 - Fossils
Fossils are a special type of currency that is most plentiful in Delve. They are used in crafting with Resonators which are likewise more commonly found in Delve, especially the rarer ones. Here are the Resonators:
| Primitive Chaotic Resonator | Potent Chaotic Resonator | Powerful Chaotic Resonator | Prime Chaotic Resonator |
In their regular form, as depicted above, they act as socketable didgeridoos in which you can insert Fossils. When you've filled them up with all the Fossils they can take (1, 2, 3, or 4 Fossils), they essentially turn into a specialized Chaos Orb that rerolls a Rare item with new modifiers, but takes into account each socketed Fossil's special modifiers.
To make this make sense, check out the following table of common Fossils which, besides the Azurite Mine, can also be found outside it. Open the box below the table to find out where else they drop.
- Fossils and Resonators are sometimes offered by Niko right outside the Azurite Mine, but they are exobitantly prices. I wouldn't rely on those.
- Ritual Favors may occasionally contain these Fossils.
- Tujen may also haggle them sometimes.
- The Fossilized Incubator will hatch into one Fossil.
- The Tinkerer's Table Divination Card awards five Fossils of the same type.
- Synthesis Maps may roll the following modifier: "Synthesizes [Rarity Type] Monsters have X% chance to drop a Fossil."
- Other league mechanics that reward other-league content may reward Fossils or Resonators, such as Heist, Blight or Delirium.
As you can see, most Fossils' effects are two-fold: They increase the odds of certain modifiers, while reducing or outright disabling the possibilities of other mods being on the item. Next, let's take a look at our second set of Fossils, which can only be found behind fractured walls in specific Biomes. We'll be tackling Biomes in Depth 9!
Finally, we have another set of Fossils that can only be found in specific nodes that are only found in specific Biomes!
You can do lots of cool things with Fossils, and they're used in bigger crafting projects quite a bit. For example, the Perfect Fossil is always a good option to get a piece of gear to 30% quality in the early stages of crafting.
Note that using a Resonator on an item with a metamod, such as "Prefixes Cannot Be Changed", will ignore (!) the metamod's effect! Don't waste your Divine Orbs!
Chest and rewards with these icons may contain common Fossils.
Depth 7 - The Upgrade System, Infinite Scaling
Now that we've finally taken a look at how to navigate the Azurite Mine and we've gotten a preview of the potential rewards that await, we can talk about depth. No, not this guide's depth, but Delve Depth.
Just like the dwarves, the more you dig, the more horrors you find. The deeper you go into the mine, the stronger and the more rewarding monsters get, as well as the loot you find in chests. Most builds should be able to tackle depths up to, say, 300-500 if they're good enough and their build type works well enough with the core gameplay loop of Delve. More specialized builds can essentially just go on forever, past depth 1000 and into the unknown.
To keep up with the increasing difficulty, we'll need to make use of the Voltaxic Generator, which contains upgrades that can be purchased using Azurite. Azurite is most reliably farmed by completing Azurite nodes in the Azurite Mine. These are common and found in almost every Biome. Let's look at all the upgrades at your disposal:
Each subsequent upgrade will cost more Azurite.
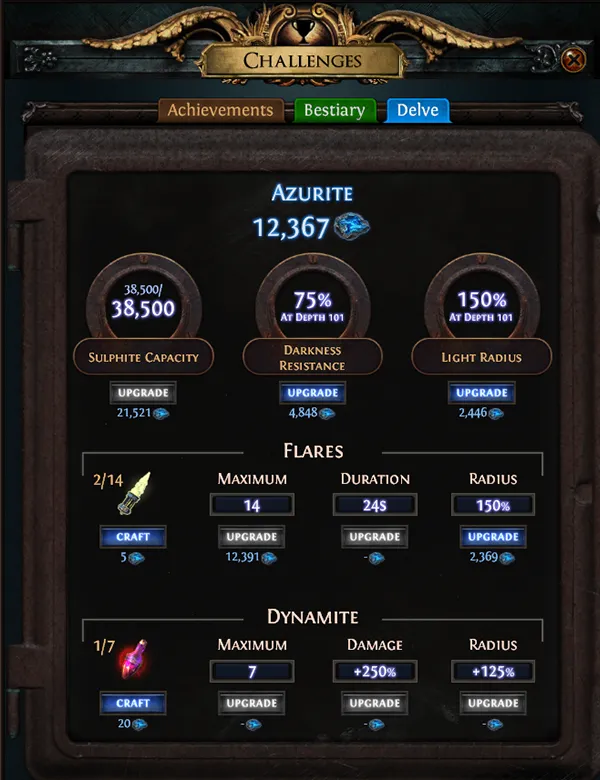
The Voltaxic Generator UI.
Sulphite Upgrade
Sulphite has only one available upgrade: Capacity. This increases the maximum amount of Sulphite you can hold in the "bank" before you need to spend it to make room for more.
- This upgrade has 15 levels. Level 1 increased your capacity from 1200 to 1800. Level 2 increases it to 2400.
- This upgrade value increases in later levels. For example, at Level 6 you can carry 6400 Sulphite. Upgrading to Level 7 increases your capacity to 9000.
- At Level 15, you'll be able to hold a whopping 65,000.
To put things into perspective, the first upgrade costs 15 Azurite. The last upgrade costs 54,709. By that point, you'd be deep enough in the mine that you could get tens of thousands of Azurite per hour.
Light & Darkness Upgrades
These are the most important upgrades you have access to: Light Radius and Darkness Resistance. Each have 105 upgrade levels, but you don't need to go all the way!
As you go deeper into the Azurite Mine, you'll need more Light Radius and more Darkness Resistance to keep up with the ever-increasing oppressiveness of the zone. As such, it is essential you keep upgrading these two when you're actively pushing deeper down, or you'll be in trouble.
The Light Radius upgrade directly affects the light emananted by the mine cart / Crawler. The Darkness Resistance upgrade reduces the damage you take while in the dark, giving you more time to explore the hidden corners of the mine.
Flare Upgrades
You can use the Voltaxic Generator to craft Flares, but also upgrade them! There are three upgrades:
- Flare Carrying Capacity. 17 upgrade levels, for a total carrying capacity of 20 Flares. By default, you can carry 3 Flares before buying any upgrades.
- Flare Light Radius. Functions the same as regular Light Radius, but for Flares. 105 upgrade levels.
- Flare Duration. 10 upgrade levels.
- By default, at Level 0, a Flare will last 14 seconds before it dies out.
- Each upgrade increases this duration by 1 second, up to 24 seconds at Level 10.
Dynamite Upgrades
You can use the Voltaxic Generator to craft Dynamite, but also upgrade them! There are three upgrades:
- Dynamite Carrying Capacity. 5 upgrade levels, for a total carrying capacity of 7 Dynamites. By default, you can carry 2 Dynamites before buying any upgrades.
- Dynamite Damage. 10 upgrade levels.
- Note that you don't need to invest in this at all if your only use for them is destroying fractured walls. Dynamites will always destroy fractured walls.
- Dynamites also deal AOE damage to nearby monsters, but your own power will pretty easily outclass them.
- Dynamite Blast Radius. 5 upgrade levels, increases its AOE range with every upgrade.
- Might be worth taking if you often find yourself throwing Dynamites too far away from fractured walls. The final upgrade costs 1899 Azurite, so it's not too expensive.
Depth 8 - Common Node Types
It's finally time to look at the nodes themselves. The following nodes are all 'common', meaning they can be found anywhere, regardless of Biome. They are:
fancy table with the node icons that, when you hover over them, it gives you their tooltip
Note that the Smuggler's Stash can only contain generic Fossils. Also note that the Azurite Fissure, the Tier III Azurite node, will have a miniboss encounter at the end!
Depth 9 - Biomes
Biomes, aside from changing the scenery and giving a breath of fresh air to the dark, twisted corridors of the mine, also come with their own quirks. Each Biome can only contain certain types of Fossils and each have certain nodes that can only be found within. Some Biomes can also only spawn past certain depths. Here's the full list:
giant table with the biomes, as well as the Fossils associated with each one, and a square image of how it looks on the Subterranean Chart. [daydreaming] When hovering over the square image, it expands to reveal it was actually a much larger screenshot, so people can see how vast biomes can be.
The Vaal Outpost, Abyssal City and Primeval Ruins are commonly referred to as "Delve Cities". We'll talk about them in Depth 11!
Note that Biomes have "Biome-wide" mods that you can check by hovering over a Biome on the Subterranean Chart and looking at the bottom-left corner of the UI.
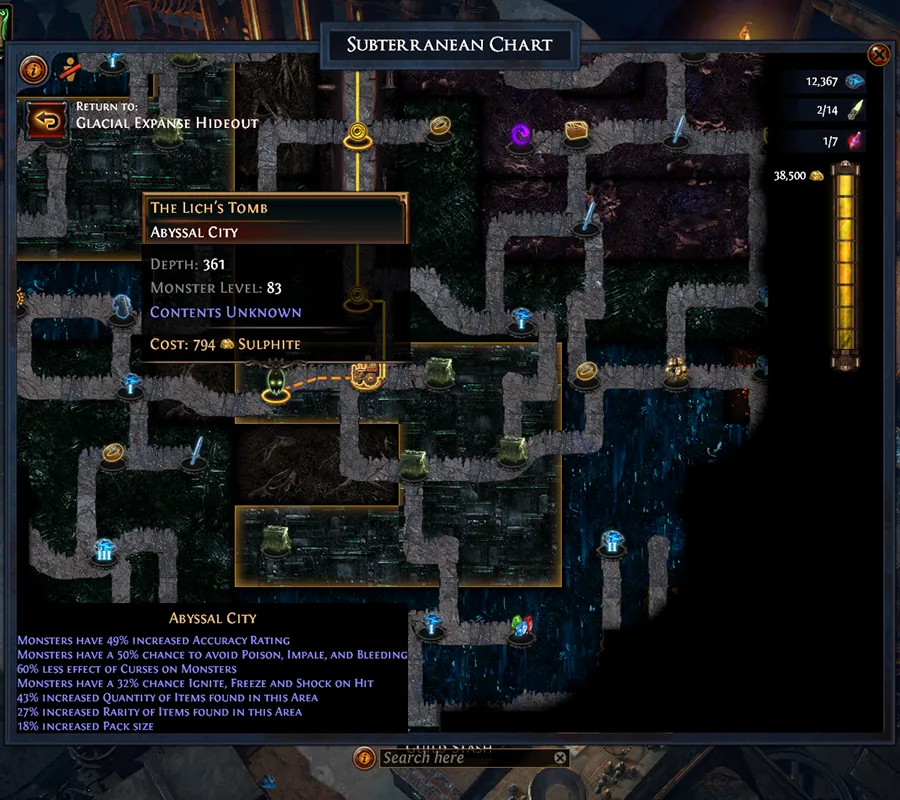
The modifiers in the bottom-left apply to all nodes in the Abyssal City, the Biome with a golden border.
Depth 10 - Notable Biome-Specific Nodes
Each Biome has its own set of nodes that can only be found within. Let's check them out:
huge table of biome-specific nodes that shows their icon, name, description, biome they belong to and additional info. If this table could be sorted alphabetically by column of choice, that would be great.
Depth 11 - Delve Cities
Delve Cities are special, in that they can only contain two types of nodes that are not found elsewhere. Let's take a look:
| Abyssal City | Vaal Outpost | Primeval Ruins |
| Abyssal Chamber | Ruined Chamber | Primeval Chamber |
| The Lich's Tomb | The Grand Architect's Temple | The Crystal King's Throne |
The Chamber rooms all function the same way, which is different from other nodes in the mine:
- Once you reach the node destination, the Crawler drops a bunch of loot on the ground and a stairway to a sub-zone opens.
- The Crawler finished its journey and dropped the loot, which means that if you die now, the node will have already been completed and you can't go into the room below to get the rest of the loot.
- Going into the chamber below, you'll see it's loosely shaped like a W.
- The initial area is fairly safe, for now, but the rest of the chamber is shrouded in darkness. The corner rooms, as well as the south-eastern room, have light pads in their center.
- As soon as you enter a darkened room of the chamber, monsters will begin spawning, and will keep spawning for quite a while.
- You'll want to activate the light pad by standing on it for a few seconds.
- Once it's active, it'll stay active for a short while. Keep stepping on it every now and then to keep it active, or it will deactivate! Remember you have Flares, should you need them.
- The corner rooms contain a whole bunch of juicy chests; you can even find 12+ chests in one single chamber.
The chests you find in chambers can also be specialized: Resonator Stashes, Currency chests, Divination Card chests, Cartography chests, and other various goodies can be found here.
The Lich's Tomb, The Grand Architect's Temple and The Crystal King's Throne are three arenas where you get to fight a boss.
Depth 12 - Delve Bosses
Delve bosses can be pretty dangerous and depending on the Biome-wide mods, exceedingly deadly. Thankfully:
- While you don't have 6 portals, if you die, you can keep attempting the fights, the only cost being the Sulphite it takes to travel to them.
- When you reach the node, a portal opens that takes you to the boss arena.
- If you somehow die after you killed a boss but before you picked up its loot, say goodbye to it! The node will be marked as complete.
- Every boss has a phase that plunges the arena in darkness and forces you to use Flares for an extended period of time. Stock up on them and make sure they're upgraded enough to actually make some decent light!
Kurgal, the Blackblooded
Ever wonder how deep those Abysses go? Well, Kurgal went deeper. Abyss league has quite the presence in Delve, and this boss is no exception. Kurgal's node, The Lich's Tomb, can only be found at depths 90 or greater. Open the box below to read up on the mechanics, or watch the embedded video below.
Kurgal's first phase is quite the bullet hell. Keep dodging his many attacks and try to sneak in as many hits as you can. His second phase is the darkness phase, which he enters when he reaches 50% health. He will become invulnerable and Abyssal monsters will spawn in the darkened arena. Use your Flares and push through. After this phase is over, he reverts back to normal and you're back in the first phase.
Once Kurgal is brought down to 0% health, he will revive to full health after a short animation, and will now gain a cute purple / pink glow. Welcome to phase three.
Phase three Kurgal has fewer attacks, but they're deadlier. His default attack fires two rapid volleys of three projectiles, which really should be dodged. He can also activate the crystal totems we mentioned previously, and they will fire a short-range ground-targeted beam that sweeps across part of the arena in random direction. What's more, his Arm Laser ability has him spread his arm to his sides, launching two laser beams that spread forward toward his front, up until a gap of approximately 20 degrees is left open. This is where you should be to avoid the damage. Immediately after this attack, he follows up with a single large laser pulse fired straight into the 'safe' gap you took refuge in, so make sure to get out quickly!
What's more, throughout the whole right, about 20% of Kurgal's damage is of the Chaos type. Yikes!
video
Kurgal's got some pretty cool loot, including some with Abyssal Sockets! Check them out:
| Command of the Pit | Hale Negator | Ahkeli's Valley | Uzaza's Mountain |
| Command of the Pit | Hale Negator | Putembo's Meadow | Misery in Darkness |
You'll notice these rings say they can be combined with others. Interesting. We'll take a look at those in our next and final section!
Ahuatotli, the Blind
Up next, our Vaal City boss, and generally the easiest of the three to deal with. When you enter his portal, you'll find yourself in the Vaal Nexus, a pretty cool platform arena with pyramids and other edgy Vaal doodads. Here's what you need to know:
- The pyramids in the outer areas create spinning beams that apply Corrupted Blood when they hit. They can, however, be disabled by stepping on pressure plates behind each one.
- His more dangerous attacks are all quite large AOE spells, so whenever he shouts something, conjures some giant blood orb or just acts suspicious in general, move to a new location!
- His darkness phase starts when he hits 50% health, and he'll spawn Vaal monsters from the four outer corners of the arena.
video
Ahuatotli, the Blind also drops some cool loot:
| Ahkeli's Mountain | Putembo's Valley | Uzaza's Meadow |
| Cerberus Limb | Doryani's Machinarium | Curiosity |
It may seem like he drops the same rings, but check out their names and compare them to Kurgal's loot able. The plot thickens.
Aul, the Crystal King
The rarest of the three, Aul is the big baddie of Delve. I geniunely don't know the tactics for this dude since i only killed him once so we'll fill this section up sometime in the future.
video
Aul, the Crystal King also drops some even cooler loot:
| Aul's Uprising | Aul's Uprising | Aul's Uprising | Aul's Uprising | Crown of the Tyrant |
| Ahkeli's Meadow | Putembo's Mountain | Uzaza's Valley | Luminous Trove | Desecreated Virtue |
Alright, let's see what these rings are all about.
Depth 13 - All Them Fancy Rings
You'll have noticed each boss drops a ring of Uzaza, Ahkeli or Putemba that are of the 'Mountain', 'Meadow' or 'Valley' variety. Alone, they don't look like much. Together, however, they are part of some secret vendor recipes! Selling a certain combination of each type, meaning one of each 'environmental suffix' name, will get you one of A MILLION possible Precursor's Emblems.
| Items Sold To Vendor | Resulting Ring |
| Uzaza's Meadow Uzaza's Mountain Uzaza's Valley | Precursor's Emblem |
| Ahkeli's Three Rangs | |
| Putembo's Three Rangs | |
| actually there's an absolute fuckload of combinations | |
| maybe this can go into a different guide, idk | |
| im tired |
Other Considerations
Wow, you've made it to the end. Congratulations, I mean it.
About_Author

Nox is a senior editor at outof.games, with a 20-year history of playing video games. While you won't find him finally playing GTA V after having bought it many years ago, you may occasionally stumble upon one of his 3000-word essays on the front page.
More_Path of Exile_Guides

A Guide to MARVEL SNAP's Token Shop
Latest_Path of Exile_Guides

// join_the_conversation
Sign in to share your thoughts, vote on comments, and connect with the community.
Comments
// no_comments_found
Be the first to share your thoughts!
Leave a Comment